The following is short tutorial about how to get my database first working in a Class Project (.NET Core), with a .NET Core Web App.
Step 1 – Install .NET Core
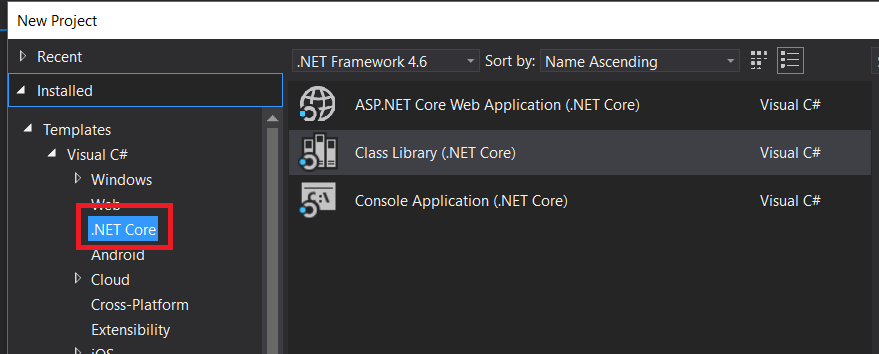
Make Sure you are using .NET Core not DNX (Hint: You should be able to see the .NET Core option when creating a New Project) – If NOT Download from Here
If you have problems installing .NET Core (Error is something like Visual Studio 2015 Update 3 not installed correctly) – You can run the installing using the command: [DotNetCore.1.0.0-VS2015Tools.Preview2.exe SKIP_VSU_CHECK=1] — Which will prevent the installation performing the Visual Studio Check Github Issue
Step 2 – Create The Projects
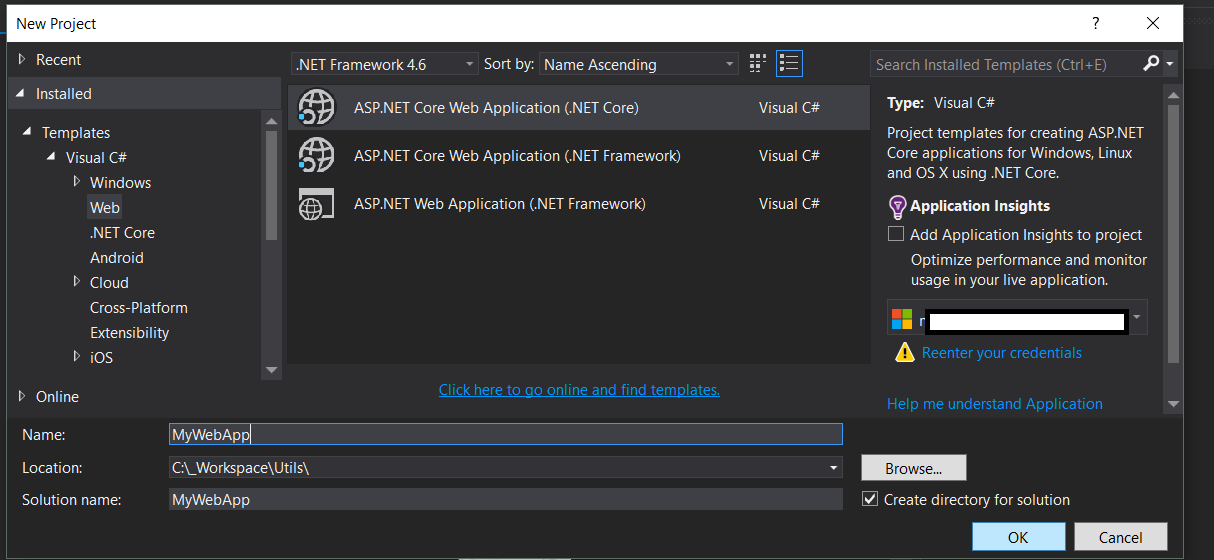
Create a new ASP.NET Core Web Application –> Then Select Web Application in the next screen
Add a Class Library (.NET Core) Project

Step 3 – Installing EF Packages
Open your project.json file of Class Library, and paste the following, then Save the file:
{
"version": "1.0.0-*",
"dependencies": {
"Microsoft.EntityFrameworkCore.SqlServer": "1.0.0",
"Microsoft.EntityFrameworkCore.SqlServer.Design": "1.0.0",
"Microsoft.EntityFrameworkCore.Tools": "1.0.0-preview2-final",
"NETStandard.Library": "1.6.0"
},
"tools": {
"Microsoft.EntityFrameworkCore.Tools": "1.0.0-preview2-final"
},
"frameworks": {
"net46": {
},
"netcoreapp1.0": {
"dependencies": {
"Microsoft.NETCore.App": {
"type": "platform",
"version": "1.0.0-*"
}
}
}
}
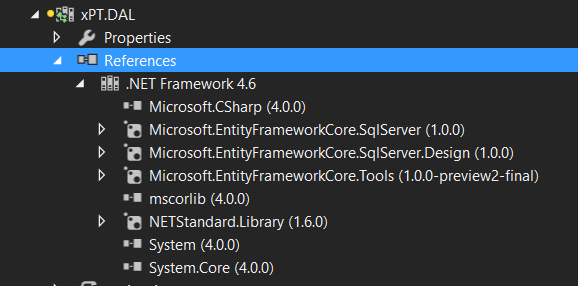
}This should restore the packages under References
OR Using Nuget Package Manager
You can install them using Nuget Package Manager by running the following commands in the Package Manager Console
Install-Package Microsoft.EntityFrameworkCore.SqlServer

Install-Package Microsoft.EntityFrameworkCore.Tools –Pre

Install-Package Microsoft.EntityFrameworkCore.SqlServer.Design
Note: Install one Package at a time – if you get an error after installing
Microsoft.EntityFrameworkCore.Tools
Then change the content of your project.json frameworks section to this:
  "frameworks": {
    "net46": {
    },
    "netcoreapp1.0": {
      "dependencies": {
        "Microsoft.NETCore.App": {
          "type": "platform",
          "version": "1.0.0-*"
        }
      }
    }
  }
Step 4 – Creating the Database Model
Now to generate the Database run the following command in the Package Manager Console (DON’T forget to Change the connection string to your Database)
Scaffold-DbContext "Server=. ; Database=DATABASE; user id= USER ; password = PASSWORD;" Microsoft.EntityFrameworkCore.SqlServer
This will give you the Error about Startup Project:
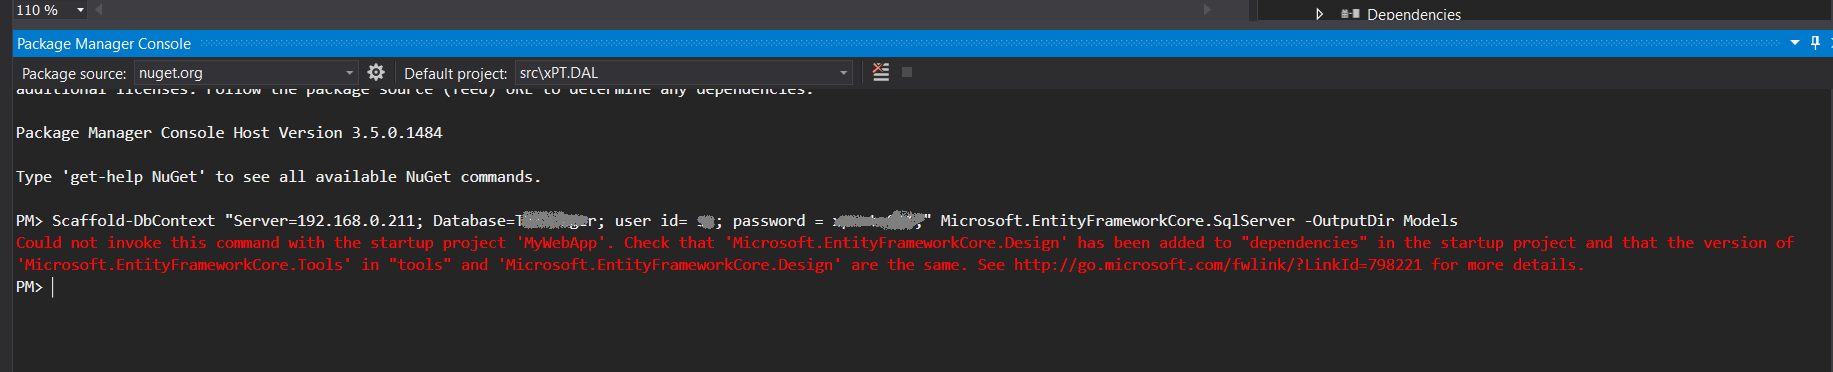
For this you have to add the same references you added to Class Library to the .NET Web App
So open your project.json for the Web App,
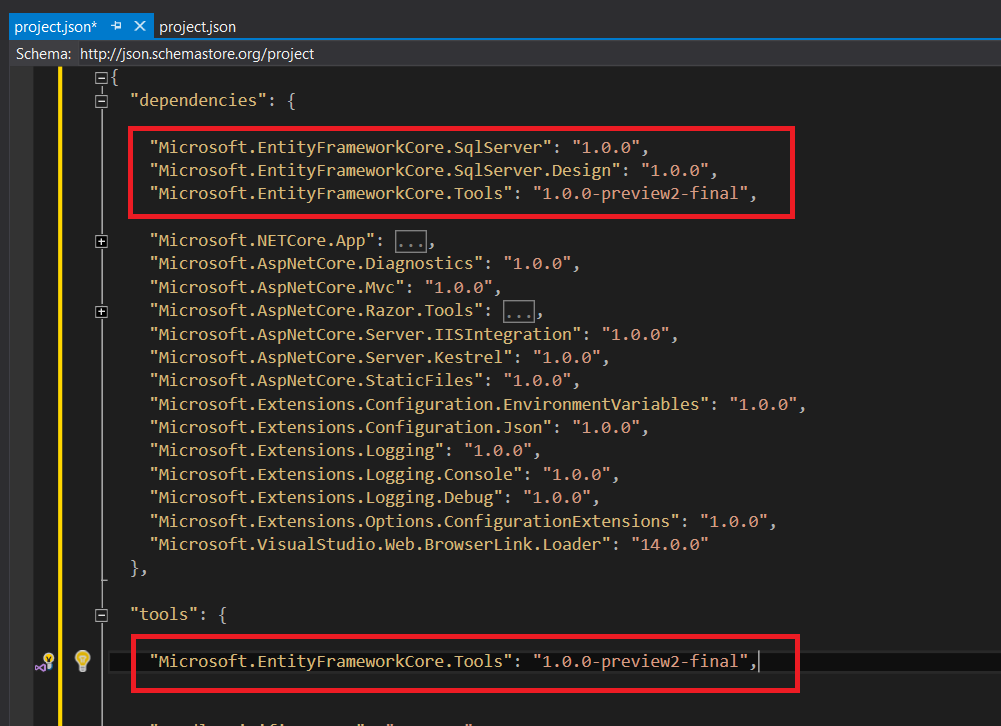
Under dependencies, add:
"Microsoft.EntityFrameworkCore.SqlServer": "1.0.0",
"Microsoft.EntityFrameworkCore.SqlServer.Design": "1.0.0",
"Microsoft.EntityFrameworkCore.Tools": "1.0.0-preview2-final",
and under tools add:
"Microsoft.EntityFrameworkCore.Tools": "1.0.0-preview2-final",
After making the changes Save the file.
This is what my project.json looks like
Then again run the command in Package Manager Console against the class library:
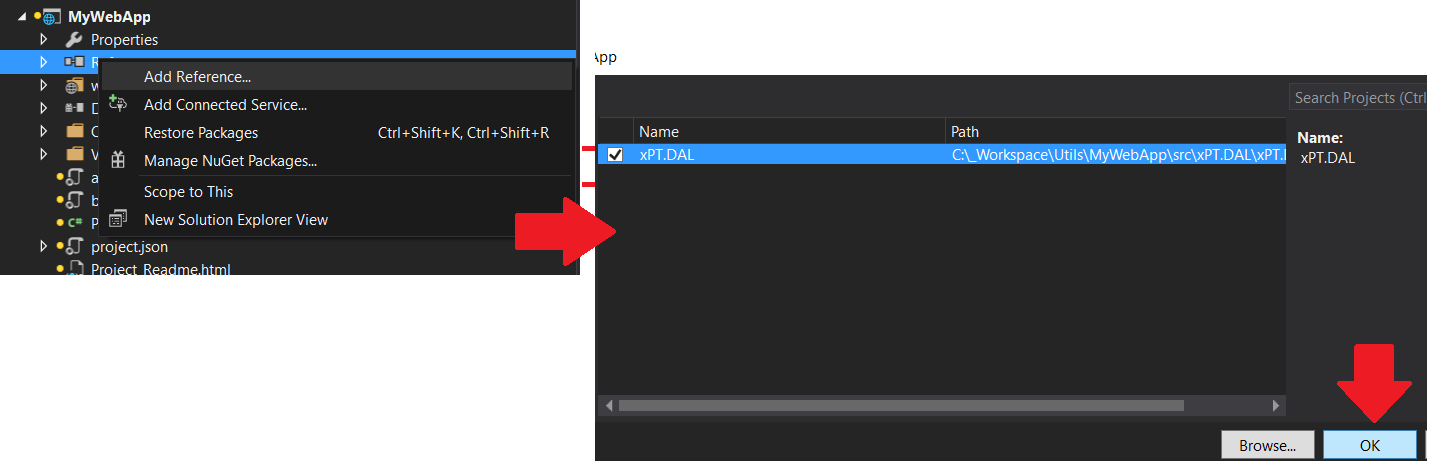
If you haven’t already added the reference of your Class Library to the Web App, you will get this error:

to solve this add reference of your class Library to your Web App:
Finally
Run the Command again – in the Package Manager Console:
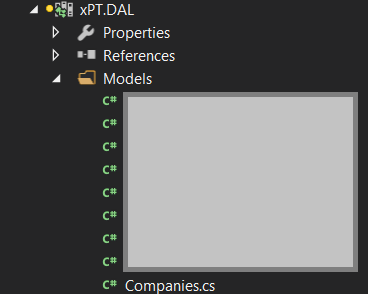
Scaffold-DbContext "Server=. ; Database=DATABASE; user id= USER ; password = PASSWORD;" Microsoft.EntityFrameworkCore.SqlServer -OutputDir Models
This should create the Entities under Models Folder, in the class library
Passing a Connection String
In my case here, we have a Multi Tenant Application, in which each client has their own Database, e.g. Client_1, Client_2, Client_3. So the connection string had to be dynamic.
So we added a connection string property to a constructor, and passed it to the Context in the OnConfiguring method
public partial class ClientContext
{
    private readonly string _connectionString;

    public ClientContext(string connectionString) : base()
    {
        _connectionString = connectionString;
    }

    protected override void OnConfiguring(DbContextOptionsBuilder optionsBuilder)
    {
        optionsBuilder.UseSqlServer(_connectionString);
    }
}
and used it like this:
    public void TestConnection()
    {
        var clientId = 1;

        var connectionString = string.Format("Server=192.168.0.211; Database=Client_{0}; user id= USER; password = PWD;", clientId);

        using (var clientContext = new ClientContext(connectionString))
        {
            var assets = clientContext.Users.Where(s => s.UserId == 1);
        }
    }
Conclusion
Congratulations, you have successfully configured database first with a Class Library and SQL server.

Javier is Content Specialist and also .NET developer. He writes helpful guides and articles, assist with other marketing and .NET community work