In this tutorial, we will show you how to implement token authentication in Asp.net Core 5 Web Api using JWT. Here are steps to use JWT token for authentication and authorization.
Creating a new .NET 5.0 Web API project
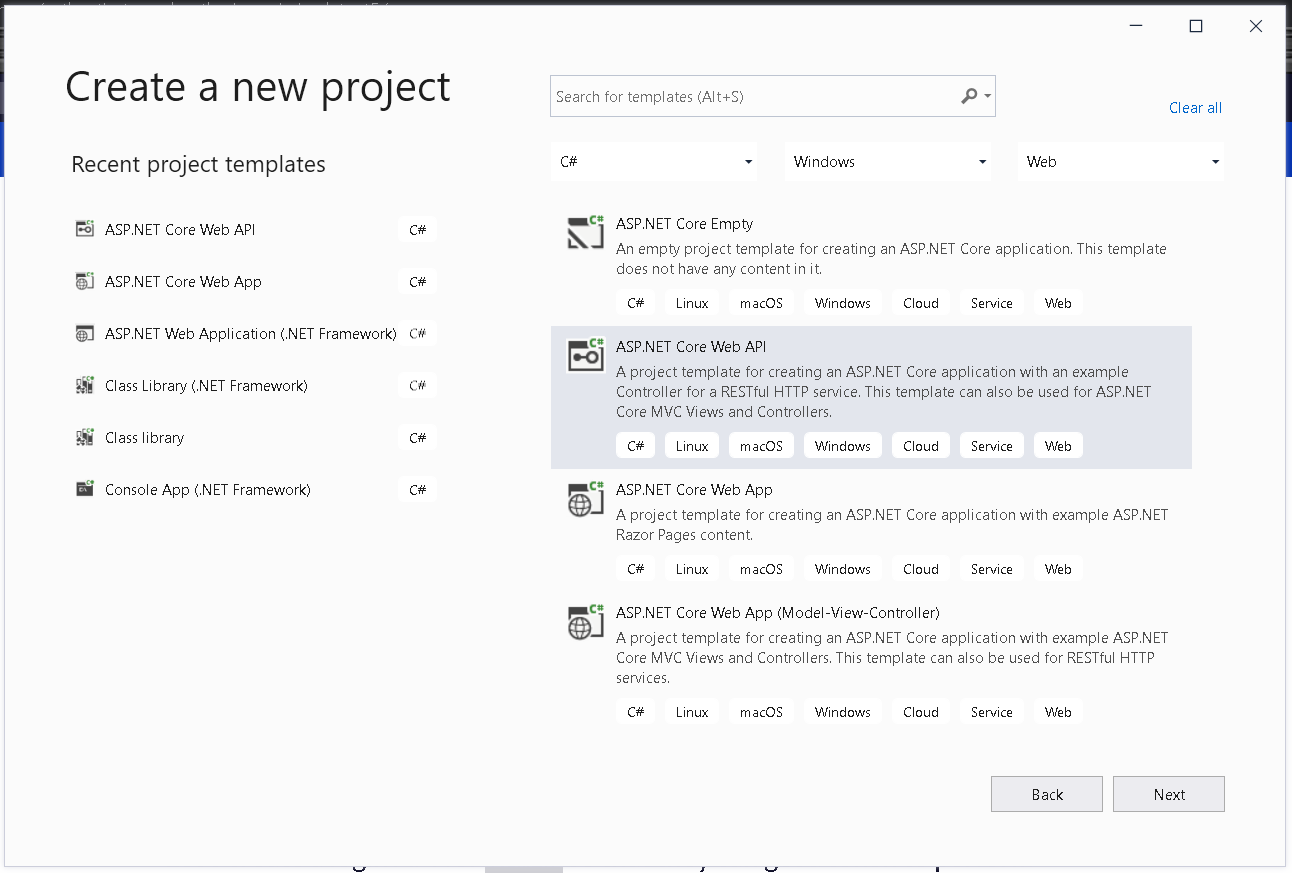
Open visual studio 2019 community and click on “create a new project” and select “ASP.NET Core Web API” project and click next.
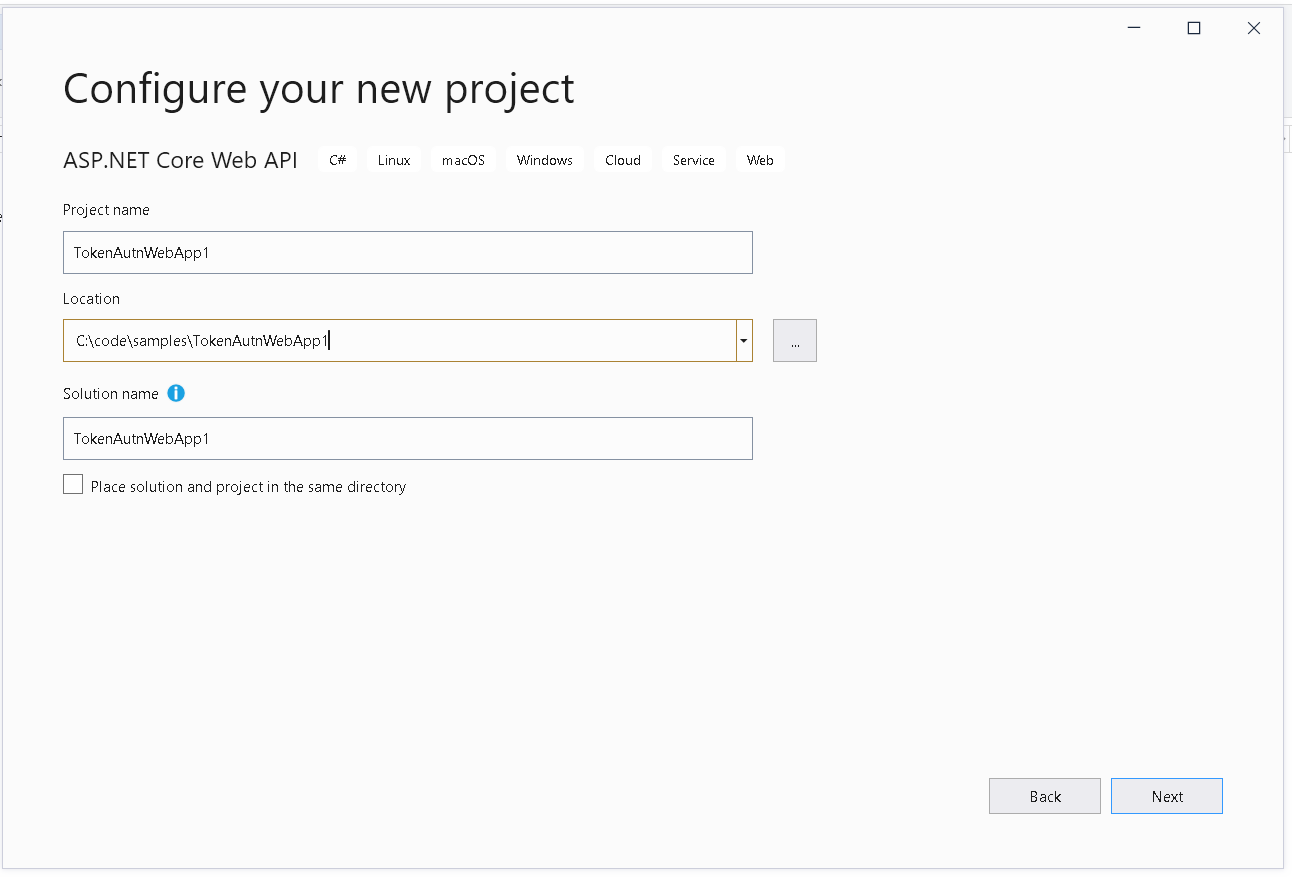
In the “configure your new project”, enter name, location, and solution name of your project and click next.
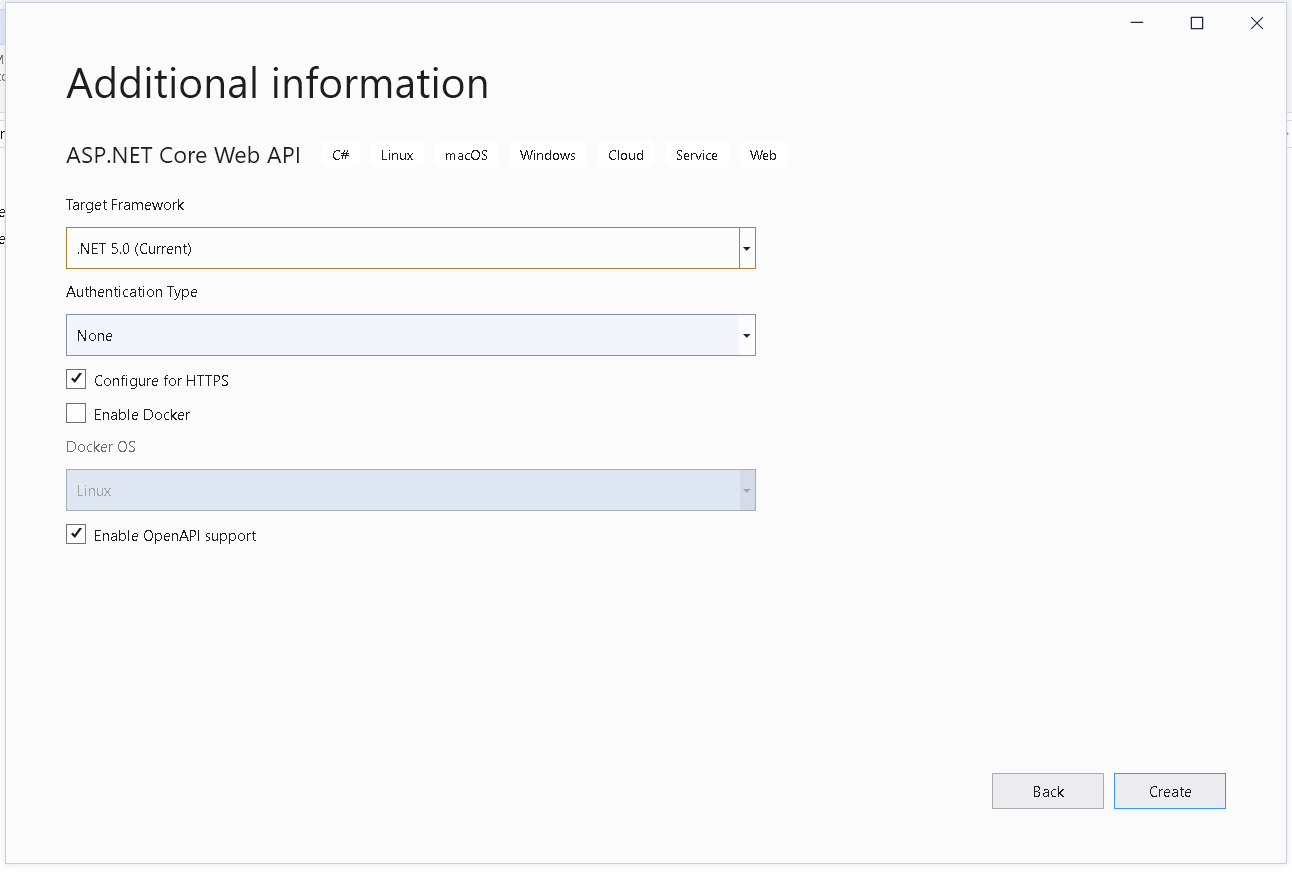
In the “Additional information” step, choose “.NET 5.0 in “Target Framework” dropdown, None in “Authentication Type” and click on create
Adding JWT configurations in appsettings.json
Run your application once and copy the url of your application. That will be used for JwtIssuer value in app settings. Open appsettings.json and add following configurations at the end of file:
"JwtKey": "a-very-long-radonmly-generated-secret-key-that-cannot-be-guessed",
"JwtIssuer": "https://localhost:44394", //replace this with your application url
"JwtExpireDays": 30,
Adding login feature
Add new empty controller in the “Controllers” folder of your project and name it AccountController and add following code into it.
public class AccountController : Controller
{
        private readonly IConfiguration _configuration;

        public AccountController(IConfiguration configuration)
        {
                _configuration = configuration;
        }
        [HttpPost]
        [Route("Login")]
        public IActionResult Login([FromBody] LoginRequest request)
        {
                var response = new Dictionary<string, string>();
                if (!(request.Username == "admin" && request.Password == "Admin@123"))
                {
                     response.Add("Error", "Invalid username or password");
                     return BadRequest(response);
                }

                var roles = new string[] { "Role1", "Role2" };
                var token = GenerateJwtToken(request.Username, roles.ToList());
                return Ok(new LoginResponse()
                {
                       Access_Token = token,
                       UserName = request.Username
                });
       }

       private string GenerateJwtToken(string username, List<string> roles)
       {
                var claims = new List<Claim>
                {
                       new Claim(JwtRegisteredClaimNames.Sub, username),
                       new Claim(JwtRegisteredClaimNames.Jti, Guid.NewGuid().ToString()),
                       new Claim(ClaimTypes.NameIdentifier, username)
                };

                roles.ForEach(role =>
                {
                       claims.Add(new Claim(ClaimTypes.Role, role));
                });

                var key = new SymmetricSecurityKey(Encoding.UTF8.GetBytes(_configuration["JwtKey"]));
                var creds = new SigningCredentials(key, SecurityAlgorithms.HmacSha256);
                var expires = DateTime.Now.AddDays(Convert.ToDouble(_configuration["JwtExpireDays"]));

                var token = new JwtSecurityToken(
                       _configuration["JwtIssuer"],
                       _configuration["JwtIssuer"],
                       claims,
                       expires: expires,
                       signingCredentials: creds
                );

                return new JwtSecurityTokenHandler().WriteToken(token);
        }
}
Securing resources using JWT Authentication
Open “WeatherForcastController.cs” and above Get() method, add this line [Authorize(Roles = "Role1")] and this will enforce the method will be only accessible if JWT token is present in the header and the user for which the token is generated belongs to Role1. you can use [Authorize()] attribute to ensure the user passes JWT token in order to access the method.
Testing the Login method issuing tokens
Run the project and you will see an Open API documentation as shown below.

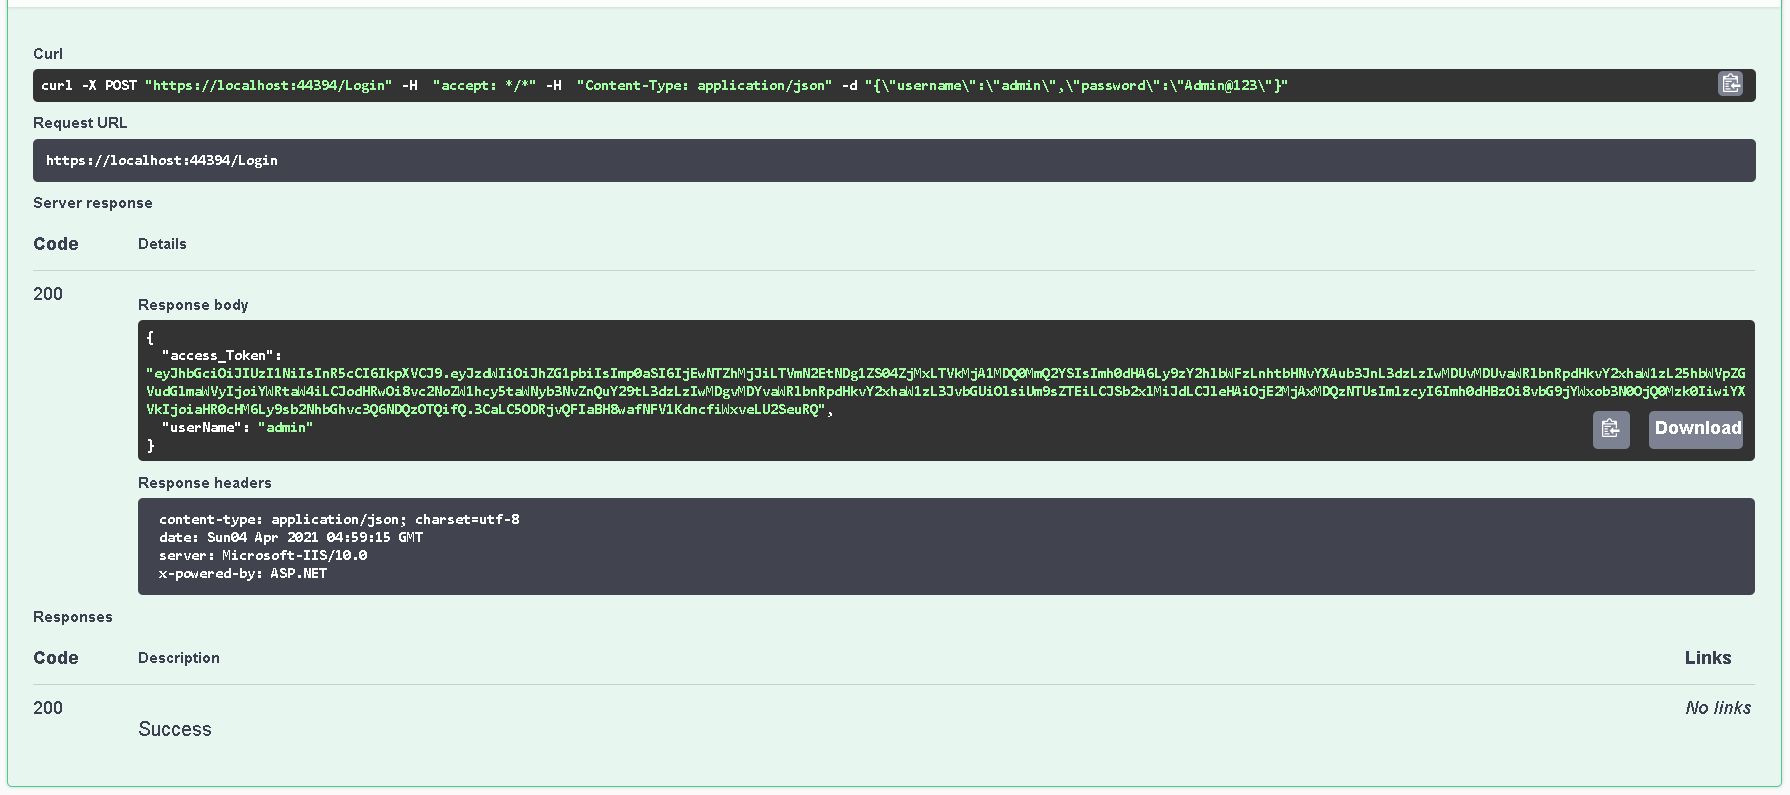
Under Account, click on the “POST /Login” and click try it out in the write. Enter body as shown in figure below and hit execute.
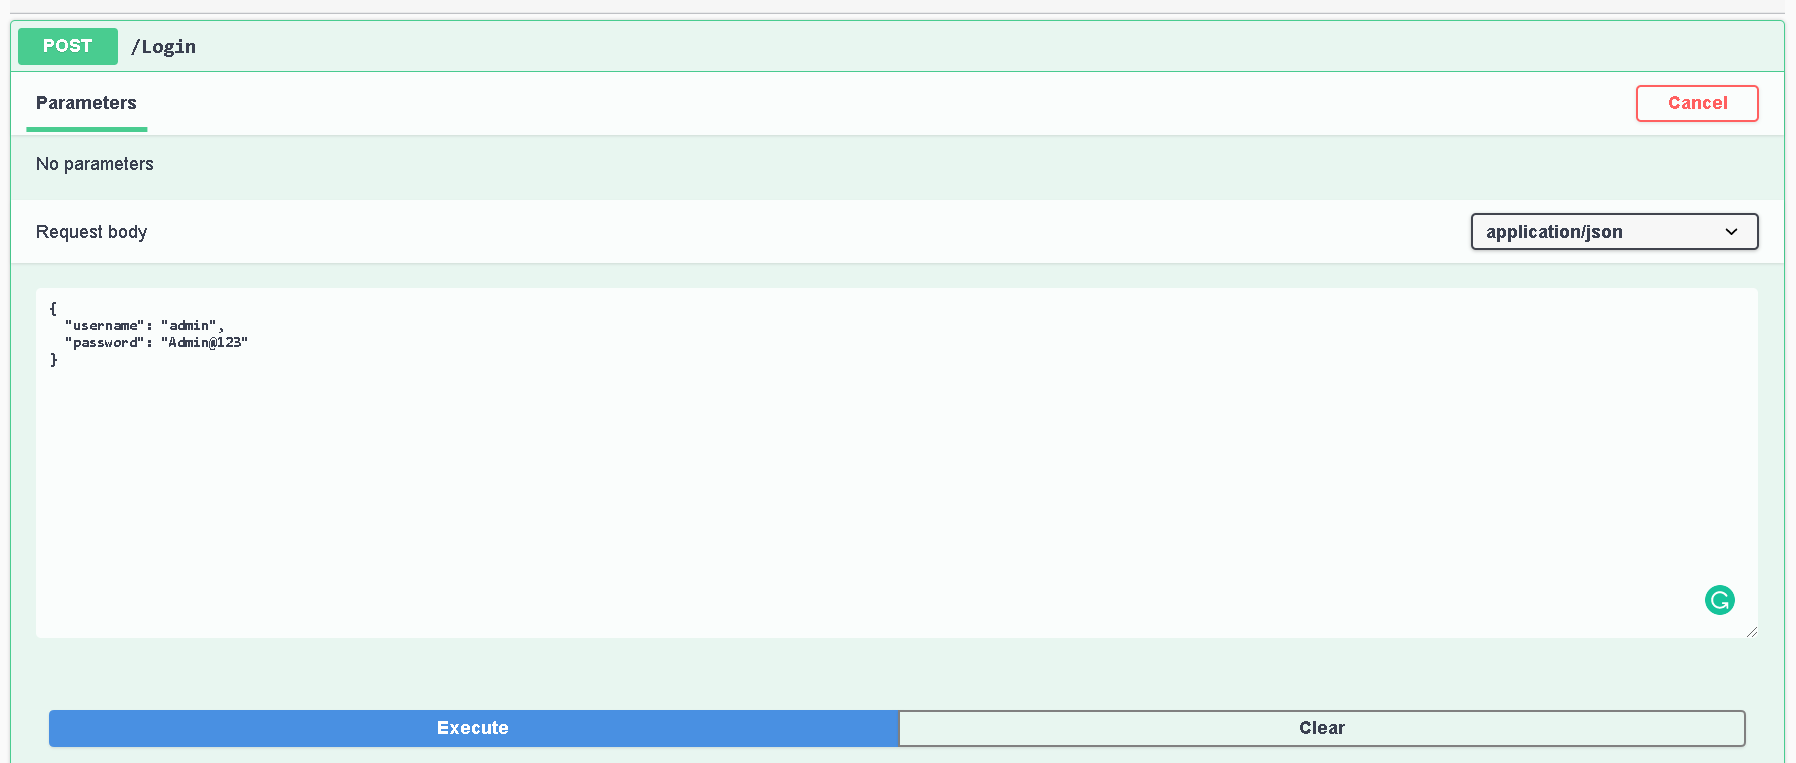
You will see a success response with token and username as shown below.
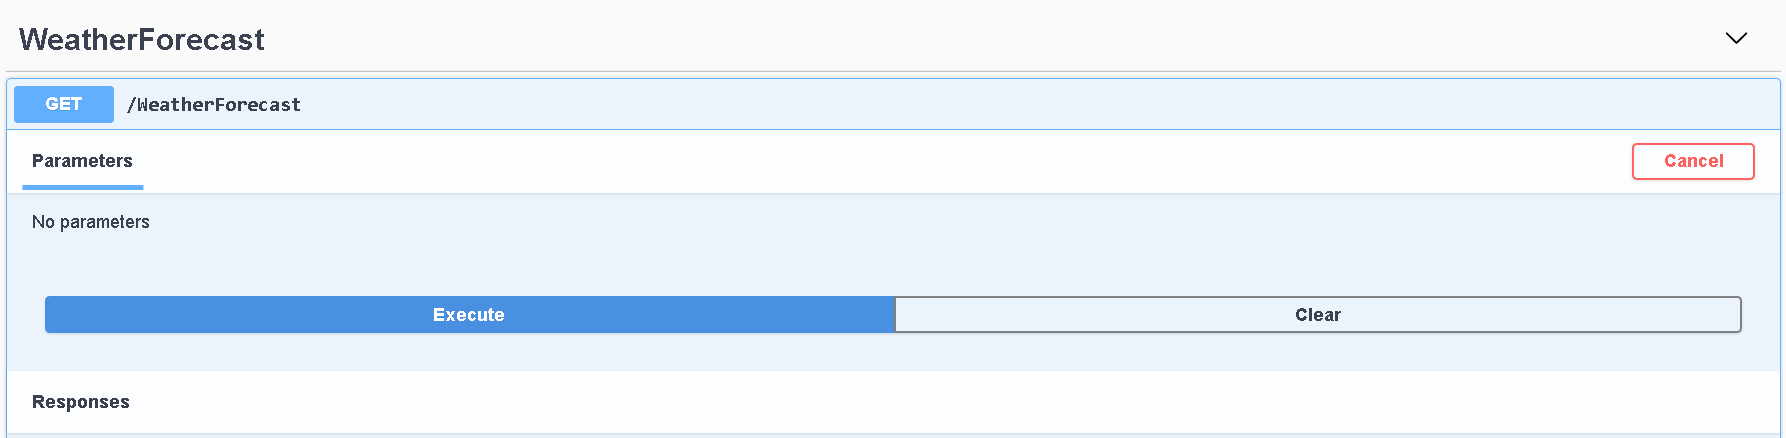
Next, we want to test the WeatherForecast service that we secure earlier. Scroll down to “WeatherForcast” section in the OpenAPI documentation and click on “GET /WeatherForcast” and click on “Try it out” in the top right of the expanded section and hit execute.
Once you hit execute, you will see following error.
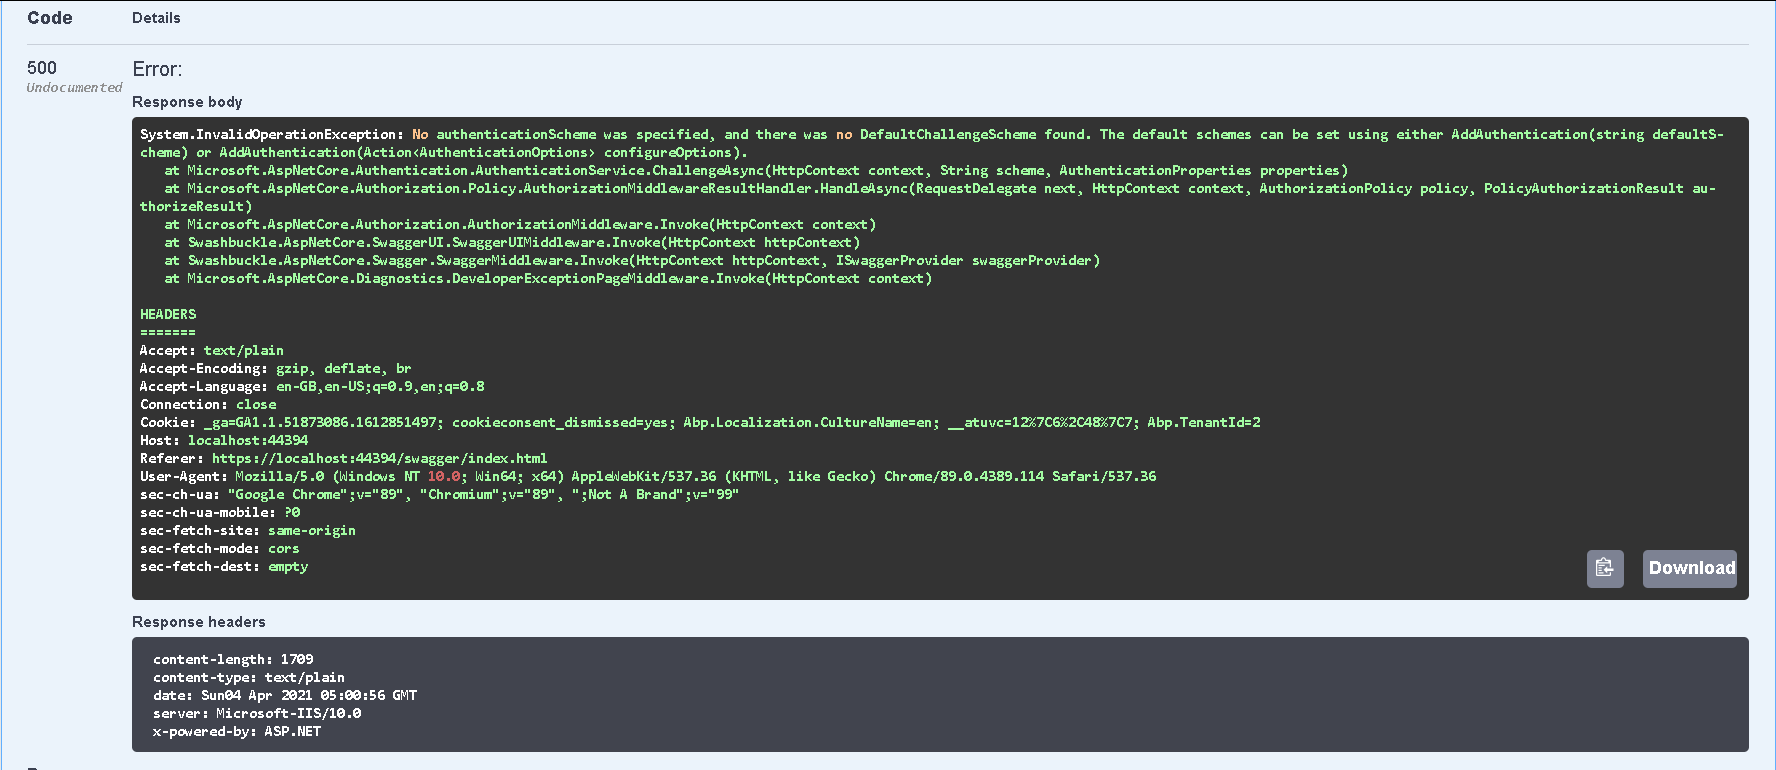
class=”post__text”>The error says “System.InvalidOperationException: No authenticationScheme was specified, and there was no DefaultChallengeScheme found.” And it means we need some more configuration to make it work.
Configure token authentication in ASP.NET Core
The error means ASP.NET Core do not know how to authorize the request since we added authorization attribute in WeatherForcast service.
In order to configure ASP.NET Core to use token authentication as the default authentication scheme and how to validate in coming tokens, add following to your CofigureServices method.
JwtSecurityTokenHandler.DefaultInboundClaimTypeMap.Clear(); // => remove default claims
services
        .AddAuthentication(options =>
        {
                options.DefaultAuthenticateScheme = JwtBearerDefaults.AuthenticationScheme;
                options.DefaultScheme = JwtBearerDefaults.AuthenticationScheme;
                options.DefaultChallengeScheme = JwtBearerDefaults.AuthenticationScheme;
        })
        .AddJwtBearer(cfg =>
        {
                cfg.RequireHttpsMetadata = false;
                cfg.SaveToken = true;
                cfg.TokenValidationParameters = new TokenValidationParameters
                {
                        ValidIssuer = Configuration["JwtIssuer"],
                        ValidAudience = Configuration["JwtIssuer"],
                        IssuerSigningKey = new S ymmetricSecurityKey(Encoding.UTF8.GetBytes(Configuration["JwtKey"])),
                        ClockSkew = TimeSpan.Zero // remove delay of token when expire
                };
        });
Next, in the Configure method, add app.UseAuthentication(); before app.UseAuthorization(); if not present.
Testing weatherForcast service with authentication
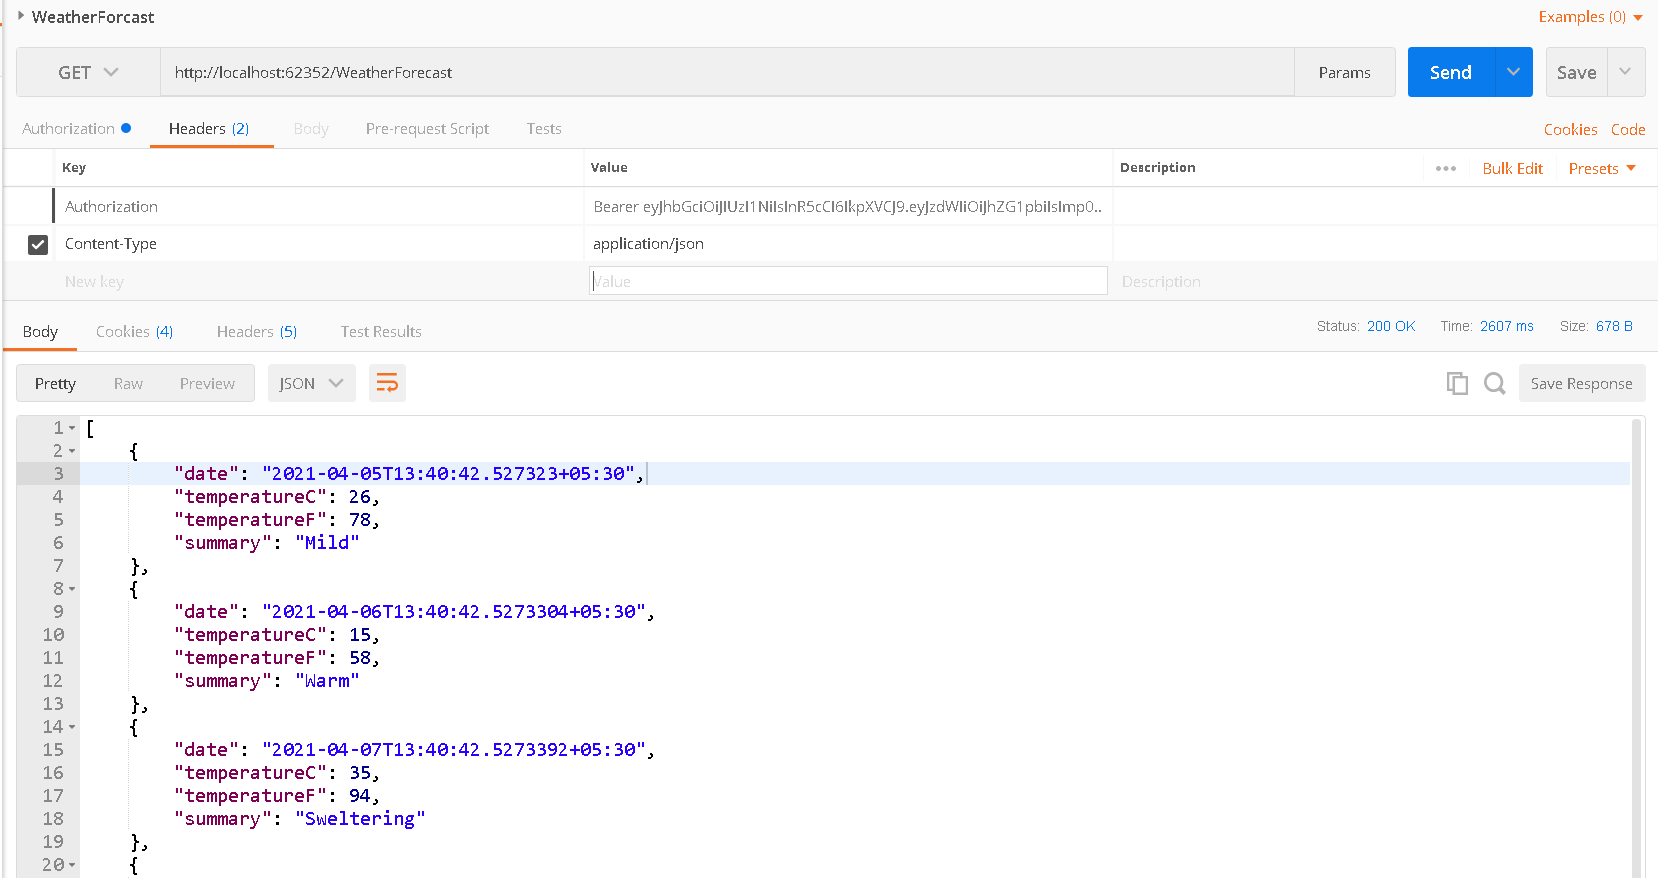
Now that we have configured ASP.NET Core to use token authentication, we should be able to use the token issued by Login method to access WeatherForcast.
Since OpenAPI documentation do not support setting up headers, we can use Postman tool to test the same.
You can copy the token received in the login response and use Authorization: Bearer and you will be able to access WeatherForcast service.

Under Account, click on the “POST /Login” and click try it out in the write. Enter body as shown in figure below and hit execute.
Conclusion
That’s it, it is simple tutorial about how to implement basic authentication in .NET 5.0. Stay tuned in next article!

Javier is Content Specialist and also .NET developer. He writes helpful guides and articles, assist with other marketing and .NET community work