Try putting the following best practices into practice to maximize the space on your HDD for IIS log files without deleting them. To begin with, launch IIS Manager and go to the Logging area. To ensure that a new log file is created every day, set the log file generation frequency to daily. You have the ability to customize the log file’s format and the information that is logged to suit your needs. You can also use Webalizer, a tool that offers comprehensive web server statistics, as an alternative.
Steps to Configure Log Rotation in IIS
1. Login to the server.
2. Open IIS Manager and select the required site.
3. In Features View, double-click “Logging”.
4. To create a new log file, select the relevant condition in the Log File Rollover section of the Logging pane. It is advised that you choose “daily” under the “schedule” option in order to schedule the creation of the new log file every day.
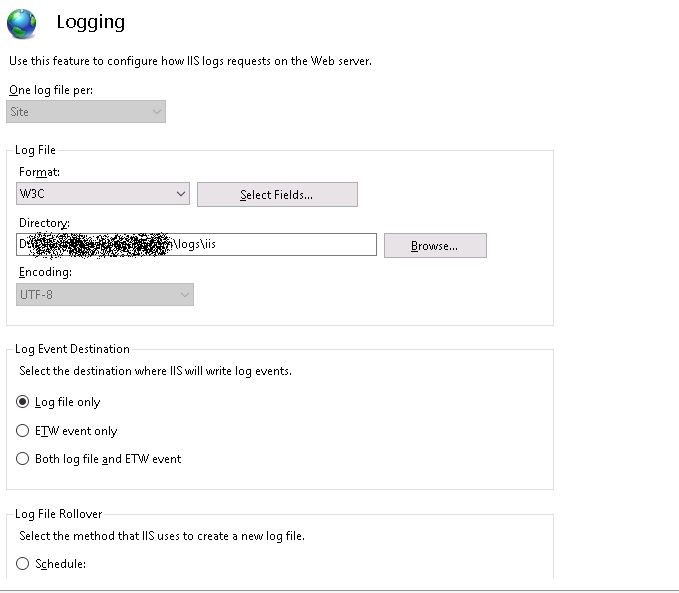
5. Choose “Use local time for file naming and rollover” to ensure that the proper local server time is used for log file naming and rollover.
6. To save your modifications, select Apply in the Actions pane.
Deleting the Log file:
1. Copy the script below, then save it as Log_File_Deletion.vbs in notepad.
sLogFolder = "c:\inetpub\logs\LogFiles"
iMaxAge = 30   'in days
Set objFSO = CreateObject("Scripting.FileSystemObject")
set colFolder = objFSO.GetFolder(sLogFolder)
For Each colSubfolder in colFolder.SubFolders
        Set objFolder = objFSO.GetFolder(colSubfolder.Path)
        Set colFiles = objFolder.Files
        For Each objFile in colFiles
                iFileAge = now-objFile.DateCreated
                if iFileAge > (iMaxAge+1)  then
                        objFSO.deletefile objFile, True
                end if
        Next
Next
You can find the path where log files are saved by going to IIS Manager >> IIS features >> Logging >> Directory
Please follow the instructions below to schedule a task to run the script:
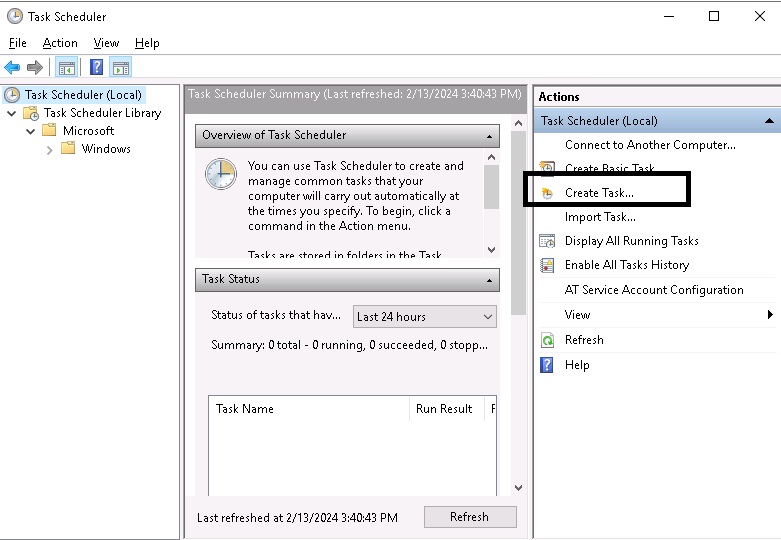
1. Open Server Manager, click the “configuration” menu, and then click “Task Scheduler”.
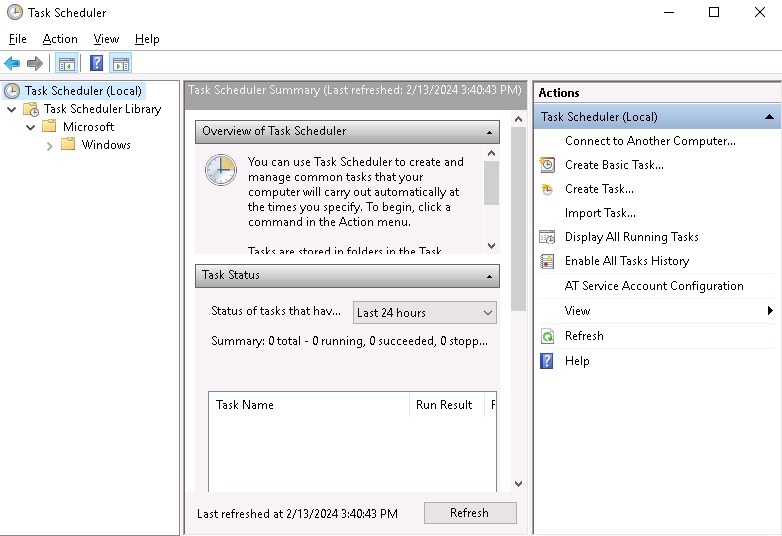
2. In the Actions pane of the Task Scheduler dialog box, click “Create Task”.
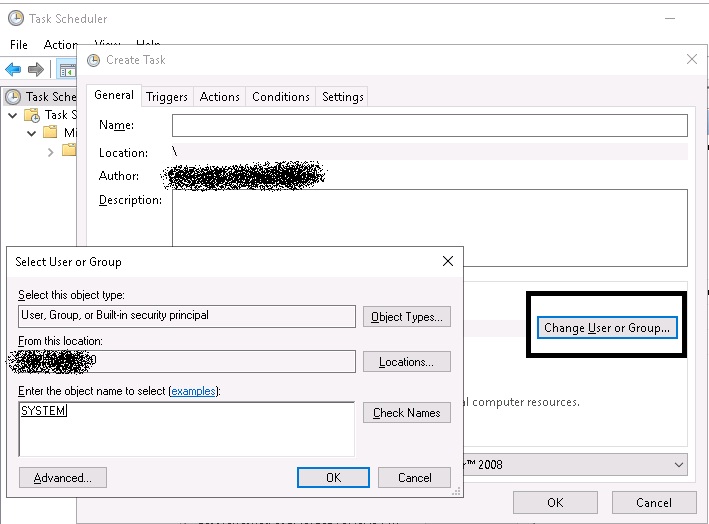
3. Name the task by typing something like “Delete Log Files” in the General tab of the Create Task dialog box. Click the Change User or Group button located next to the security options section of the dialog box to adjust the security properties. This enables us to designate the user that the task will execute under. After entering SYSTEM, select “OK”.
4. Click “OK” in the General tab.
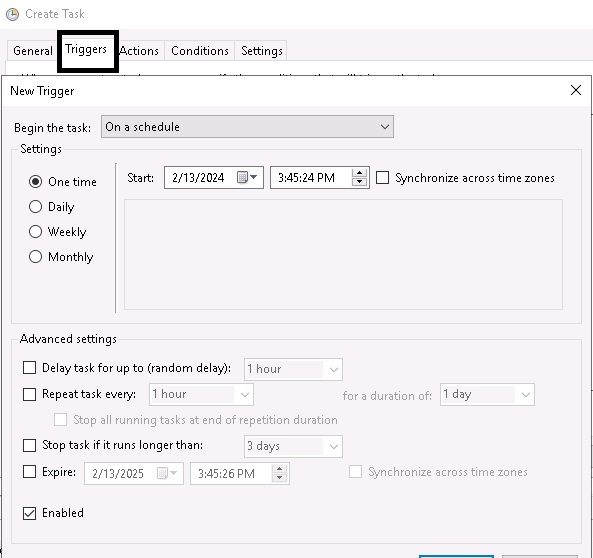
5. Select “New” after selecting the Triggers tab. Select “On a schedule” under “Begin the task” in the New Trigger dialog box. Choose a periodicity, such as daily. If you’re ready to start the schedule, enter the Start date, choose more advanced settings, and make sure Enabled is selected. Press “OK.”
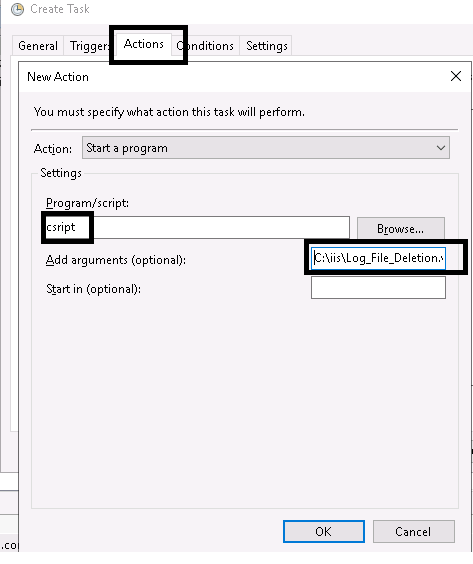
6. Select “New” after selecting the Actions tab. Choose Start a program as the value for Action in the New Action dialog box. Enter cscript under Program/script, and then, under Add arguments (optional), type the path and file name of the script, for instance, “C:\iis\Log_File_Deletion.vbs”. Press OK.
7. Click “OK” in the Actions tab.
8. Check to see if the task is now displayed in the Active Tasks pane. Double-click the task we created after swiping down to see “Active Tasks” in the task scheduler pane.
9. Right-click on the new task we created now, and select Run.
10. Check that the relevant log files were removed by navigating to the folder (c:\inetpub\logs\LogFiles) where the script was executed.
11. Return to the Task Scheduler, select the task with a right-click, and then select End to bring the task’s status back to Ready and prepare it for future scheduled runs.
Conclusion
Now, you have learned how to clean your log files in IIS and hopefully above tutorial helpful for you.


Javier is Content Specialist and also .NET developer. He writes helpful guides and articles, assist with other marketing and .NET community work