AutoMapper is an object-object mapper library
In Realtime application we assign values from one object to another object in many places such as mapping View Model to Model in controller similar way we do mapping again for showing values on Views by getting an object from the database back assigning to ViewModel.
In future, if we add a new property again to class, then the same assignment needs to do at all place where are doing object to object mapping right.
To overcome this object to object mapping, again and again, we can use AutoMapper.
Let’s start with creating an application.
Steps by Steps to Setup AutoMapper in ASP.NET Core
1. Create ASP.NET Core Web Application

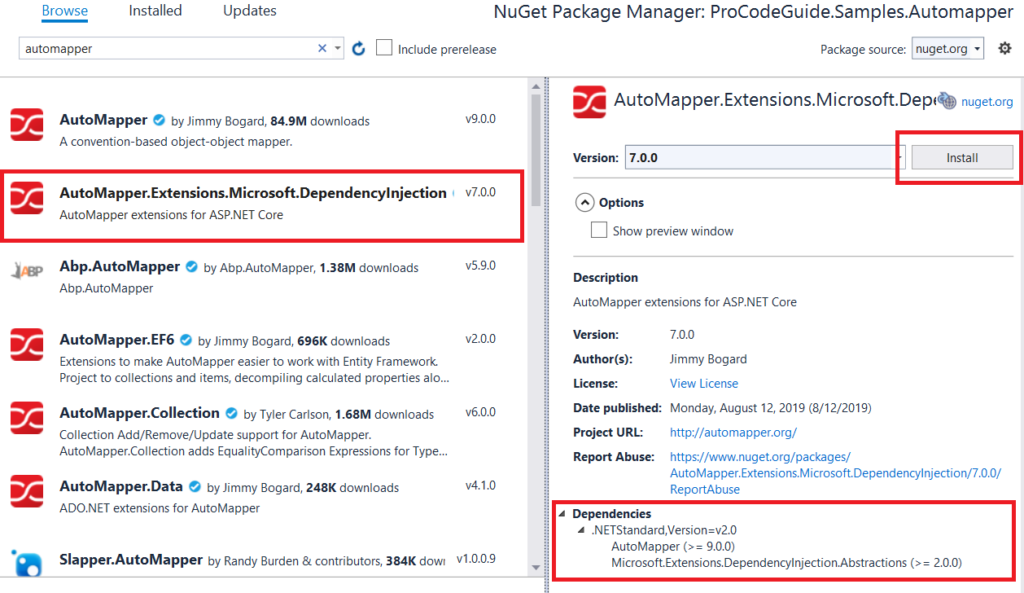
Install automapper NuGet package
Install package AutoMapper.Extensions.Microsft.DependencyInjection & this package depends on the AutoMapper package which will also get installed with this package.
Create sample EmployeeDTO & EmployeeModel classes
public class EmployeeDTO
{
public long Id { get; set; }
public string Name { get; set; }
public int Age { get; set; }
public double Salary { get; set; }
}
public class EmployeeModel
{
    public long Id { get; set; }
    public string Name { get; set; }
    public int Age { get; set; }
    public double Salary { get; set; }
}
2. Configure automapper in startup.cs
public void ConfigureServices(IServiceCollection services)
{
    services.AddAutoMapper(AppDomain.CurrentDomain.GetAssemblies());
}
//Remaining code has been removed
3. Create an automapper mapping profile as EmployeeProfile.cs
Creating Mapping profiles is a better way to organize your object mappings. This profile tells automapper about which object links to which another object, which property of one object links to which property of other object and even let’s configure conditional mappings.
Create a mapping profile class that inherits from AutoMapper.Profile and add the configuration in the constructor of that mapping profile class
public class EmployeeProfile : Profile
{
    public EmployeeProfile()
    {
        CreateMap<EmployeeDTO, EmployeeModel>();
    }
}
Do note that with the above CreateMap you can map from EmployeeDTO to EmployeeModel but reverse mapping will not be supported. Reverse Maps will have to be used for bidirectional mapping.
4. Using employee mapping in Employee controller
Create an Employee controller as shown below. Automapper service will have to be injected into the controller using constructor dependency injection (Refer here for more details on Dependency Injection). Here Employee controller’s post method takes an object of type EmployeeDTO and using automapper maps it to EmployeeModel & returns the same as JSON.
[Route("api/[controller]")]
[ApiController]
public class EmployeeController : ControllerBase
{
    private readonly IMapper _mapper;

    public EmployeeController(IMapper mapper)
    {
        _mapper = mapper;
    }

    // POST api/<EmployeeController>
    [HttpPost]
    public IActionResult Post([FromBody] EmployeeDTO _employeeDTO)
    {
        var employeeModel = _mapper.Map<EmployeeModel>(_employeeDTO);
        return Ok(employeeModel);
    }
}
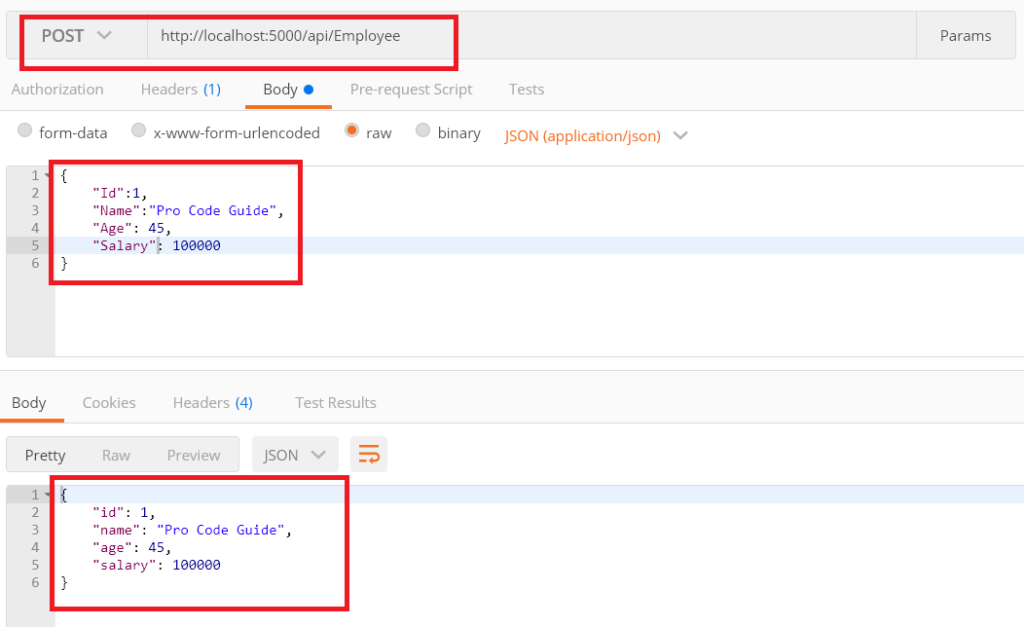
After executing the above project and calling the Employee controller post-action using postman we got the following result
5. Mapping objects having different property names
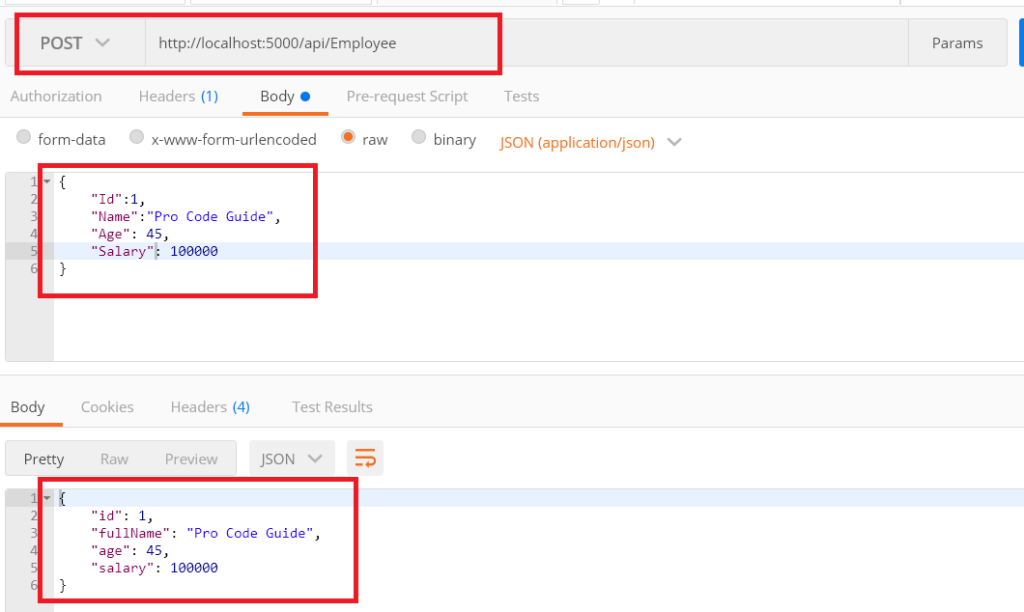
To demonstrate how to map objects using automapper having different property names. We have modified the class EmployeeModel property name for Name to FullName.
public class EmployeeDTO
{
    public long Id { get; set; }
    public string Name { get; set; }
    public int Age { get; set; }
    public double Salary { get; set; }
}
public class EmployeeModel
{
    public long Id { get; set; }
    public string FullName { get; set; }
    public int Age { get; set; }
    public double Salary { get; set; }
}
public class EmployeeProfile : Profile
{
    public EmployeeProfile()
    {
        CreateMap<EmployeeDTO, EmployeeModel>()
             .ForMember(empmodel => empmodel.FullName, empdto => empdto.MapFrom(empdto => empdto.Name));
    }
}
After executing the above project and calling the Employee controller post-action using postman we got the following result.
6. Mapping objects with conditional mapping
Here is the how-to implement conditional mapping for objects in the Employee Mapping Profile class
public class EmployeeProfile : Profile
{
    public EmployeeProfile()
    {
        CreateMap<EmployeeDTO, EmployeeModel>()
             .ForMember(empmodel => empmodel.FullName, empdto => empdto.MapFrom(empdto => empdto.Name))
             .ForMember(empmodel => empmodel.Salary, empdto => empdto.MapFrom(empdto => empdto.Age > 55 ? empdto.Salary * 10 : empdto.Salary));
    }
}
7. Mapping objects with Null Subsitution
This allows you to set a default or alternate value for the destination data member in case the source data member is null
public EmployeeProfile()
{
    CreateMap<EmployeeDTO, EmployeeModel>()
        .ForMember(empmodel => empmodel.Telephone, empdto => empdto.NullSubstitute("Not Available"));
}
8. Mapping objects with Reverse Map
Do note that with CreateMap you can map from source (EmployeeDTO) to destination (EmployeeModel) but reverse mapping will not be supported. Reverse Maps will have to be used for bidirectional mapping.
public class EmployeeProfile : Profile
{
    public EmployeeProfile()
    {
        CreateMap<EmployeeDTO, EmployeeModel>()
            .ForMember(empmodel => empmodel.FullName, empdto => empdto.MapFrom(empdto => empdto.Name))
            .ForMember(empmodel => empmodel.Salary, empdto => empdto.MapFrom(empdto => empdto.Age > 55 ? empdto.Salary * 10 : empdto.Salary))
            .ReverseMap();
    }
}
9. Mapping Objects of Complex Types
EmployeeDTO & EmployeeModel classes have been modified to add a new property which is of a type of custom class as shown below
public class TelephoneNumberDTO
{
    //1 - Home, 2 - Office, 3 - Mobile
    public int PhoneType { get; set; }
    public string PhoneNumber { get; set; }
}
public class TelephoneNumberModel
{
    //1 - Home, 2 - Office, 3 - Mobile
    public int PhoneType { get; set; }
    public string PhoneNumber { get; set; }
}
public class EmployeeDTO
{
    public long Id { get; set; }
    public string Name { get; set; }
    public int Age { get; set; }
    public double Salary { get; set; }
    public TelephoneNumberDTO Telephone { get; set; }
}
public class EmployeeModel
{
    public long Id { get; set; }
    public string FullName { get; set; }
    public int Age { get; set; }
    public double Salary { get; set; }
    public TelephoneNumberModel Telephone { get; set; }
}
Here is the how to map complex objects in Employee Mapping Profile class
public class EmployeeProfile : Profile
{
    public EmployeeProfile()
    {
        CreateMap<EmployeeDTO, EmployeeModel>()
            .ForMember(empmodel => empmodel.FullName, empdto => empdto.MapFrom(empdto => empdto.Name))
            .ForMember(empmodel => empmodel.Salary, empdto => empdto.MapFrom(empdto => empdto.Age > 55 ? empdto.Salary * 10 : empdto.Salary))
            .ReverseMap();
        CreateMap<TelephoneNumberDTO, TelephoneNumberModel>()
            .ReverseMap();
    }
}
Advantages of automapper in ASP.NET Core
- No need to write boring code so saves time
- Handles conditional mapping
- Handles complex objects
Summary
Automapper in ASP.NET Core is used to map objects of dissimilar types without the need to write boring code to map each data member.
We used automapper in ASP.NET Core to map objects of dissimilar types. It was easy to map objects having the same property names with minimal coding. Though different property names required some mapping to map properties within classes.


Yury Sobolev is Full Stack Software Developer by passion and profession working on Microsoft ASP.NET Core. Also he has hands-on experience on working with Angular, Backbone, React, ASP.NET Core Web API, Restful Web Services, WCF, SQL Server.