This tutorial explain how to setup Let’s Encrypt via Plesk Control Panel. We are using Plesk Control Panel here and we offer Let’s Encrypt for free to our customers.
Here are few steps to install your Let’s Encrypt via your Plesk control panel
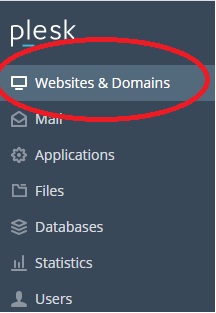
1. Login to your Plesk Control Panel
2. Find Websites & Domains button:
3. Find SSL/TLS Certificates like below:
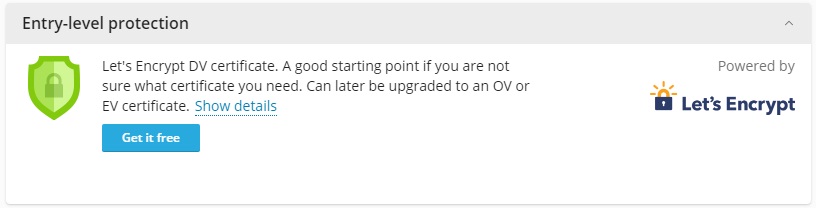
4. Once you click Get it free button, you’ll go this page:
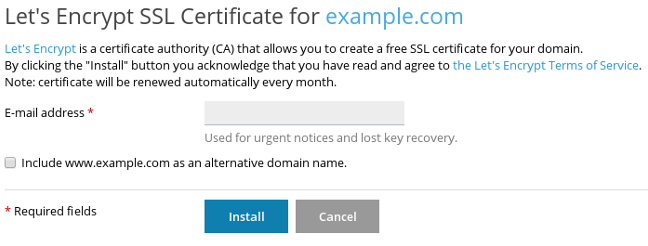
5. Fill your email address and the select Include www.example.com as an alternative domain name if you want the SSL certificate to protect your domain with and without www prefix.
6. Click Install. If there is no issue with installation, you will receive message “Let’s Encrypt SSL certificate was successfully installed on example.com“
If installation fails, make sure that your domain name is valid and you need to make sure that you have pointed your domain/website to our name server.
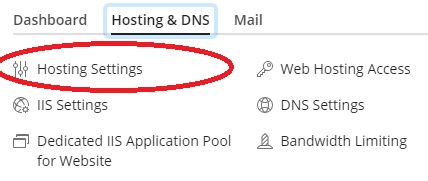
7. Click Hosting Settings
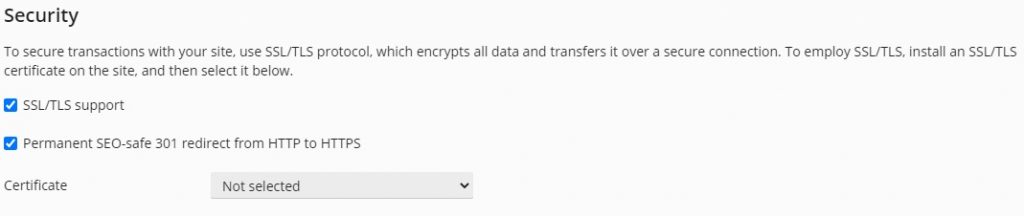
8. Under Security, confirm the SSL support check box is selected, and the Let’s Encrypt SSL certificate is selected in the Certificate list box.
9. Click OK. Your site is using Let’s Encrypt now.
Summary
We hope this article can help you to install your Let’s Encrypt via Plesk Control Panel. Due to many customers are using this Let’s Encrypt SSL, then we decide to write this tutorial. If you are looking for ASP.NET Hosting with FREE SSL Certificate, please feel free to visit our site.

Javier is Content Specialist and also .NET developer. He writes helpful guides and articles, assist with other marketing and .NET community work