There is a template you can use in Visual Studio to create your project if you’re attempting to build a.NET Core web application using React.js. However, there are a few extra steps you must take if you want to include Typescript in your application.
Steps to Setup .NET Core with React
OK, let’s get started. You can follow these steps below
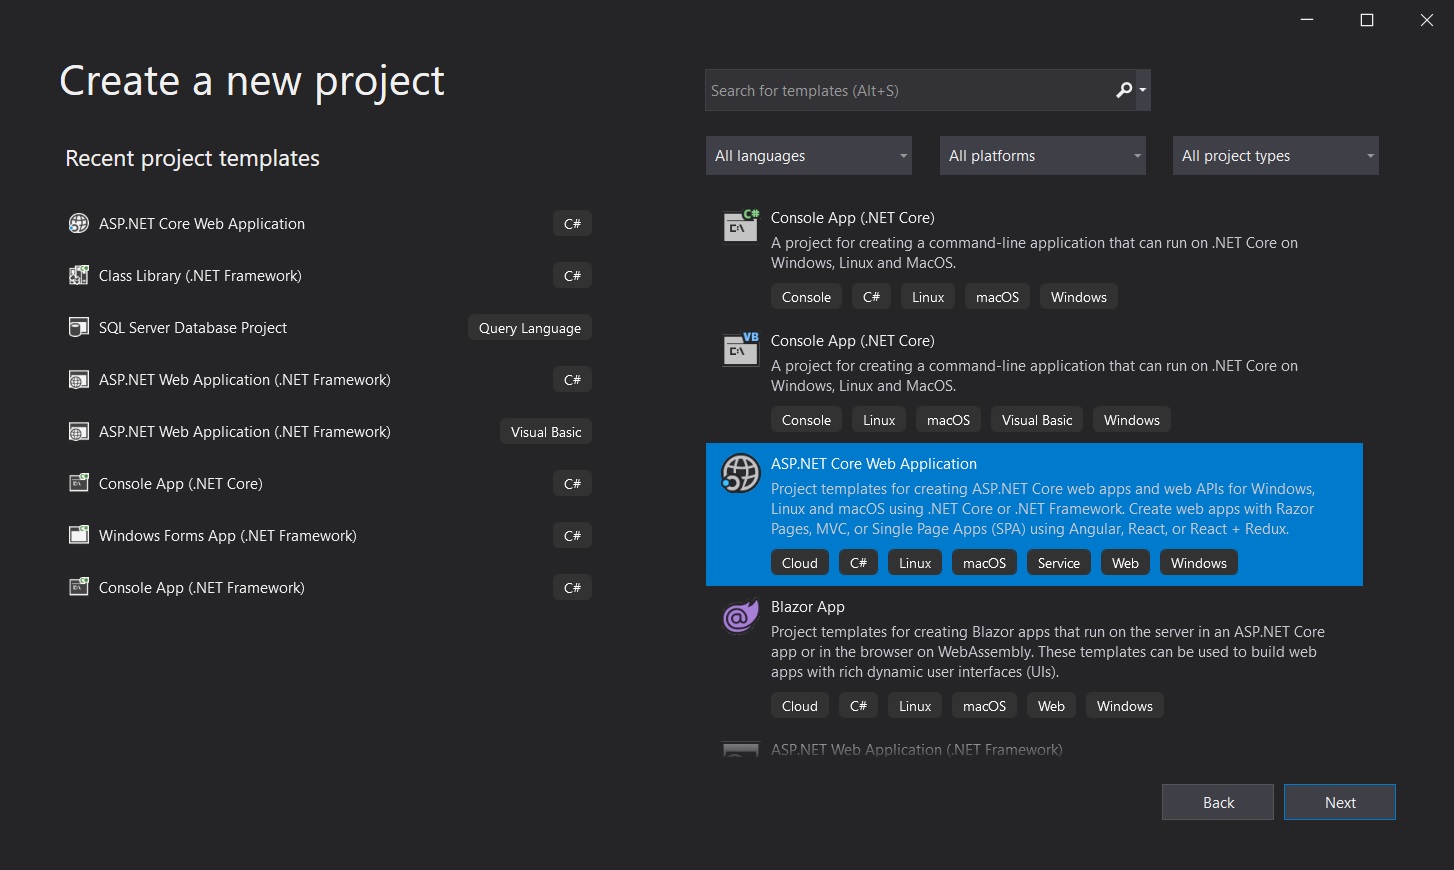
1. Create Your .NET Core with React.js Template

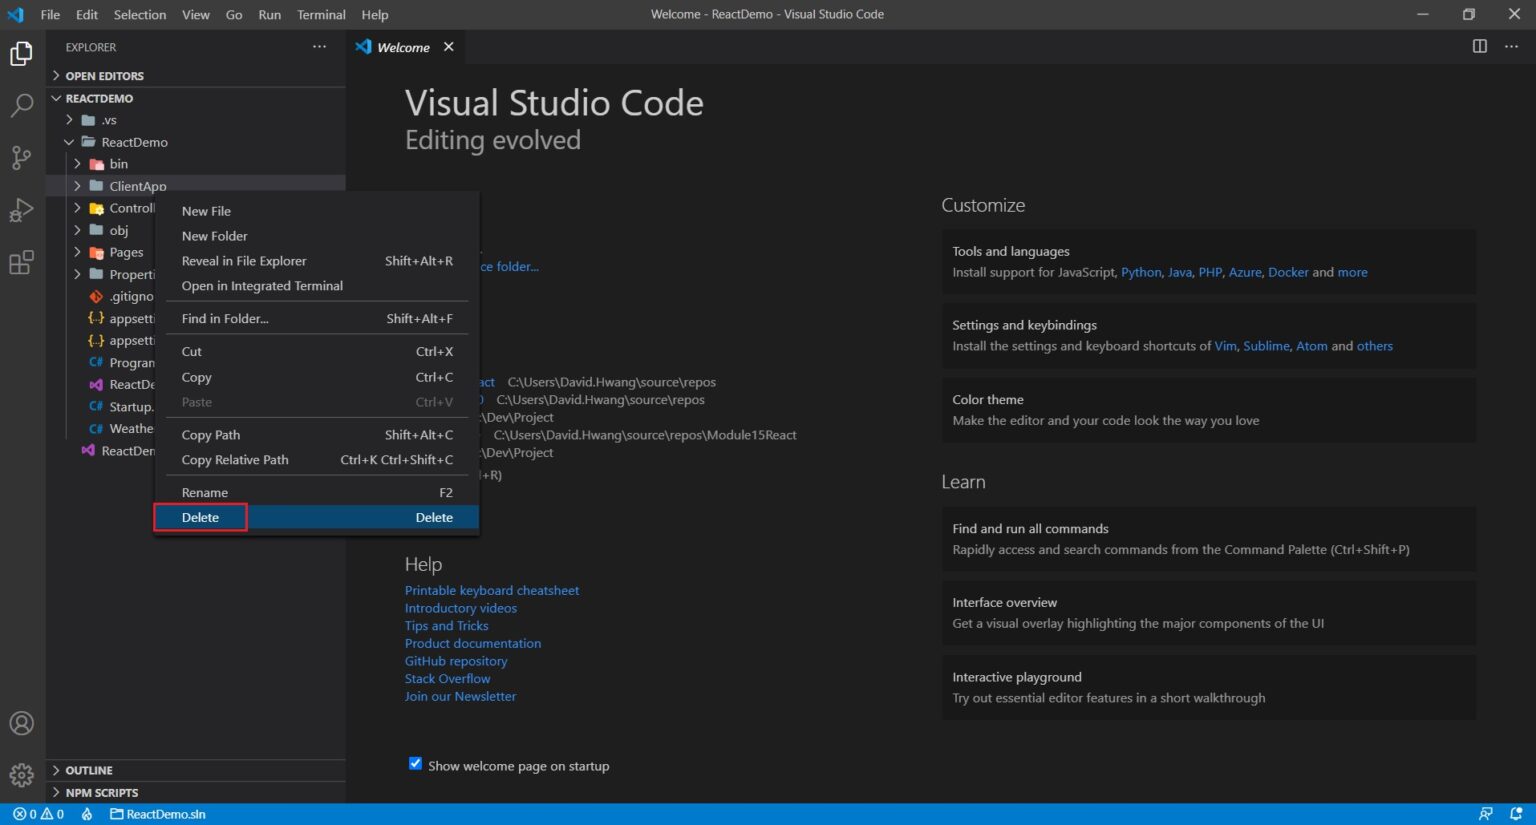
2. Once you create the project, head over to Visual Studio Code and open the folder containing the project. Right-click the ClientApp folder and delete it.
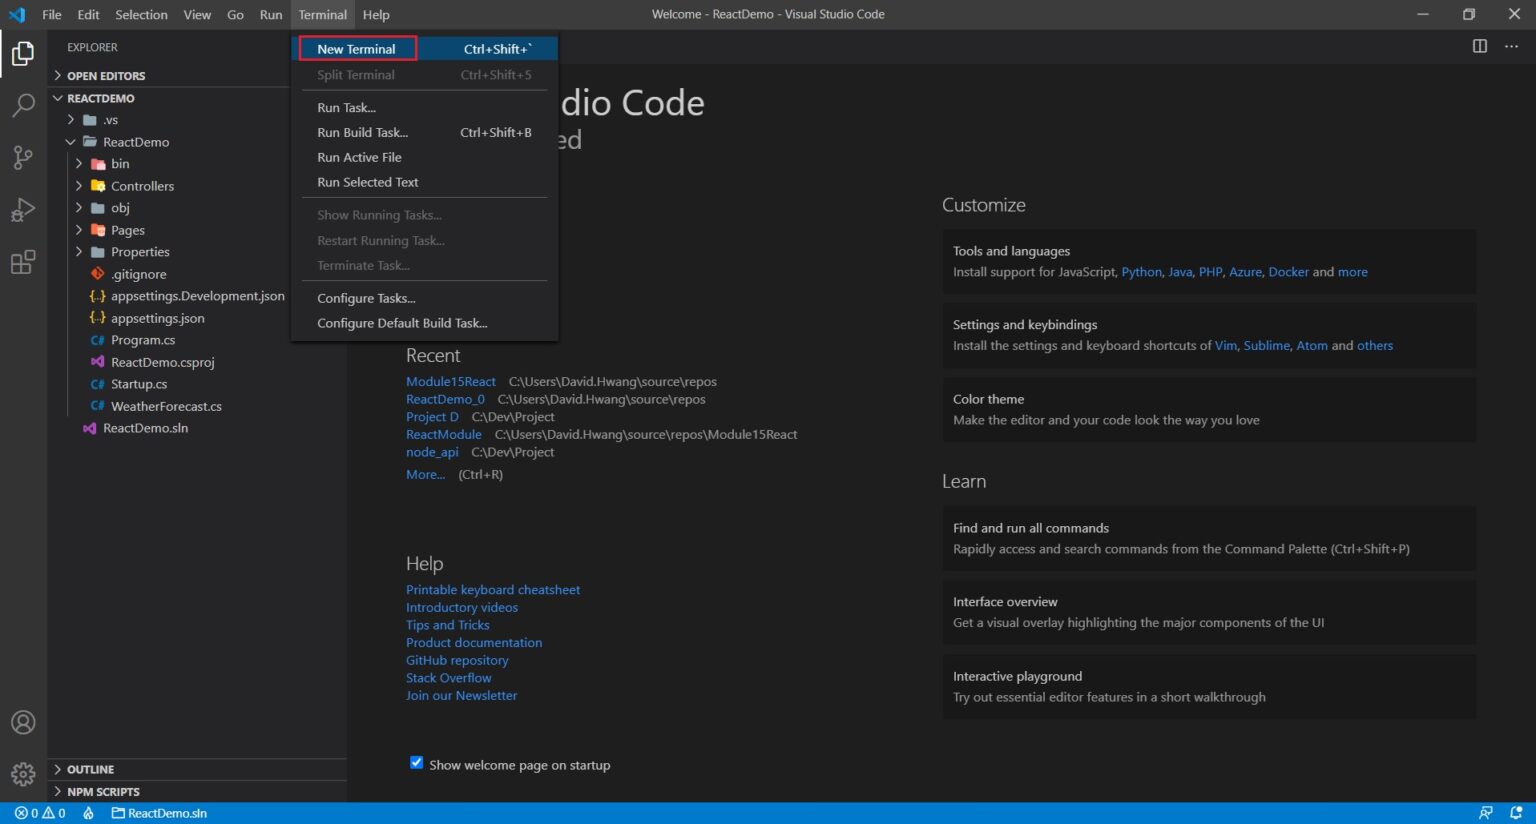
3. Open up a new terminal.
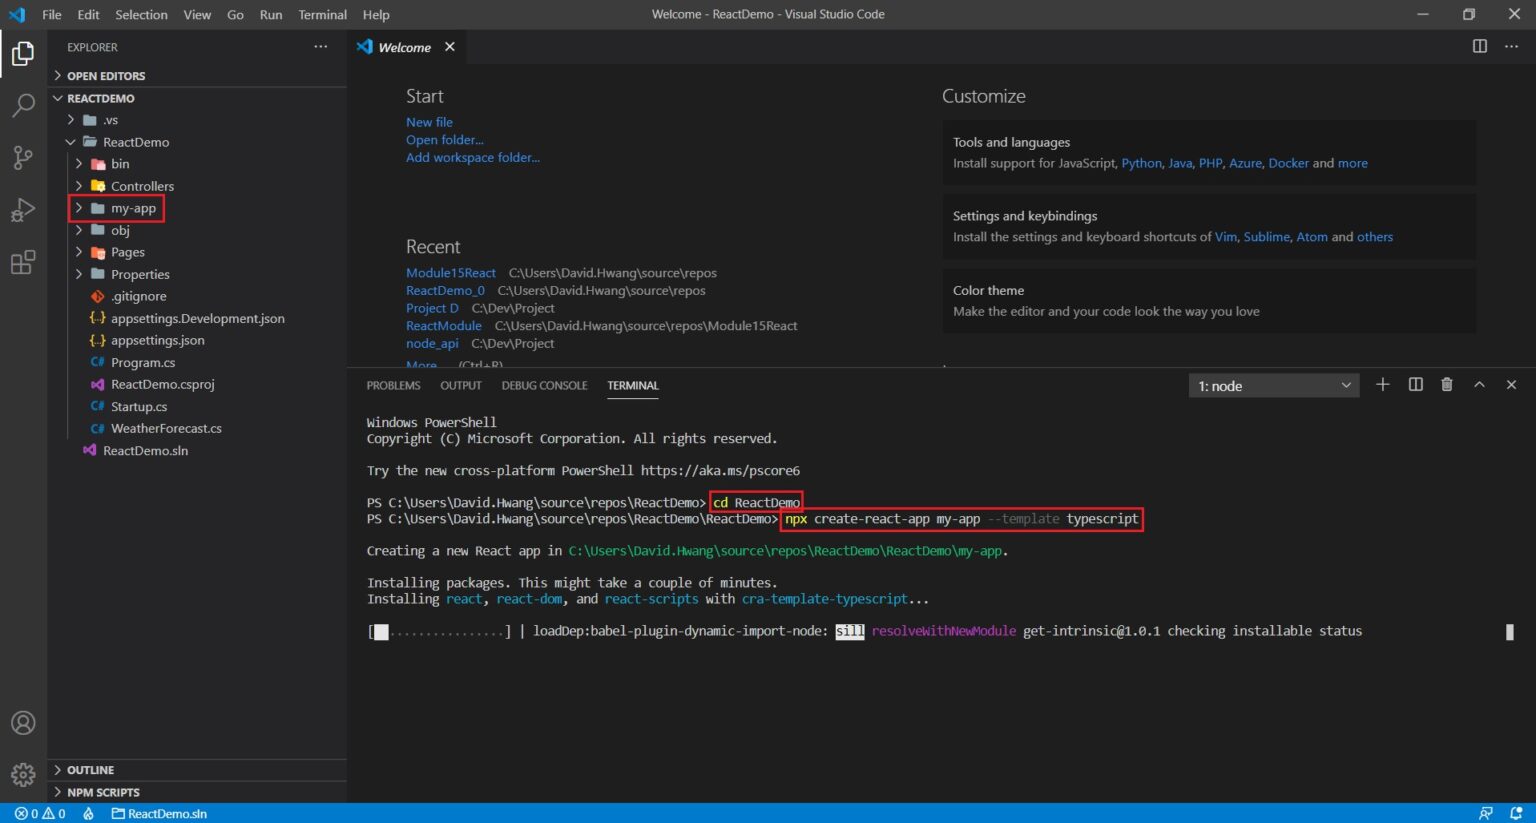
4. Step into the sub-folder by doing a ‘cd <name of your folder>’. Enter ‘npx create-react-app my-app –template typescript‘ to create your react application with typescript.
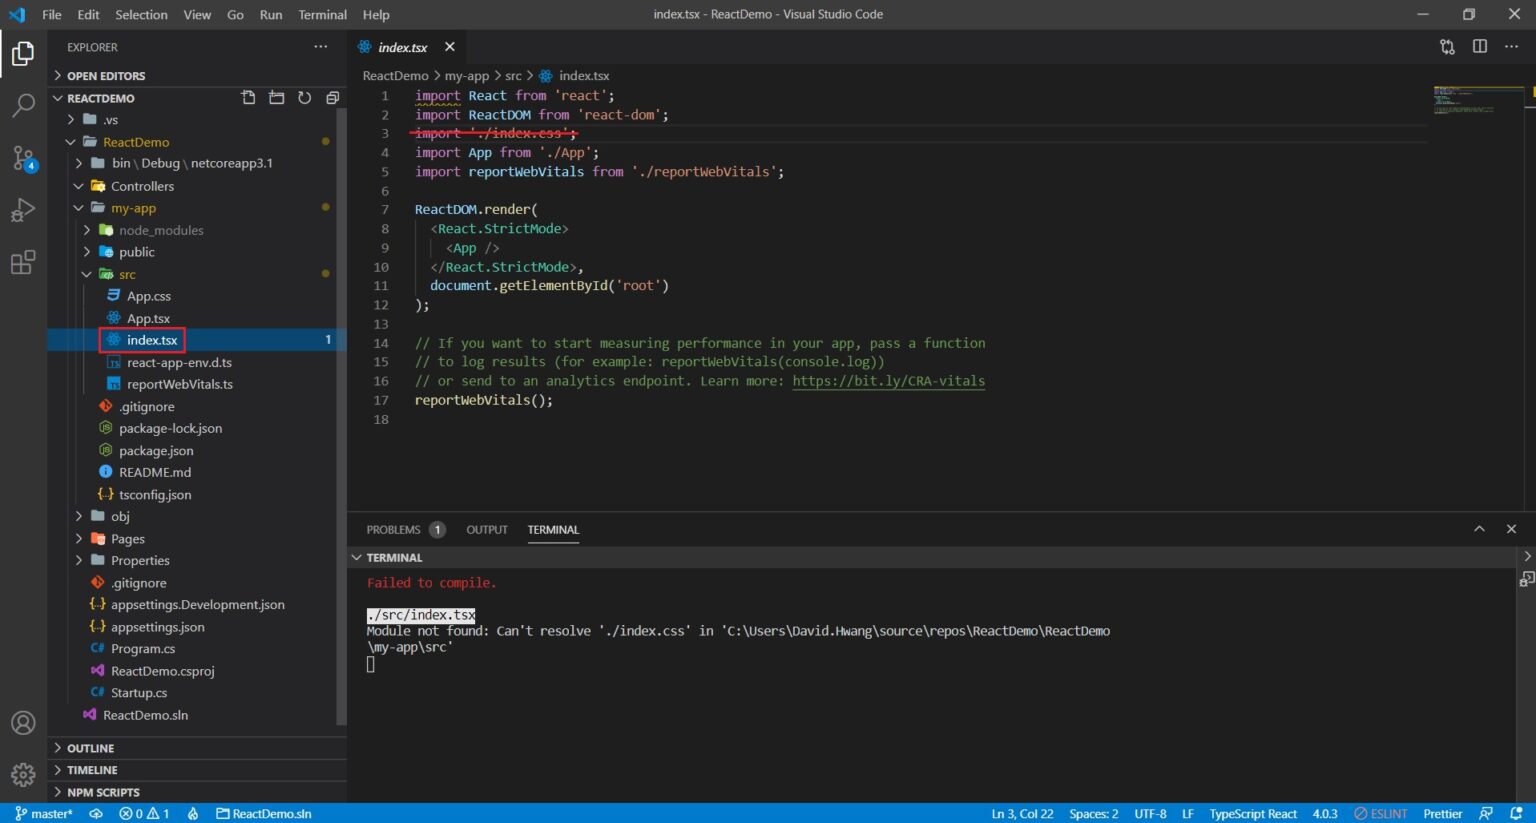
5. You may delete these files:
- src/setupTests.ts
- src/App.test.tsx
- src/Index.css
- WeatherForecast.cs
- WeatherForecastController
Remove those lines that import any of the files deleted above.
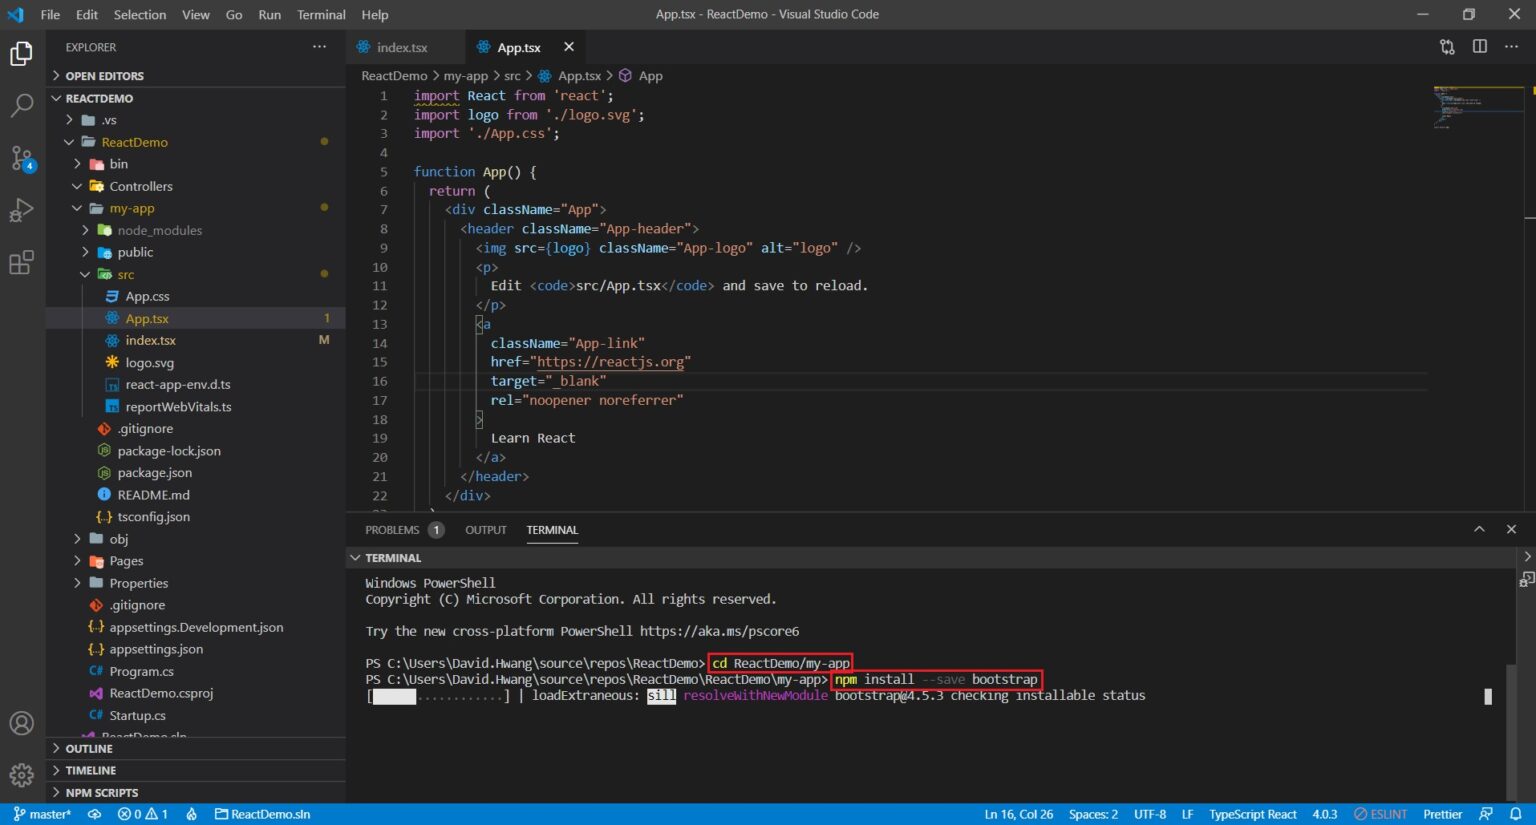
6. Type “npm install -save bootstrap” in the react app to install bootstrap. To see a reference, click here.
7. To launch your application on localhost, run ‘npm start’ right away!
Conclusion
In simple tutorial above, you have learned how to setup .net core with React.js. If you find this article useful, please feel free to share this article. Thank you and Happy Coding!


Javier is Content Specialist and also .NET developer. He writes helpful guides and articles, assist with other marketing and .NET community work