
Many of you might have heard about ASP.NET Core SignalR, an open-source library to send real time web based notifications. This article will help you build or integrate SignalR based notification in your ASP.NET Core web application.
Let’s look at what we will require to build an up & running example. ASP.NET Core We will use .NET Core 3.1.
You can install SDK and runtime from the given link. .NET Framework 4.5 or higher
How does it work?
SignalR provides API for creating server-to-client remote procedure calls (RPC) that call JavaScript functions in client browsers (and other client platforms) from server-side .NET code. SignalR also includes API for connection management (for instance, connect and disconnect events), and grouping connections. Using SignalR you can send broadcast messages to all connected clients simultaneously or target a specific client or a group of clients.
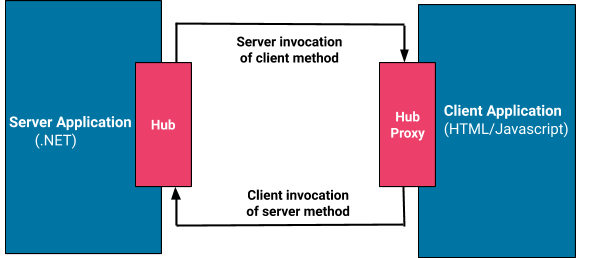
A hub is a pipeline build over connection API that allows your client and server to call methods and communicate with each other. Using hub you can pass strongly typed parameters & enable model binding. SignalR is capable of handling serialization and deserialization of complex objects and arrays. SignalR supports more than 1 transport techniques for handling real-time communication between client & server.
- WebSockets
- Server-sent
- EventsLong Polling
The interesting fact is, SignalR automatically chooses the best transport technique depending on server & client capabilities.
Example
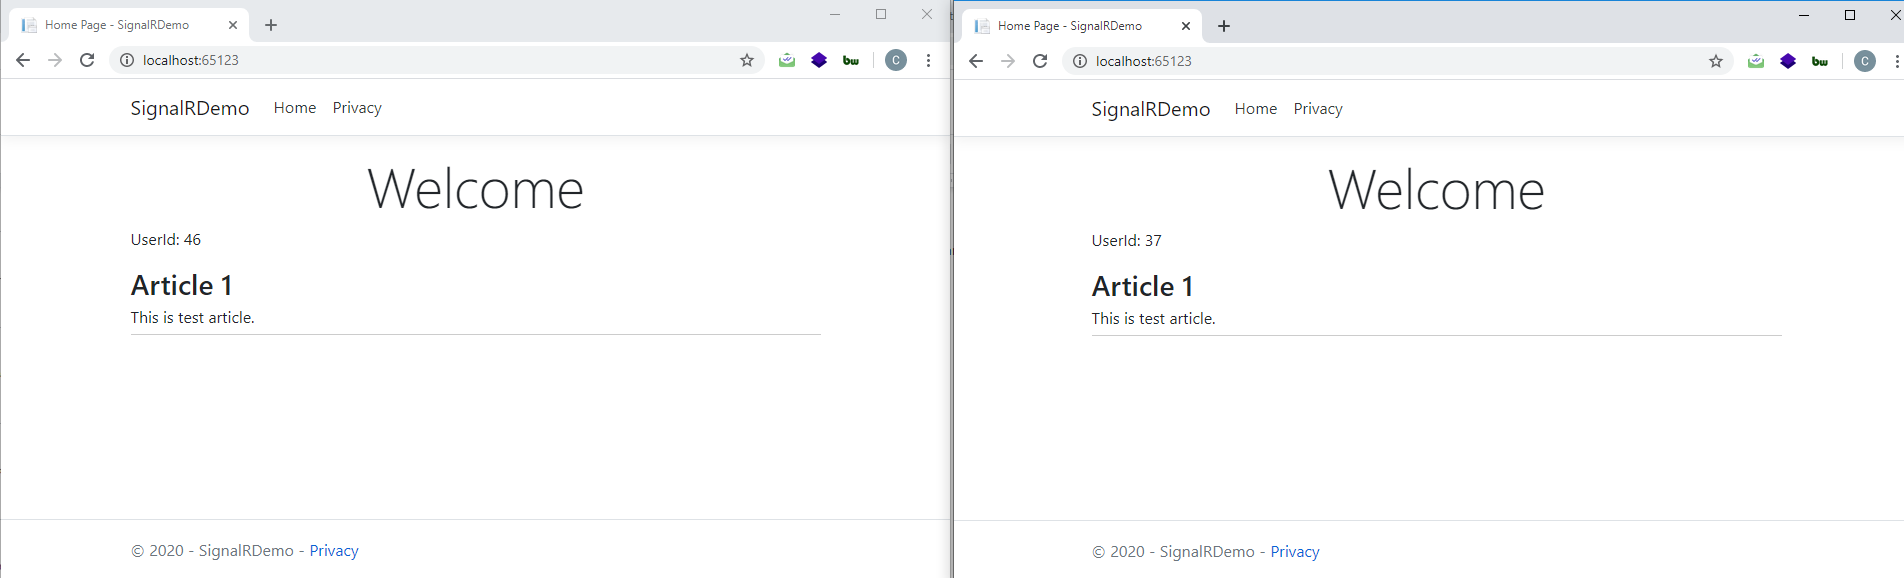
In this example we will send real-time notification to all online users when a new article is added by the admin. Users will instantly see the newly added article data.
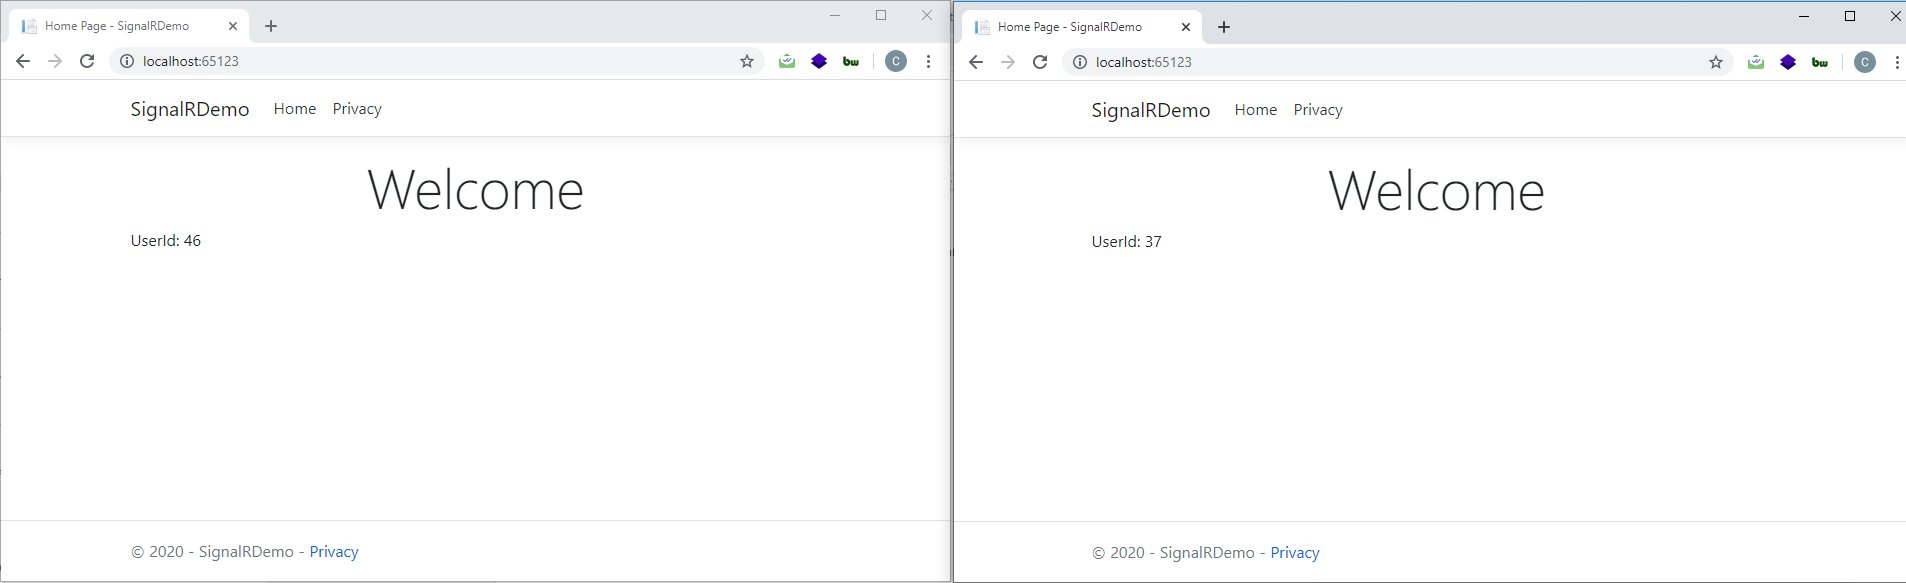
- When a user opens the page, a random number between 1 to 100 will be generated and we will send the generated number to the server to create a new hub connection.
- Server will create a connection and return the new connection id to client hub proxy.
- If the server wants to send the Notification to a user, it will find all the connectionId of a user and send it to the clients (by the connectionId).
We will do the example in two parts
- Send real-time notification to all users
- Send real-time notification to specific user
Let’s start:
1) Send real-time notification to all users
Step 1: Create ASP.NET Core web application. I have used .NET core 3.1 but you can use a different version of .NET Core as far as it supports SignalR.
Step 2: Install Microsoft.AspNetCore.SignalR.Core from Nuget Package Manager.
Step 3: Create a new folder named “Hubs” and a class named NotificationHub.cs.
using Microsoft.AspNetCore.SignalR;
namespace SignalRDemo.Hubs
{
public class NotificationHub : Hub
   {
    }
}
Step 4: To register SignalR open Startup.cs file, add below line under ConfigureServices method.
services.AddSignalR();
Step 5: And add below code inside Configure method.
app.UseEndpoints(endpoints =>
     {
        endpoints.MapHub(“/NotificationHub”);
     });
Step 6: Download signalr.js file from a CDN & place it inside wwwroot -> lib -> signalr folder. Step 7: Create Article.cs class file under Models folder and replace it with below code.
namespace SignalRDemo.Models
{
     public class Article
   {
     public string articleHeading { get; set; }
     public string articleContent { get; set; }
     public string userId { get; set; }
   }
}
Step 8: Create notification.js file under wwwroot -> js folder and add below code.
“use strict”;
var connection = new signalR.HubConnectionBuilder().withUrl(“/NotificationHub”).build();
connection.on(“sendToUser”, (articleHeading, articleContent) => {
      var heading = document.createElement(“h3”);
      heading.textContent = articleHeading;
      var p = document.createElement(“p”);
      p.innerText = articleContent;       var div = document.createElement(“div”);
      div.appendChild(heading);
      div.appendChild(p);

       document.getElementById(“articleList”).appendChild(div);
});
connection.start().catch(function (err) {
       return console.error(err.toString());
});
Step 9: Open Index.cshtml file and replace it with below code.
@{
     ViewData[“Title”] = “Home Page”;
}
<div class=”text-center”>
     <h1 class=”display-4″>Welcome</h1>
     <div id=”articleList”></div>
</div>
<script>
     function ready() {
}
     //random number between 1 and 100 for demo
     var userId = Math.floor((Math.random() * 100) + 1); document.addEventListener(“DOMContentLoaded”, ready);
</script>
<script src=”~/lib/signalr/signalr.js”></script>
<script src=”~/js/notification.js”></script>
Step 10: Create AdminController.cs inside controller folder and add below code.
using System.Threading.Tasks;
using Microsoft.AspNetCore.Mvc;
using SignalRDemo.Hubs;
using Microsoft.AspNetCore.SignalR; namespace SignalRDemo.Controllers
{
public class AdminController : Controller
{
   private readonly IHubContext<NotificationHub> _notificationHubContext;
 public AdminController(IHubContext<NotificationHub>notificationHubContext)
{
_notificationHubContext = notificationHubContext;
}
public IActionResult Index()
{
     return View();
}
[HttpPost]
public async Task<IActionResult> Index(Article model)
{
     await _notificationHubContext.Clients.All.SendAsync(“sendToUser”, model.articleHeading, model.articleContent);
     return View();
     }
   }
}
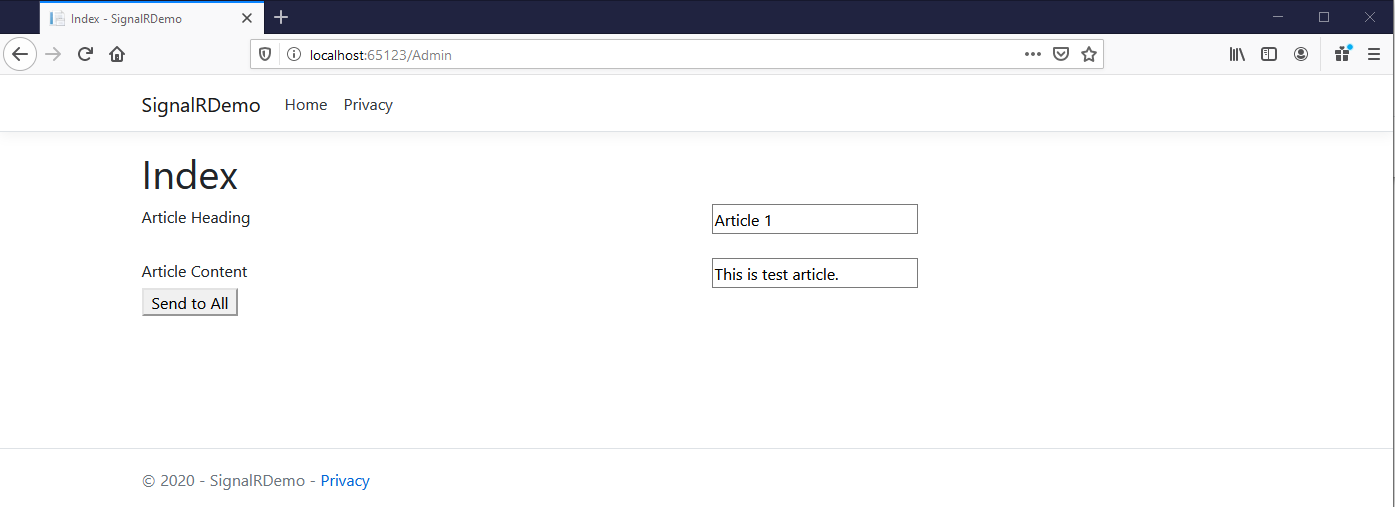
Step 11: Inside Views -> Admin -> Index.cshtml file add below code.
@using SignalRDemo.Models
@model Article
@{
     ViewData[“Title”] = “Index”;
}
<h1>Index</h1>
@using (Html.BeginForm(“Index”, “Admin”, FormMethod.Post, new { id = “Article” }))
{
     <div class=”row”>
       <div class=”col-6″>
         Article Heading
</div>
<div class=”col-6″>
     <input type=”text” id=”articleHeading” name=”articleHeading” />
     @Html.TextBoxFor(model => Model.articleHeading, new { @maxlength = “50” })
</div>
</div>
<div class=”row”>
    <div class=”col-6″>
       Article Content
</div>
<div class=”col-6″>
     @Html.TextBoxFor(model => Model.articleContent, new { @maxlength = “100” })
     </div>
</div>
<div>
     <button type=”submit” id=”Add” value=”Add” />
</div>
}
Step 12: You can add some style to make it look good.
#articleList div {
     text-align: left;
     margin-bottom: 20px;
     border-bottom: 1px solid #ccc;
}
#articleList div h3 {
     margin-bottom:5px;
}
#articleList div p {
     margin-bottom:5px;
}
2) Send real-time notification to specific user
Now, if you want to send notification to any specific user you have to make some tweaks in the code. And use Clients.Client method & pass connectionId of a specific user whom you want to send notification.
Step 1: Create Interface folder and create IUserConnectionManager.cs interface & add below code.
using System.Collections.Generic;
namespace NotificationMvcDemo.Interface
{
     public interface IUserConnectionManager
   {
     void KeepUserConnection(string userId, string connectionId);
     void RemoveUserConnection(string connectionId);
     List<string> GetUserConnections(string userId);
   }
}
Step 2: Create NotificationUserHub.cs class under wwwroot -> Hubs folder and add below code.
using Microsoft.AspNetCore.SignalR;
using System;
using SignalRDemo.Interface;
using System.Threading.Tasks; namespace SignalRDemo.Hubs
{
     public class NotificationUserHub : Hub
{
     private readonly IUserConnectionManager _userConnectionManager;
     public NotificationUserHub(IUserConnectionManager userConnectionManager)
    {
     _userConnectionManager = userConnectionManager;
    }
    public string GetConnectionId()
    {
       var httpContext = this.Context.GetHttpContext();
       var userId = httpContext.Request.Query[“userId”];
       _userConnectionManager.KeepUserConnection(userId,                Context.ConnectionId);          return Context.ConnectionId;
      }
      //Called when a connection with the hub is terminated.
      public async override Task OnDisconnectedAsync(Exception exception)
      {
        //get the connectionId
        var connectionId = Context.ConnectionId;
        _userConnectionManager.RemoveUserConnection(connectionId);
        var value = await Task.FromResult(0);
       }
   }
}
Step 3: Create UserConnectionManager.cs class under Interface folder and add below code.
using System.Collections.Generic;
namespace SignalRDemo.Interface
{
    public class UserConnectionManager : IUserConnectionManager
{
     private static Dictionary<string, List<string>> userConnectionMap = new Dictionary<string, List<string>>();
      private static string userConnectionMapLocker = string.Empty;
    public void KeepUserConnection(string userId, string connectionId)
    {
       lock (userConnectionMapLocker)
       {
           if (!userConnectionMap.ContainsKey(userId))
           {
                userConnectionMap[userId] = new List<string>();
            }
                userConnectionMap[userId].Add(connectionId);
            }
}
public void RemoveUserConnection(string connectionId)
{
        //This method will remove the connectionId of user
        lock (userConnectionMapLocker)
    {
       foreach (var userId in userConnectionMap.Keys)
       {
       if (userConnectionMap.ContainsKey(userId))
           {
          if (userConnectionMap[userId].Contains(connectionId))
            {
          userConnectionMap[userId].Remove(connectionId);
          Break;
             }
         }
     }
   }
}
public List<string> GetUserConnections(string userId)
{
      var conn = new List<string>();
      lock (userConnectionMapLocker)
     {
        conn = userConnectionMap[userId];
     }
return conn;
      }
   }
}
Step 4: Go to Startup.cs file and add below line of code insider ConfigureServices method.
services.AddSingleton<IUserConnectionManager, UserConnectionManager>();

And go to Configure method and replace app.UseEndpoints method with below line of code

app.UseEndpoints(endpoints =>
{
         endpoints.MapControllerRoute(
                  name: “default”,
                  pattern: “{controller=Home}/{action=Index}/{id?}”);

         endpoints.MapHub(“/NotificationHub”);
         endpoints.MapHub(“/NotificationUserHub”);
});
Step 5: Go to AdminController.cs file and add below line of code with other declaration at the top.
private readonly IHubContext<NotificationUserHub> _notificationUserHubContext;
private readonly IUserConnectionManager _userConnectionManager;
Step 6: In the AdminController.cs file replace the constructor method code with the code below.
public AdminController(IHubContext<NotificationHub> notificationHubContext, IHubContext<NotificationUserHub> notificationUserHubContext, IUserConnectionManager userConnectionManager)
{
       _notificationHubContext = notificationHubContext;
       _notificationUserHubContext = notificationUserHubContext;
       _userConnectionManager = userConnectionManager;
  }
Step 7: We will be using the same Article class model. Open Article.cs file and add below line of code.
public string userId { get; set; }
Step 8: Go to AdminContrller.cs file and add the new method which will send notification to a specific user.
[HttpPost]
public async Task<ActionResult> SendToSpecificUser(Article model)
{
    var connections = _userConnectionManager.GetUserConnections(model.userId);
    if (connections != null && connections.Count > 0)
{
     foreach (var connectionId in connections)
     {
          await _notificationUserHubContext.Clients.Client(connectionId).SendAsync(“sendToUser”, model.articleHeading, model.articleContent);
      }
}
      return View();
}
Step 9: Create a new view named SendToSpecificUser.cshtml under Views -> Admin folder.
@using SignalRDemo.Models
@model Article
@{
        ViewData[“Title”] = “SendToSpecificUser”;
}
<h1>Index</h1>
@using (Html.BeginForm(“SendToSpecificUser”,”Admin”,FormMethod.Post))
{
    <div class=”row”>
       <div class=”col-6″>
          User Id
</div>
<div class=”col-6″>
         @Html.TextBoxFor(model => Model.userId, new { @maxlength = “50”})
       </div>
</div>
<br />
<div class=”row”>
<div class=”col-6″>
       Article Heading
</div>
<div class=”col-6″>
 @Html.TextBoxFor(model=>Model.articleHeading,new{@maxlength=”50″})
     </div>
</div>
<br />
<div class=”row”>
<div class=”col-6″>
      Article Content
</div>
<div class=”col-6″>
@Html.TextBoxFor(model=>Model.articleContent,new{@maxlength=”100″})
      </div>
</div>
<div>
    <button type=”submit”>Send to Specific User</button>
</div>
}
Step 10: Now, in order for admin to add the UserId we have to print generated user id so that we can know which value to enter. Open Index.cshtml file of Views -> Home folder. Add <p> tag in which we will print generate user id.
<p id=”user”></p>
In the same file add the below line of code at the bottom of the <script> tag. document.getElementById(“user”).innerHTML = “UserId: ” + userId
Step 11: Create new usernotification.js file under wwwroot -> js folder and add below code.
“use strict”;
var connection = new signalR.HubConnectionBuilder().withUrl(“/NotificationUserHub?userId=” + userId).build();
connection.on(“sendToUser”, (articleHeading, articleContent) => {
    var heading = document.createElement(“h3”);
    heading.textContent = articleHeading;
    var p = document.createElement(“p”);
    p.innerText = articleContent;
    var div = document.createElement(“div”);
    div.appendChild(heading);
    div.appendChild(p);    document.getElementById(“articleList”).appendChild(div);
});
connection.start().catch(function (err) {
    return console.error(err.toString());
}).then(function () {
    document.getElementById(“user”).innerHTML = “UserId: ” + userId;
    connection.invoke(‘GetConnectionId’).then(function (connectionId) {
document.getElementById(‘signalRConnectionId’).innerHTML=connectionId;
   })
});
Step 12: Create User.cshtml file under Views -> Home and add below line of code.
@{
       ViewData[“Title”] = “User”;
}
    <div class=”text-center”>
       <h1 class=”display-4″>Welcome</h1>
       <p id=”user”></p>
       <div id=”articleList”></div>
</div>
<input type=”hidden” id=”signalRConnectionId” />
<script>
       function ready() {
}
       //random number between 1 and 100 for demo
       var userId = Math.floor((Math.random() * 100) + 1); document.addEventListener(“DOMContentLoaded”, ready);
       document.getElementById(“user”).innerHTML = “UserId: ” + userId;
</script>
<script src=”/lib/signalr/signalr.js”></script>
<script src=”/js/usernotification.js”></script>
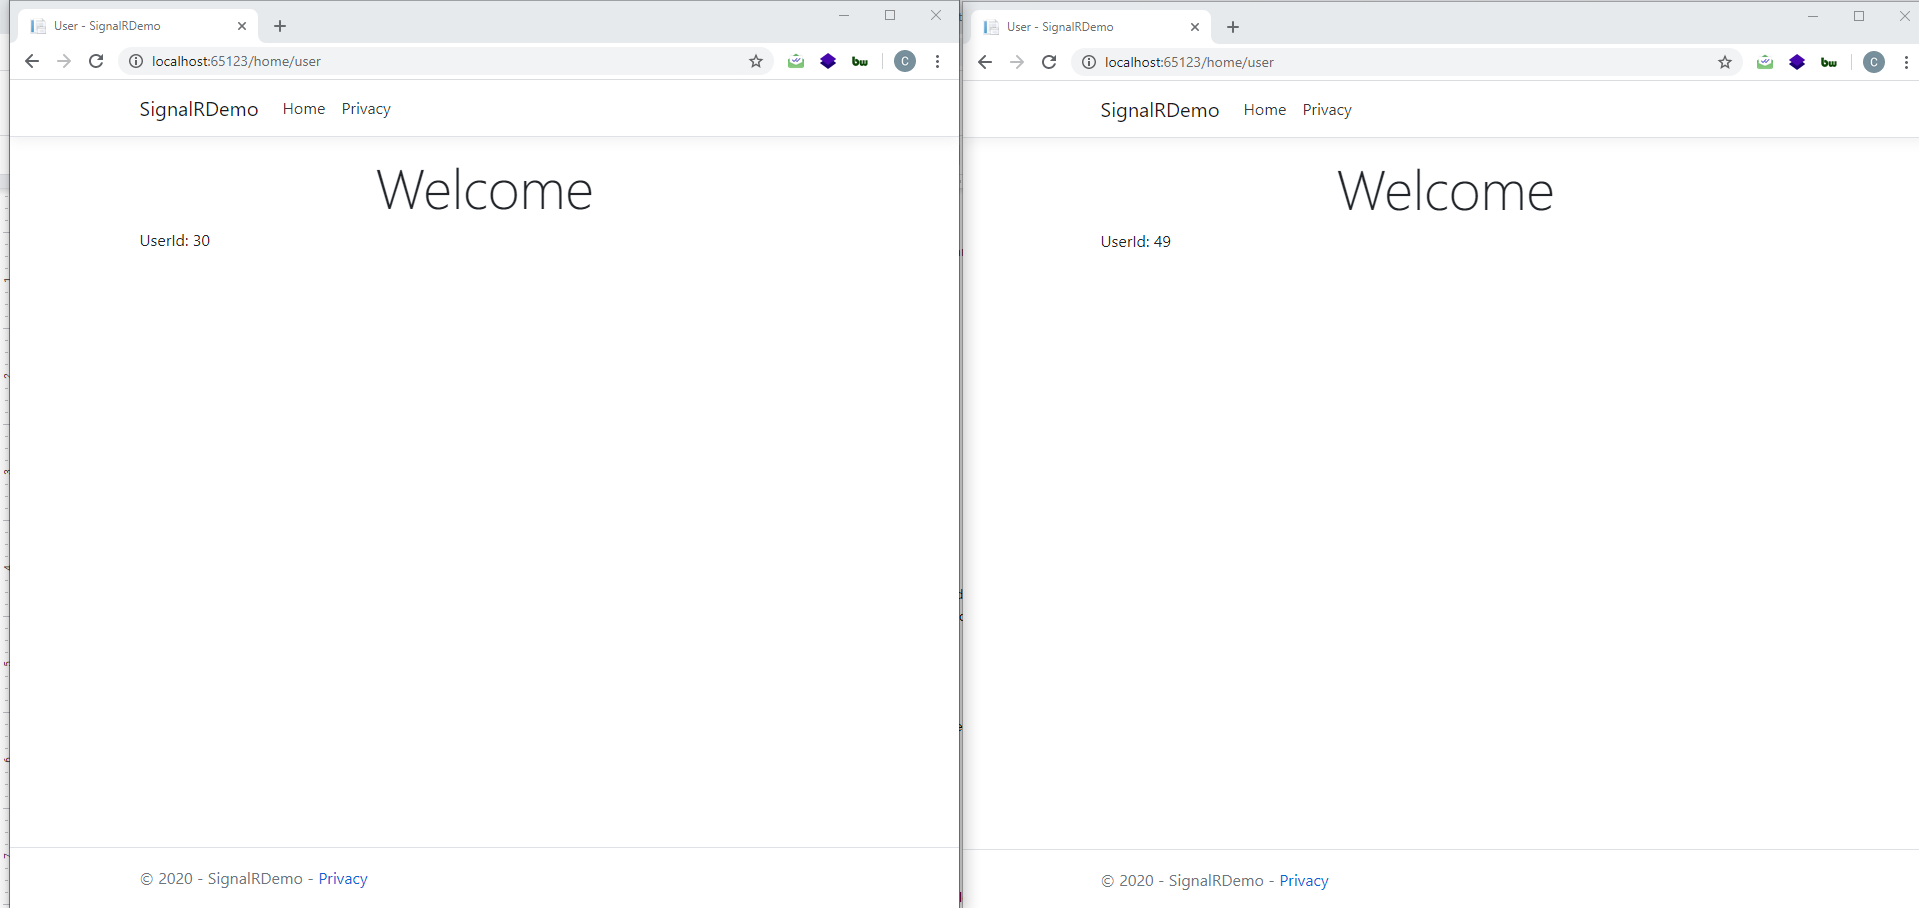
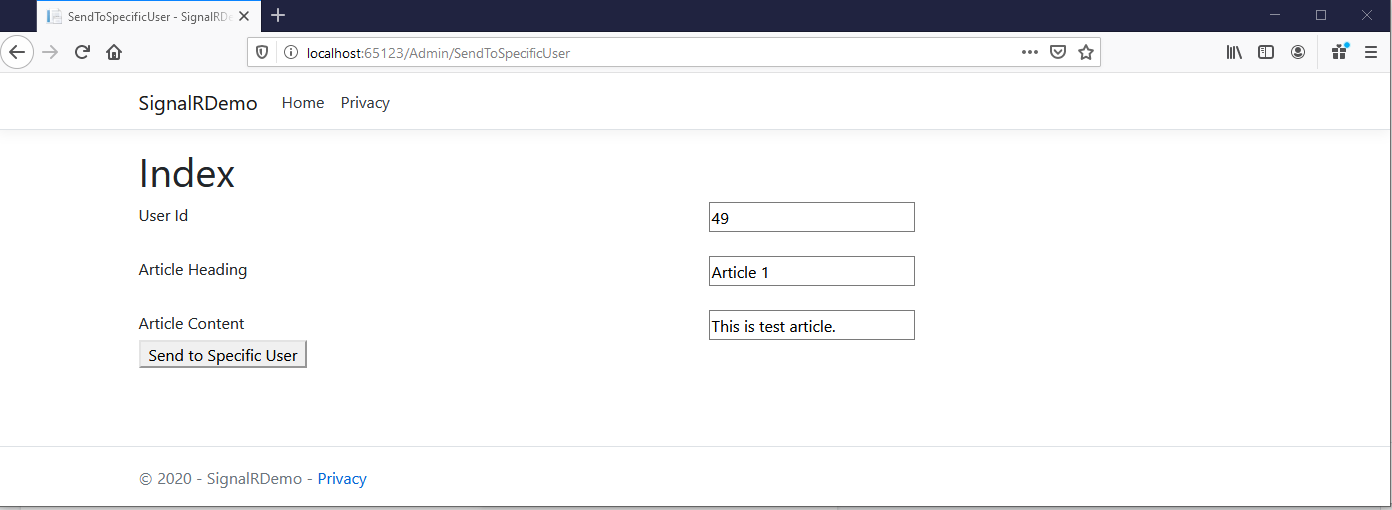
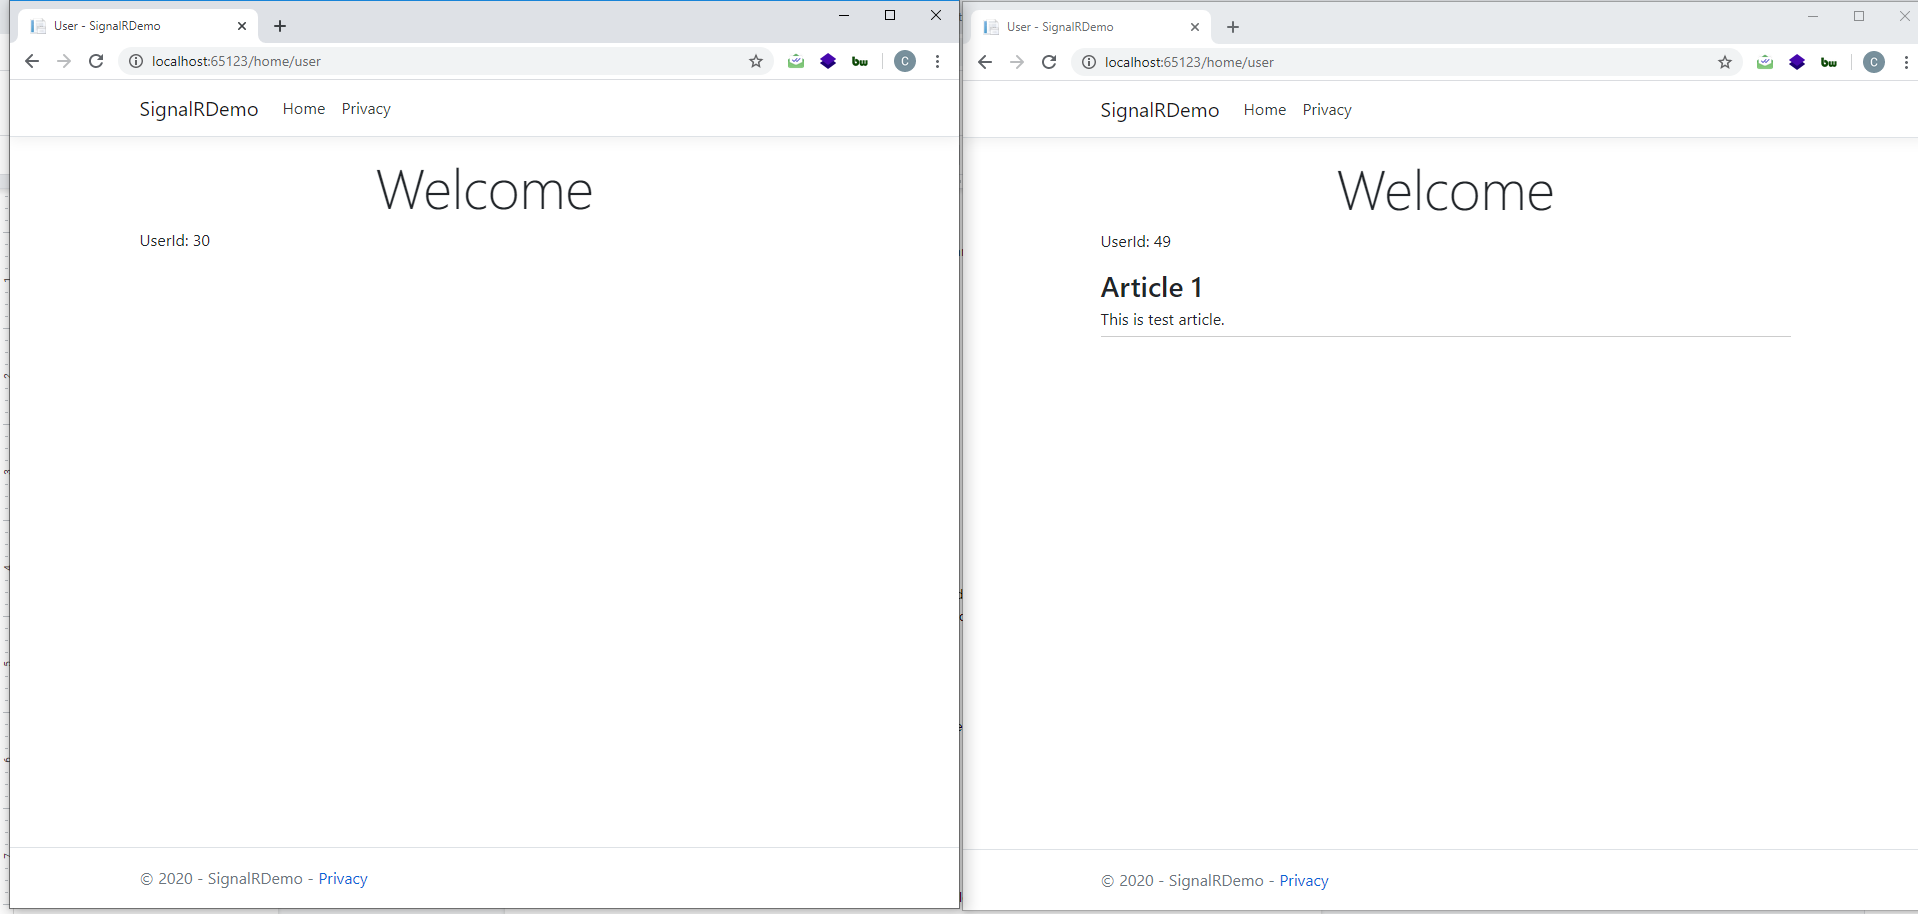
Step 13: Build & run, open /home/user in multiple different browsers. And in a separate browser open /Admin/SendToSpecificUser. Now you can input the userId and send notification to the user. As you can see in the below screenshots only the user with given id will receive the notification.
Conclusion
Increasing online presence has led to a sharp boom in web development requirements. It began with basic developmental processes, and now it has come to specialize in each of them. SignalR is a recent advancement in the DotNet genre and has taken the market by surprise. Its ability to perform tasks on a real-time basis acts as a complete game-changer. If you are a DotNet developer looking to understand SignalR in complete dept, this blog is just for you.


Javier is Content Specialist and also .NET developer. He writes helpful guides and articles, assist with other marketing and .NET community work

