
In this article, we will show tutorial about how to upload and resize image with ASP.NET Core. Resizing image is one of ASP.NET Core features.
OK, let’s get started! To implement some backend, we’ll start by creating a simple client:
<form enctype="multipart/form-data" method="post" action="/home/upload">
    <input type="file" name="file" />
    <input type="submit" />
</form>
And this is the result:

To implement the /home/upload as an action accepting a file, you can use the IFormFile interface available in the Microsoft.AspNetCore.Http namespace:
[HttpPost]
public IActionResult Upload(IFormFile file)
{
    // ...
    return Ok();
}
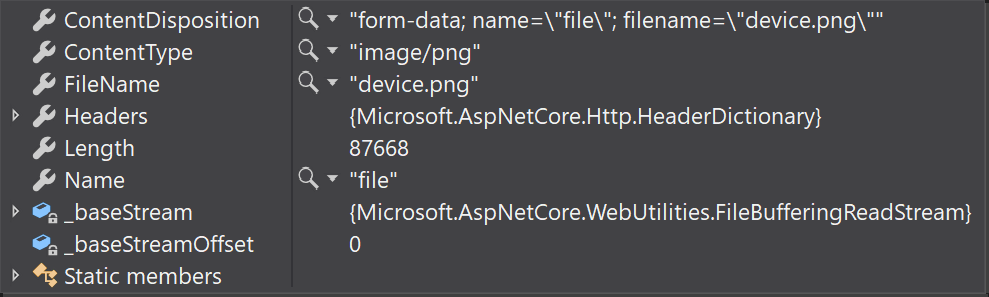
If you put a breakpoint inside the Upload method, you will see metadata about the chosen file:
Now for the resizing part. Since we no longer have access to the WebImage class, we’ll install an excellent replacement named ImageSharp:
Install-Package SixLabors.ImageSharp -IncludePrerelease
ImageSharp is currently in beta but already working out great. ImageSharp has an Image class that works like WebImage in a lot of ways. It accepts the posted file as a stream:
using var image = Image.Load(file.OpenReadStream());
Once you get an instance of the image, you can start manipulating it using the Mutate method. For this post we want to resize the image to a fixed size:
image.Mutate(x => x.Resize(256, 256));
Finally, we can save the image to a stream or as a file:
image.Save("filename");
Again, lots of possibilities using the Image class, so check out the documentation.
Here’s the entire Upload method:
[HttpPost]
public IActionResult Upload(IFormFile file)
{
    using var image = Image.Load(file.OpenReadStream());
    image.Mutate(x => x.Resize(256, 256));
    image.Save("...");
    return Ok();
}
Simple, right?

Javier is Content Specialist and also .NET developer. He writes helpful guides and articles, assist with other marketing and .NET community work