In previous post, we have written tutorial about upgrade to .net 5, now Microsoft has released newest .NET Core 6 here that you can try. In this tutorial, we will advise steps by steps to upgrade ASP.NET Core 5 to .NET 6.
Upgrading an ASP.NET Core 5 application to .NET 6, all what needs to be done is to change the project file for .NET 6, and update the NuGet packages to the new versions, and you’re done and can build and run the application. However, to take advantage of new features, and reduce the number of source code lines, some things can be changed – as shown in this article.
The sample application
The original sample application is a simple Web API implemented with ASP.NET Core 5.0, using EF Core to access a database, and manipulate Book objects.
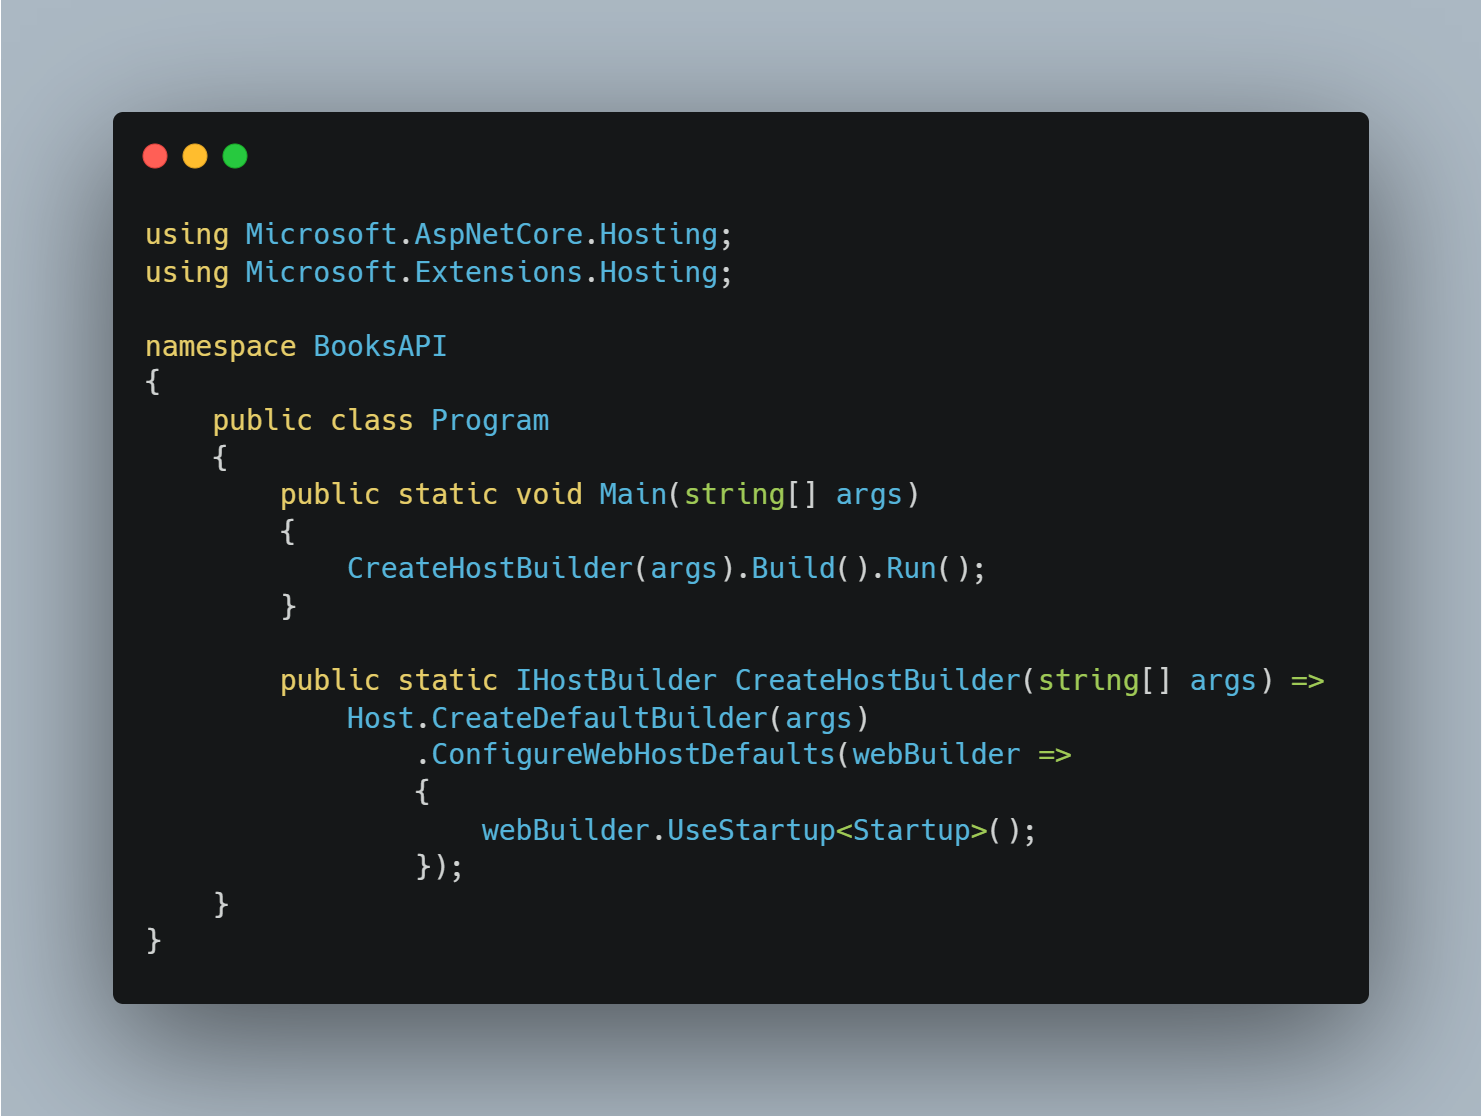
The Program class with the Main method uses the Host class to invoke the CreateDefaultBuilder method for the default configuration of the DI container, logging, and configuration – and with ASP.NET Core, the Startup class.
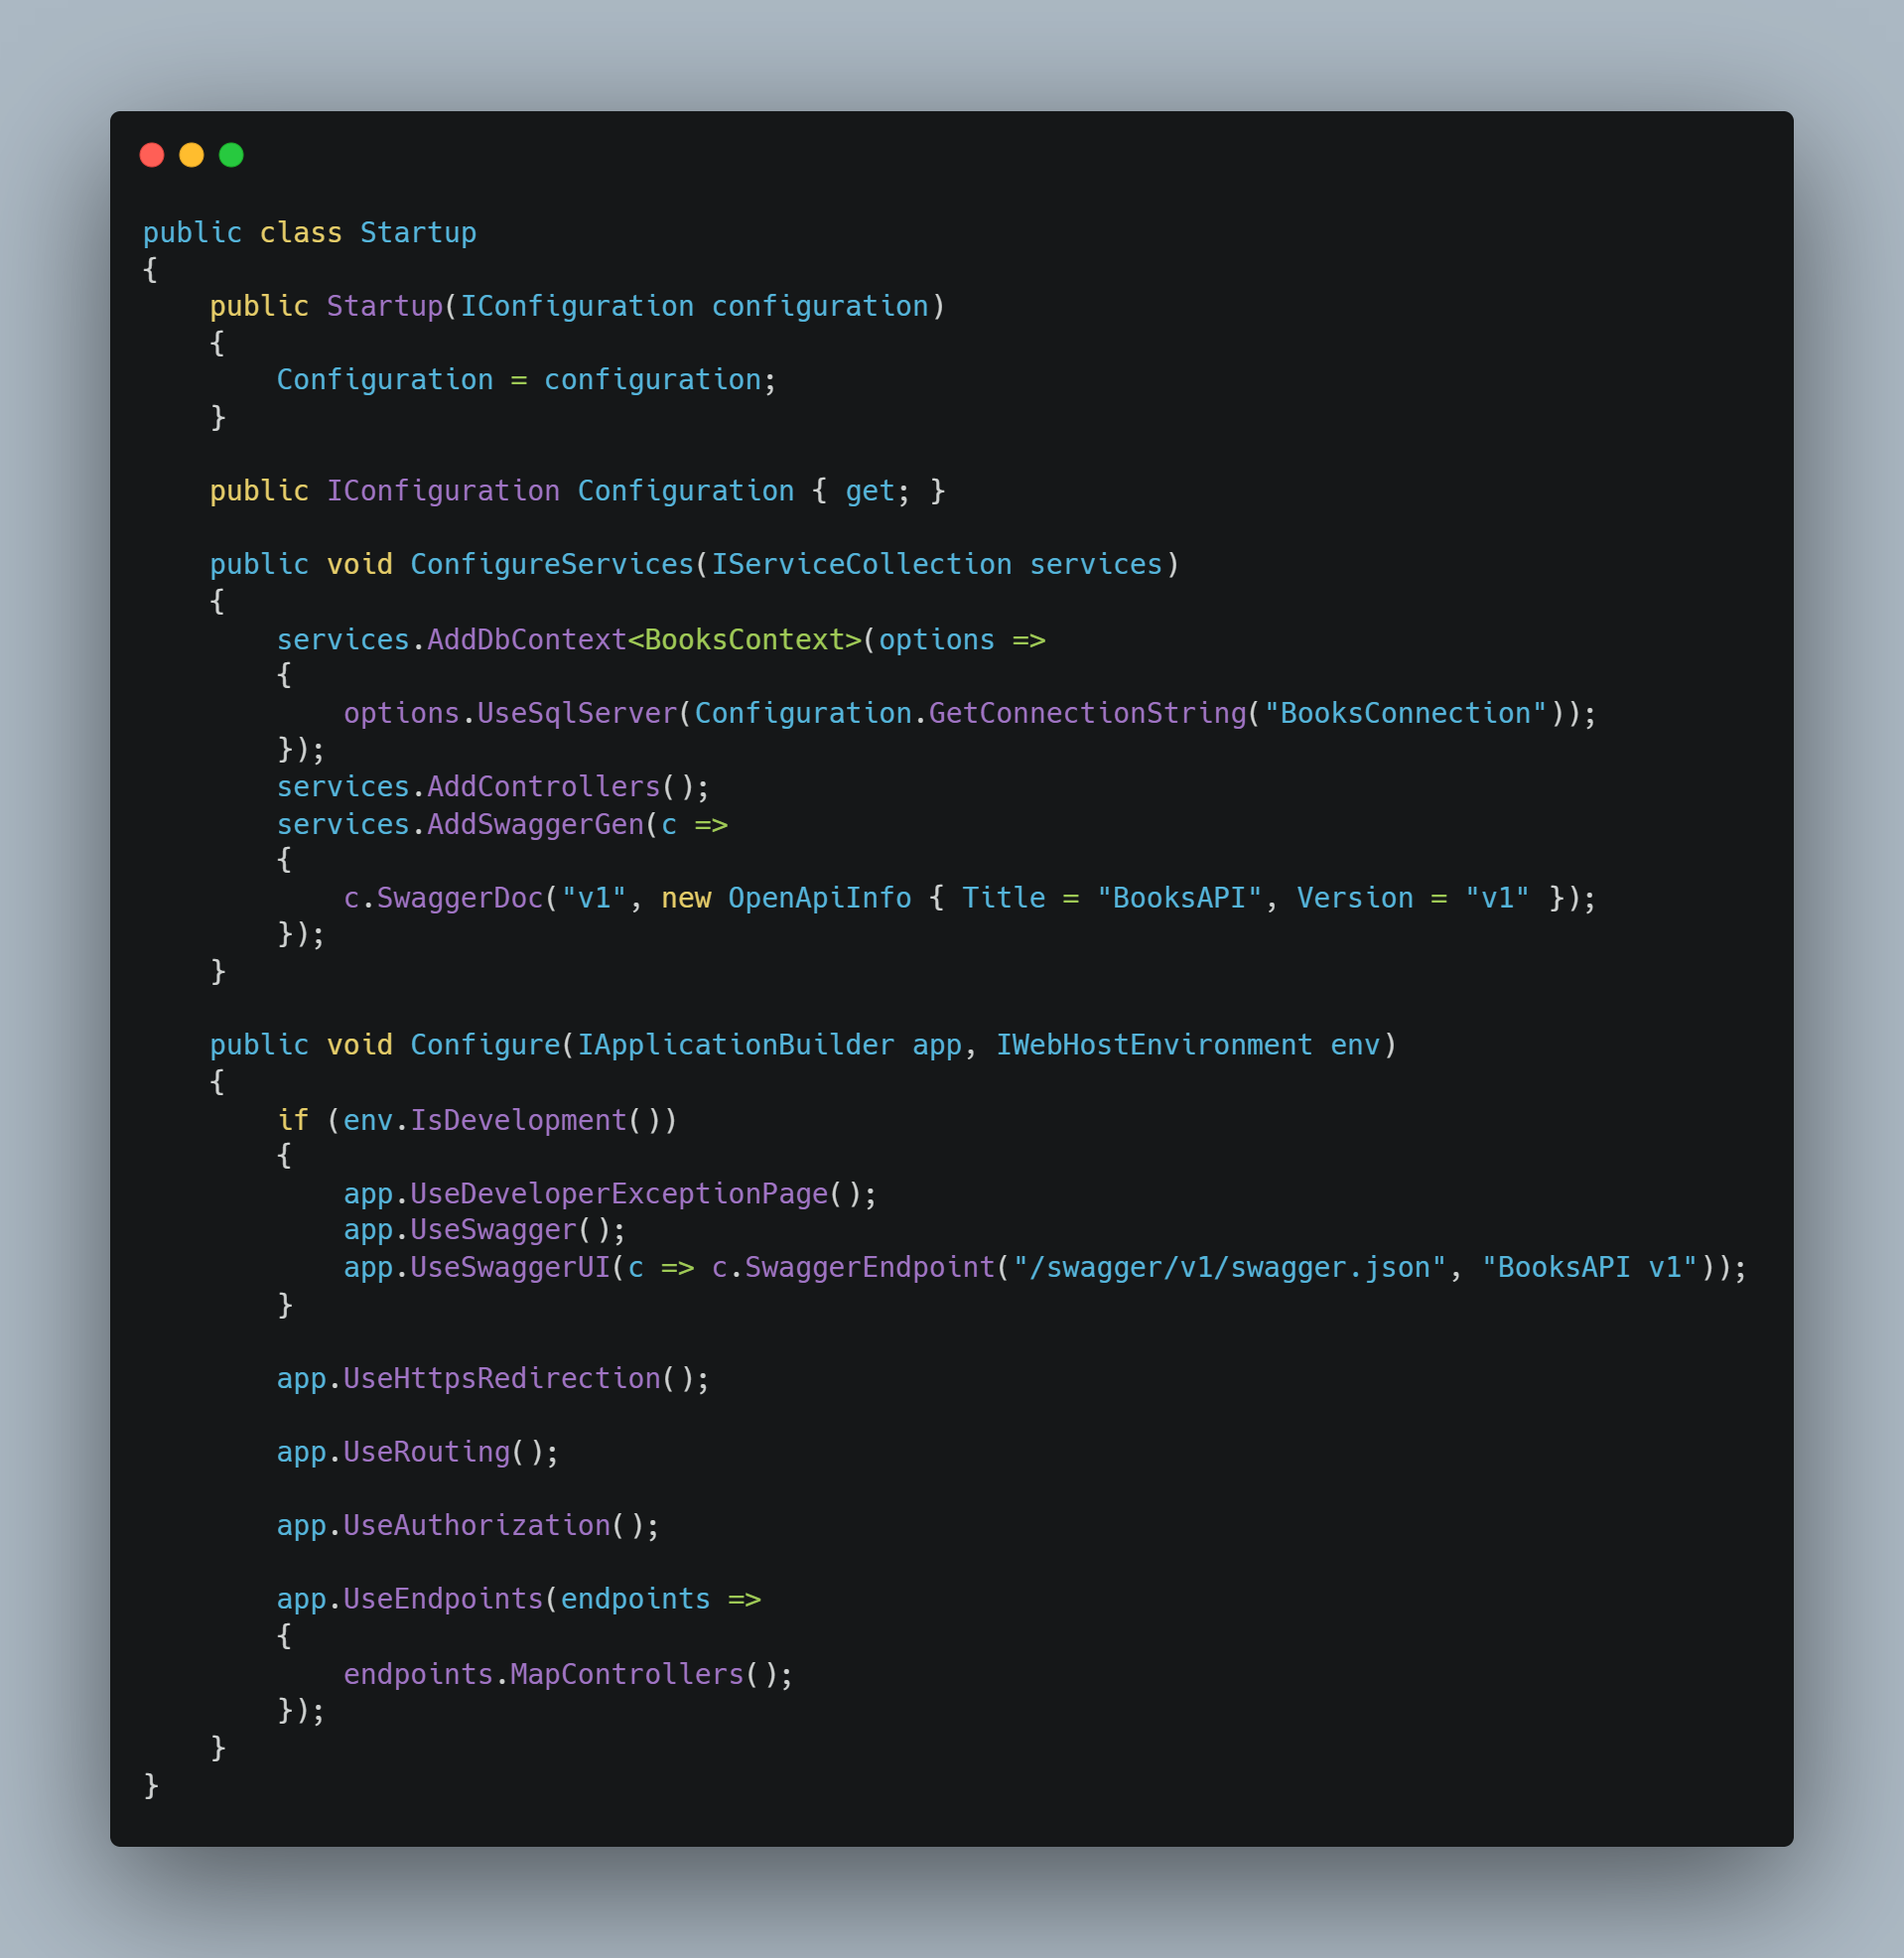
The following code snippet shows a part of the Startup class (without the using directives and the namespace definition for clarity) where the application services are registered with the DI container, and the middleware is configured.
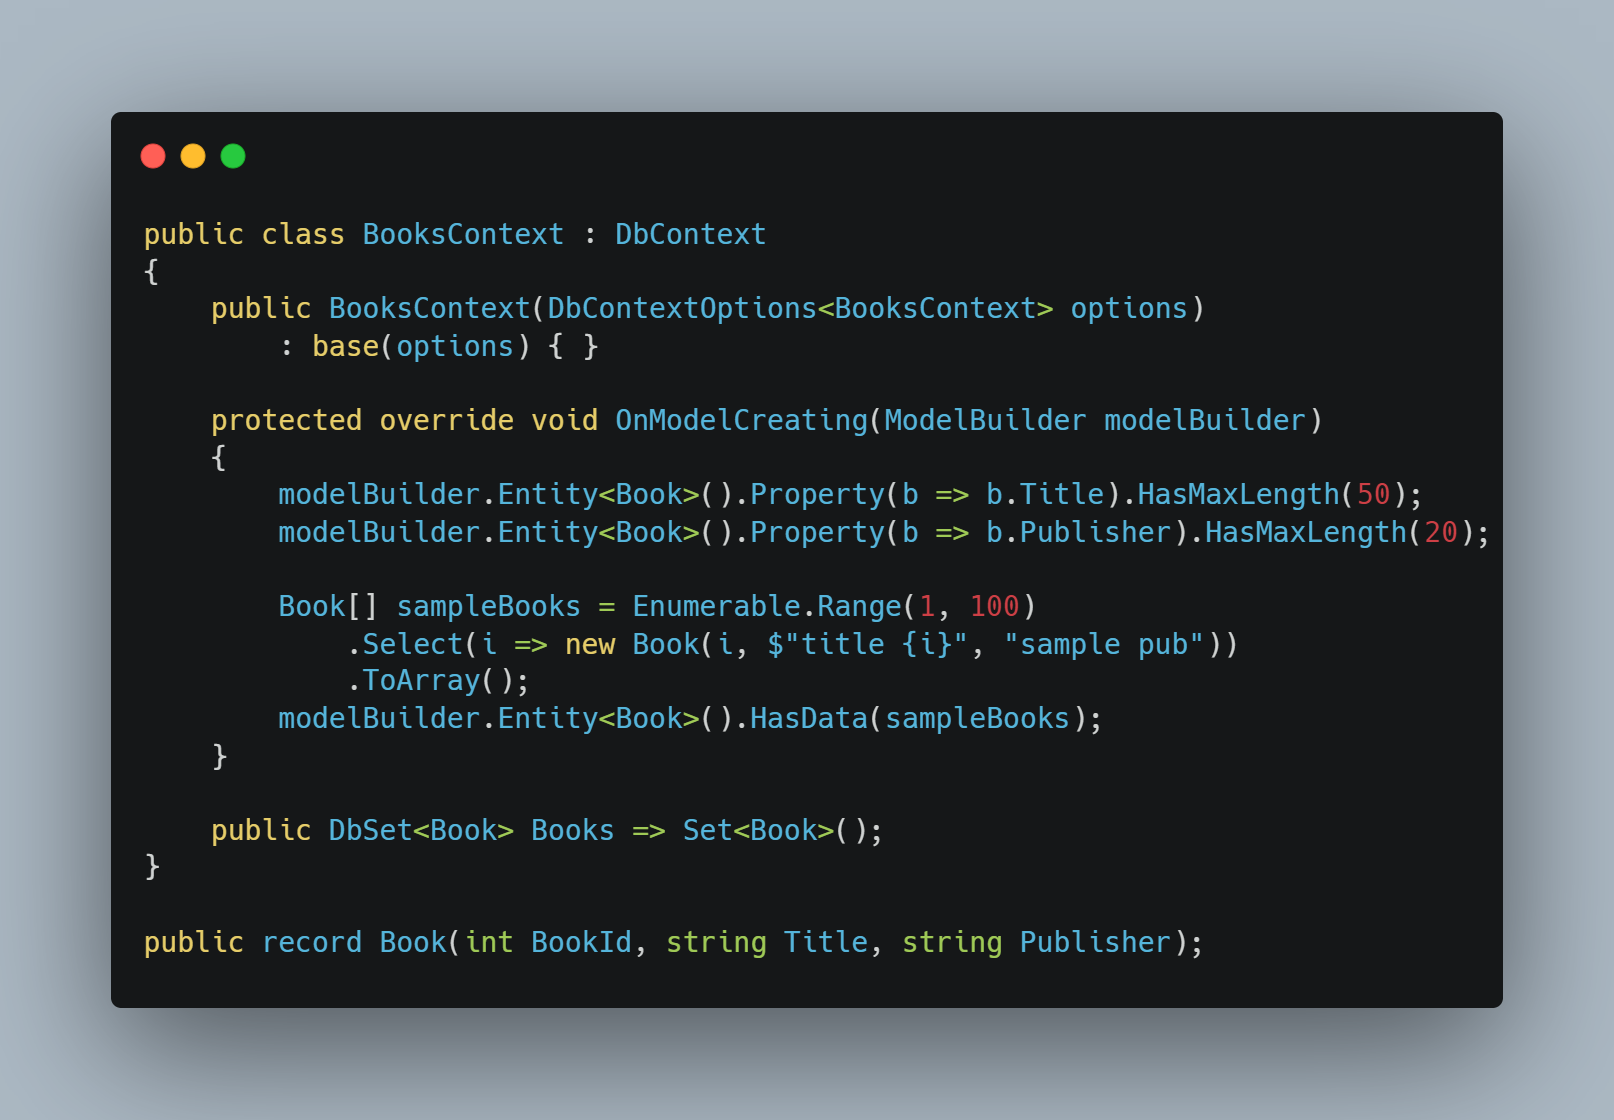
The BooksContext class defines the mapping for the Book record to the database using EF Core.
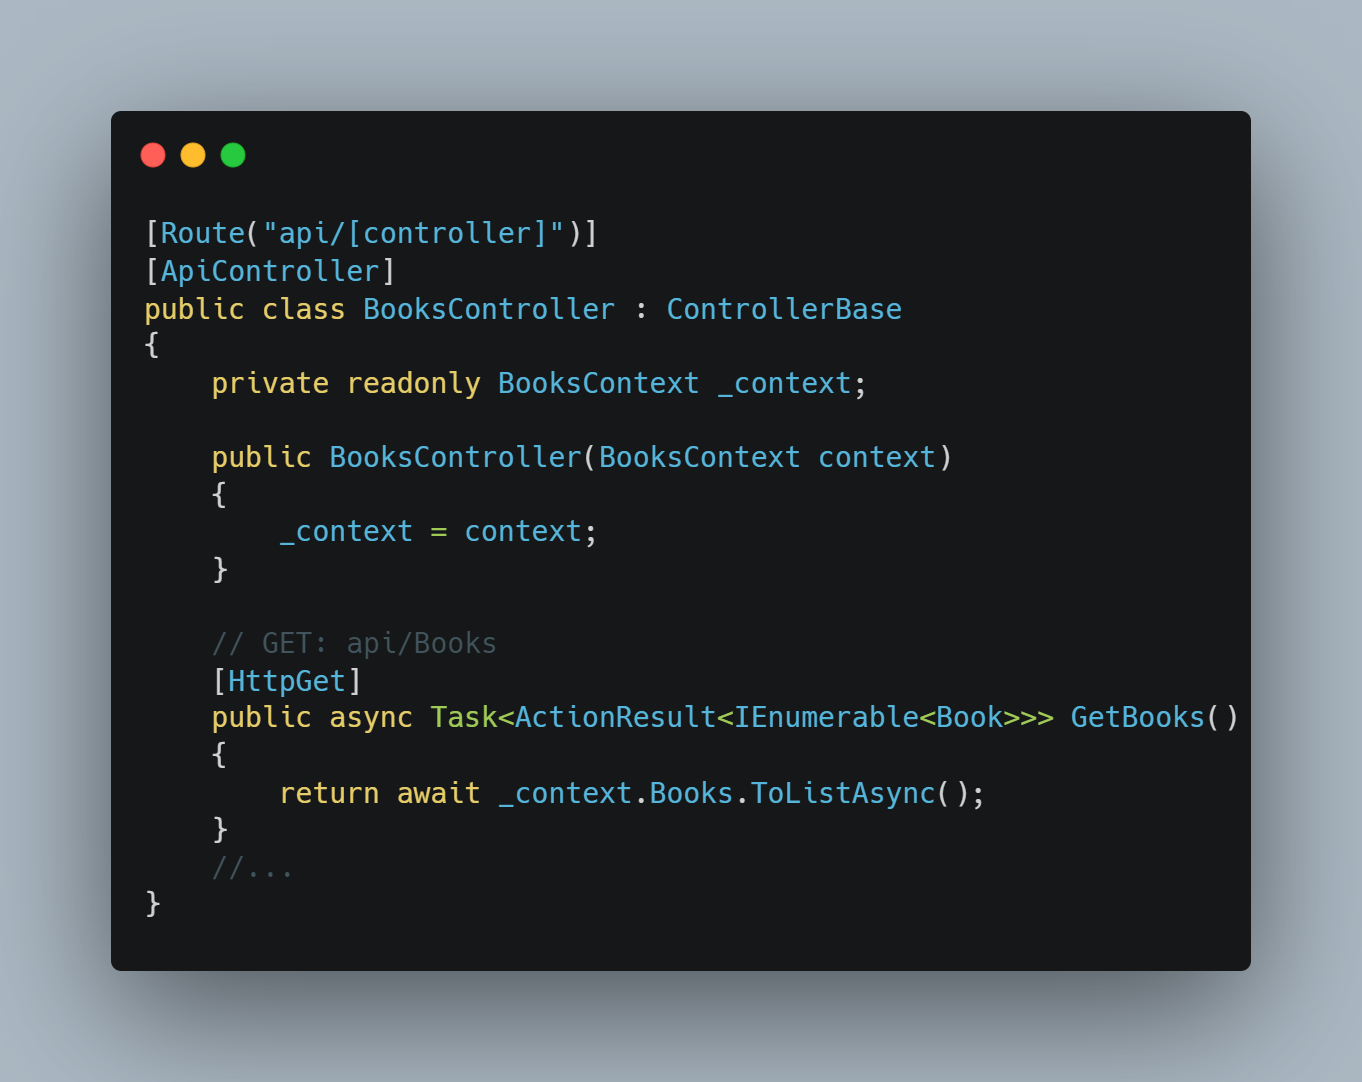
With the BooksController class, the BooksContext is injected to access it with the public methods that have attributes such as HttpGet and HttpPost annotated to use these methods calling the different HTTP verbs. The following code snippet shows a small part of the BooksController implementation.
With the project configuration file BooksAPI.csproj, the application has the <TargetFramework> set to dotnet5, and NuGet packages Microsoft.EntityFramework.SqlServer, Microsoft.EntityFrameworkCore.Tools, Microsoft.EntityFrameworkCore.Design, and Swashbuckle.AspNetCore packages compatible with .NET 5 configured – and it has nullable enabled.
Nullable reference types are available since C# 8, just with new .NET Core 6 projects it’s a default confinguration. It helps reducing nullable issues also with older project types.
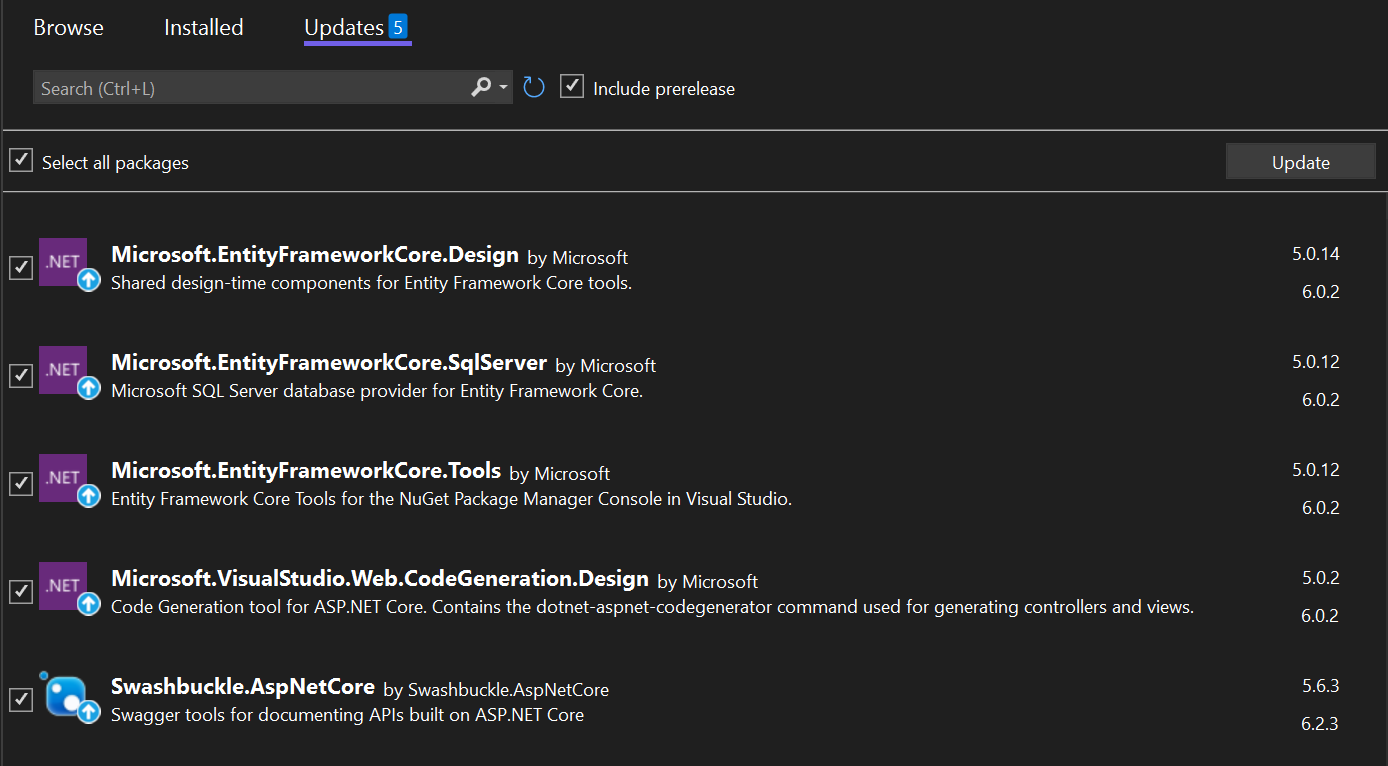
All what needs to be done to run the existing .NET 5 application with .NET 6 is to change the <TargetFramework> to dotnet6, and update the NuGet packages (as shown in the following figure). The application can be rebuild and runs without any other changes needed.
File-Scoped Namespaces
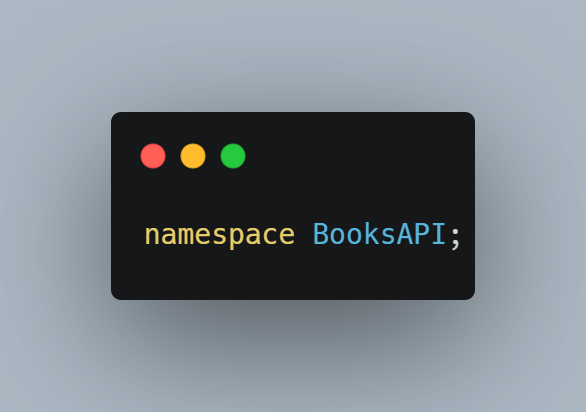
To get advantages of C# 10 and .NET 6, let’s start changing the code-base to use new features. The first change done in the application is to chagne the namespace declarations to file-scoped namespaces. This reduces the horizontal characters needed which helps for better readability – and removes a few code lines.
Using the newest version of Visual Studio 2022 you just need to add a ; add the end of the namespace declaration (e.g. namespace BooksAPI;), and the refactoring happens automatically. This change is done with the files Program.cs, Startup.cs, BooksContext.cs, and BooksController.cs.
Global Usings
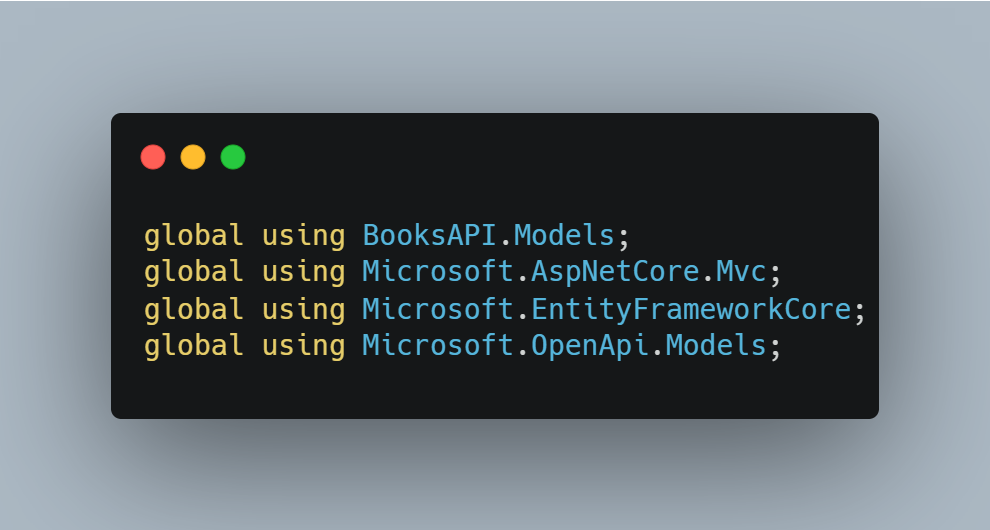
Some using declarations that are needed across different files can be removed with C# 10. With this small application, an extreme is done by specifying the namespaces needed in the complete application within the Program.cs file as shown in the following code snippet.
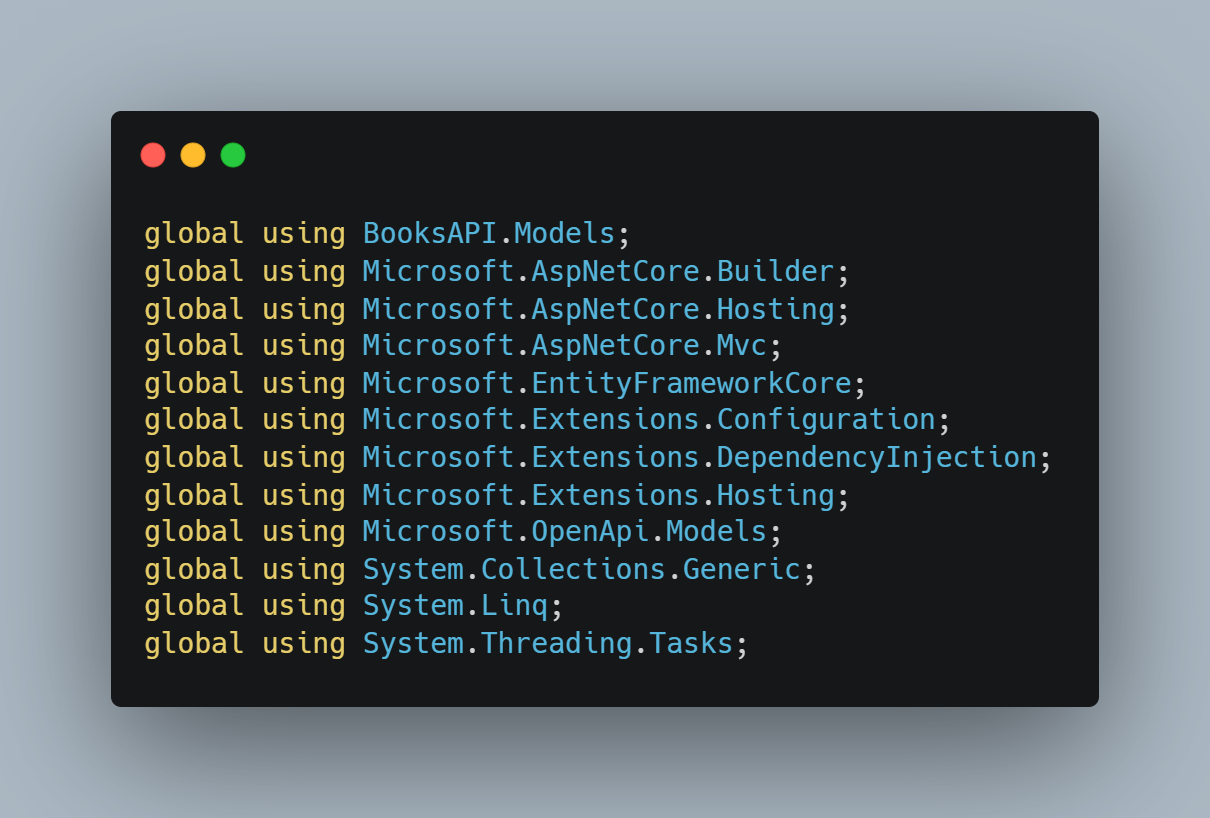
You can use a different approach and just use
global usingfor commonly used namespaces in the application, and use the traditionalusingwith the source code files where other namespaces are required. You can also specify a different source code file (e.g. GlobalUsings.cs) where to specify theglobal usingstatements.
Implicit Usings
The next step is to remove some of the required namespaces completely from the source code. This can be done by enabling implicit usings in the project configuration file as shown in the next figure.
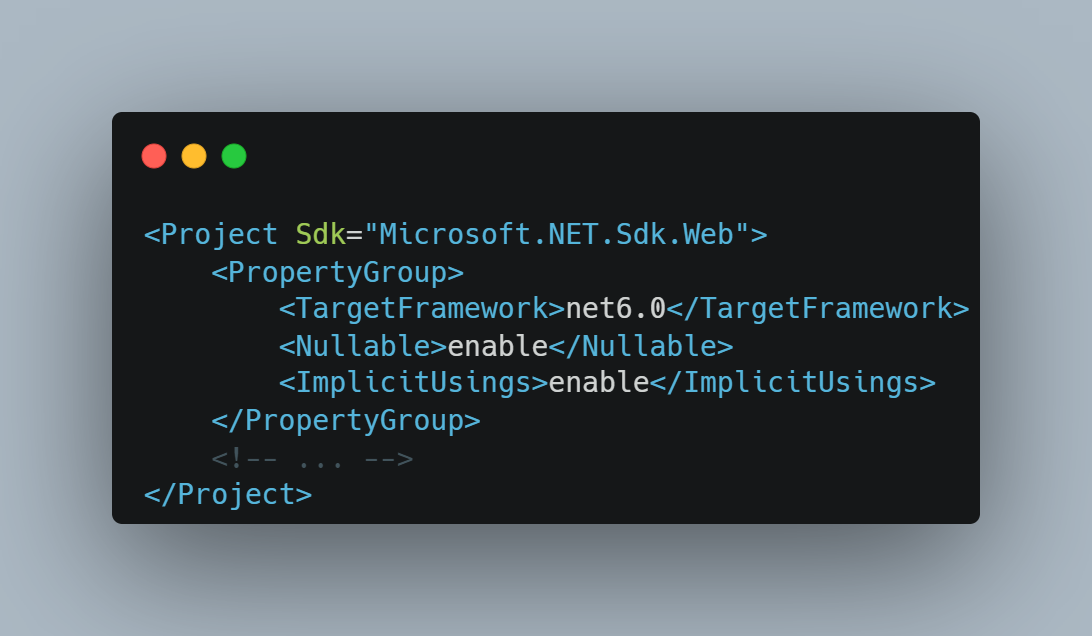
Depending on the SDK used, different namespaces are than added as global using by default. Using the Web SDK, just a few namespaces are left that need to be included as shown in the following code snippet.
Web Application Builder
So far you’ve seen some small C# features which increase the productivity by reducing the number of code lines needed. Now let’s step over to enhancements with ASP.NET Core. To get more advantages of C# top-level statements, the WebApplication together with WebApplicationBuilder can be used to configure DI, logging, configuration, and middleware. This removes the need for the Startup class.
Check the following code snippet with code changes to get rid of the Startup class. First, Services property of the WebApplicationBuilder is used to configure the DI container. With the previous implementation, the ConfigureServices method was used. With the Startup class, AddDbContext was used to add the EF Core context to the DI container. For top-level statements, the EF Core team created a new method for SQL Server – AddSqlServer – which just needs a connection string instead of specifying options with a lambda expression. Configuration for the connection string is read using the Configuration property of the WebApplicationBuilder.
Invoking the Build method of the WebApplicationBuilder returns the WebApplication class. Before invokding the Run method, with UseXXX methods, middleware is configured. This is the previous implementation of the Configure method with the Startup class.
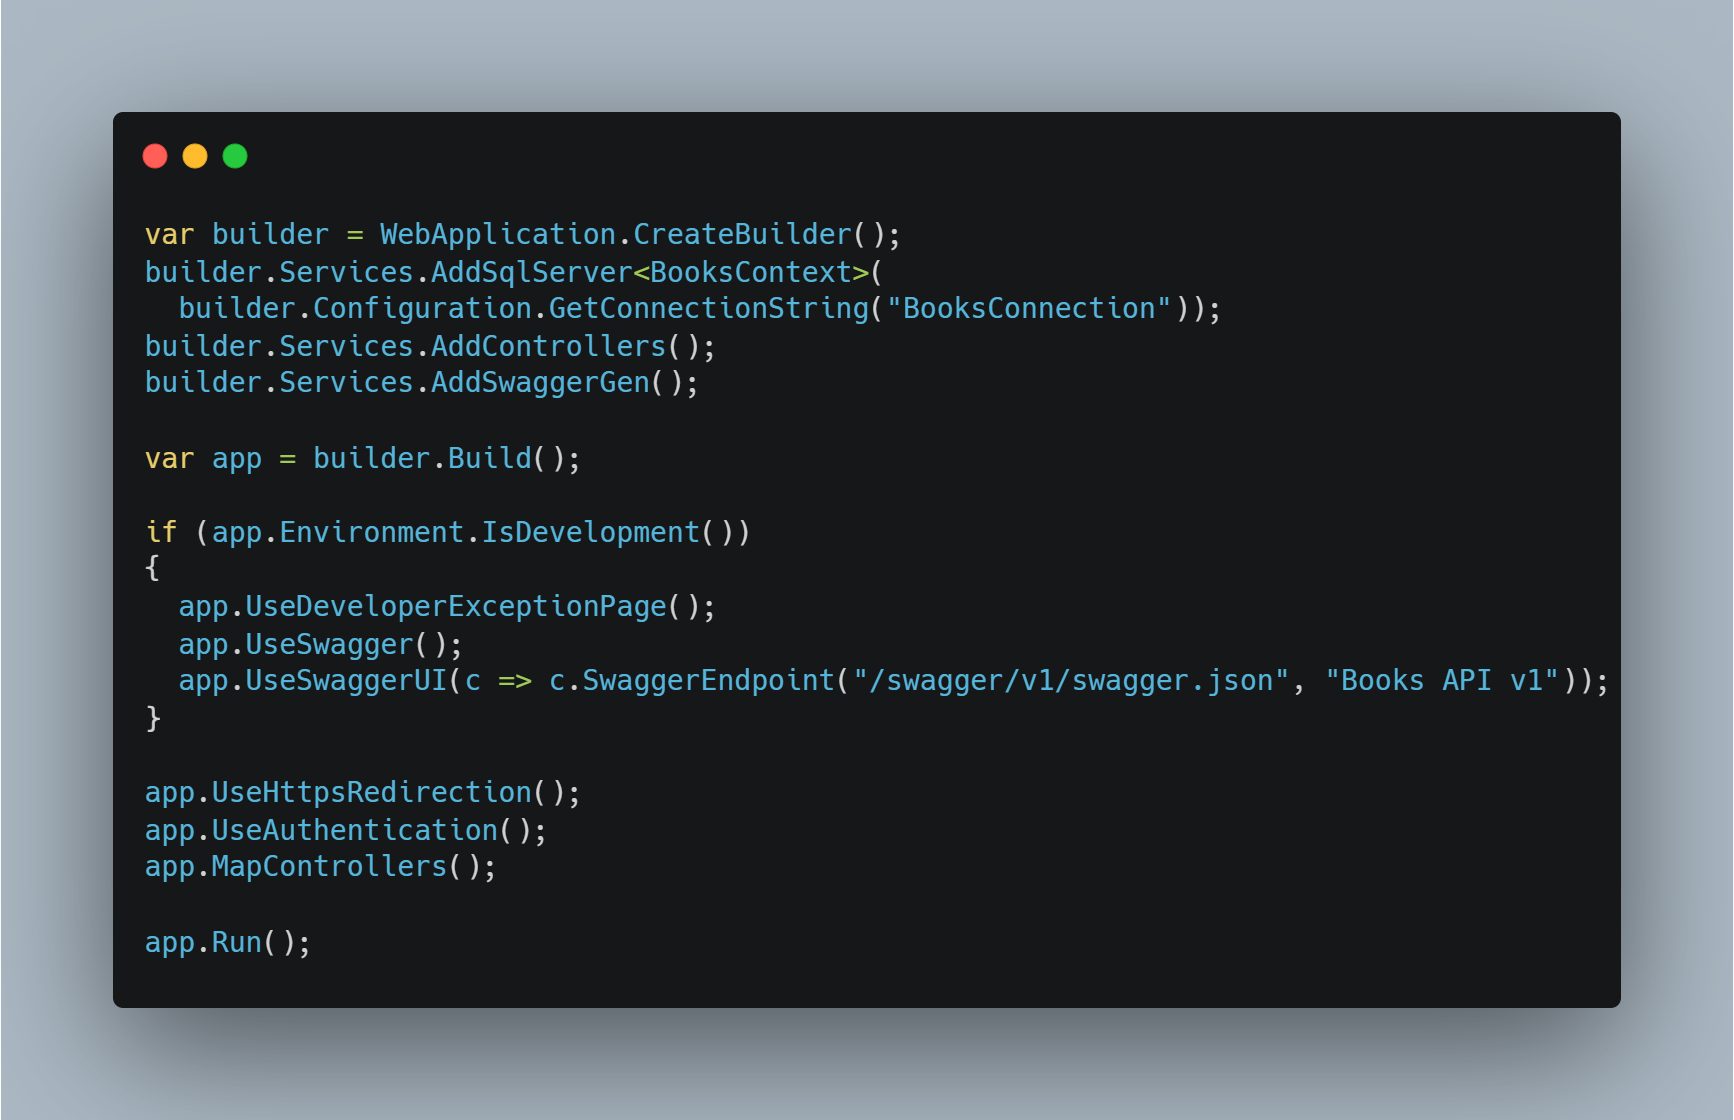
Getting rid of the Startup class, removing some boiler-plate code, the application runs like before.
Depending on the size of your service, you might stop at this stage updating the source code for ASP.NET Core 6 – keeping the controller class like it was before (with the minor changes for implicit usings, global usings, and file-scoped namespaces). In case your service is small (Microservice?), you continue with the next step and use the Minimal API to get rid of the controller class as well.
Creating a Minimal API and Extensions with Lambdas
With the Minimal API, you can map the routes for the implementation of the API directly using the WebApplication class – the BooksController is no longer needed. Thus, the AddControllers method can be removed because the DI services for the controllers are no longer needed, and the middleware for the controllers, UseControllers can be removed as well. To still have OpenAPI configuration, the services needed by swagger need to be configured with the DI container. This is done invoking the method AddEndpointsApiExplorer.
The routes can now be mapped with the MapGet, MapPost, MapPut, and MapDelete methods. With ASP.NET Core 6, a new overload of these methods is available. The code snippet below shows the MapPost method – mapping a HTTP POST method with the route /api/books to this method. Creating a few of these methods spares creating a controller.
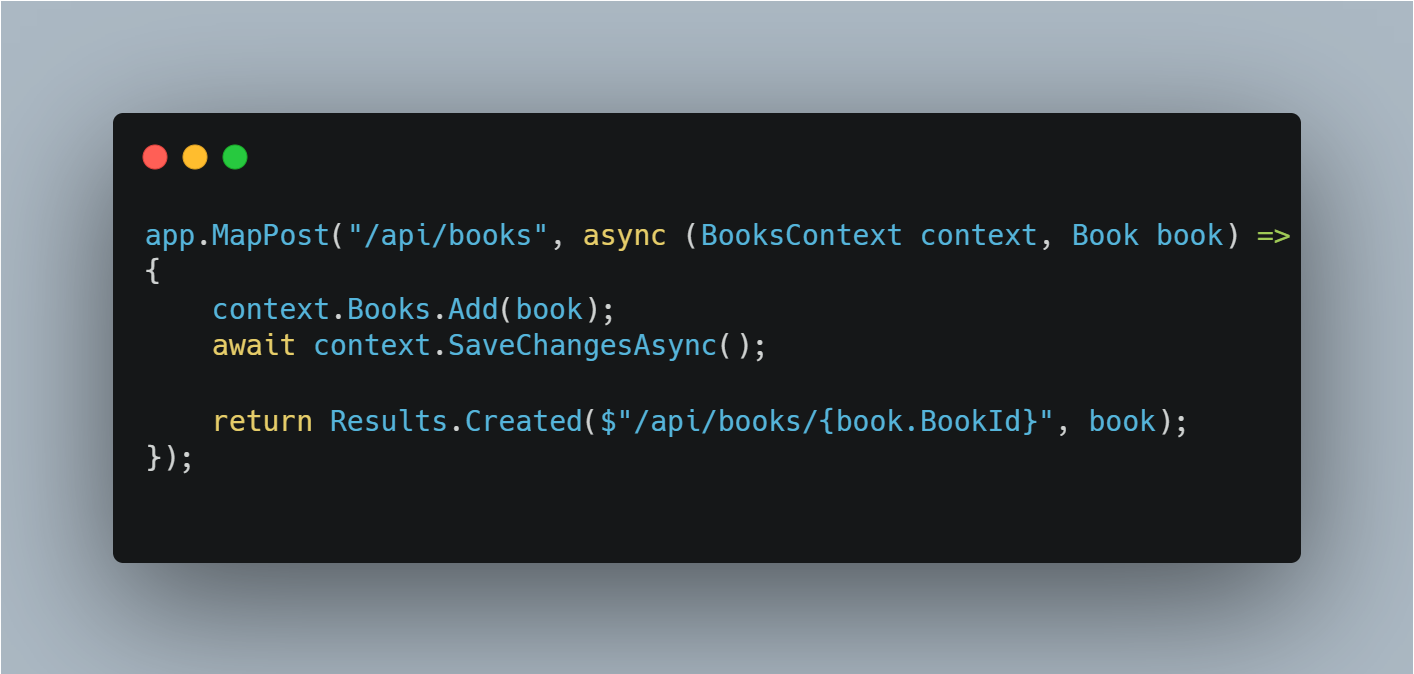
The new overloads of these methods, have a Delegate parameter type instead of the RequestDelegate with .NET 6. This allows passing a delegate or lambda expression with parameters and return types as needed. With the code snippet, the BooksContext parameter is injected from the DI container, the Book parameter gets its value from the body of the HTTP request. Using C# 10, you can specify attributes with parameters of lambda expressions. The attribute [FromServices] and [FromBody] would apply to the parameters of this method. With the default binding sources for route values, query strings, HTTP header and body, and dependency injection services, it’s not necessary to specify attributes.
Another feature using the Minimal API that’s shown here is the Results factory class that offers an easy way to return different HTTP results.
Allowing attributes with parameters of lambdas is one of the C# 10 extensions for lambdas. Another is that it’s allowed to specify the return type. This is necessary if the return type can not be deducted directly from the returned value, e.g. if the return type should be of a base class or an interface.
The sample application available with the GitHub repo implements methods for reading and writing book data from the database.
The sample application uses different methods for all the HTTP verbs used. The InstantAPIs library (currently in very early stages) tries to make this even easier: just one method is required to offer a CRUD REST API accessing a database using an EF Core context. See the link below.
Lambda improvements with C# 10 useful for Minimal APIs:
- Attributes with lambda parameters
- Explicitly declaring return types
- Natural delegate types
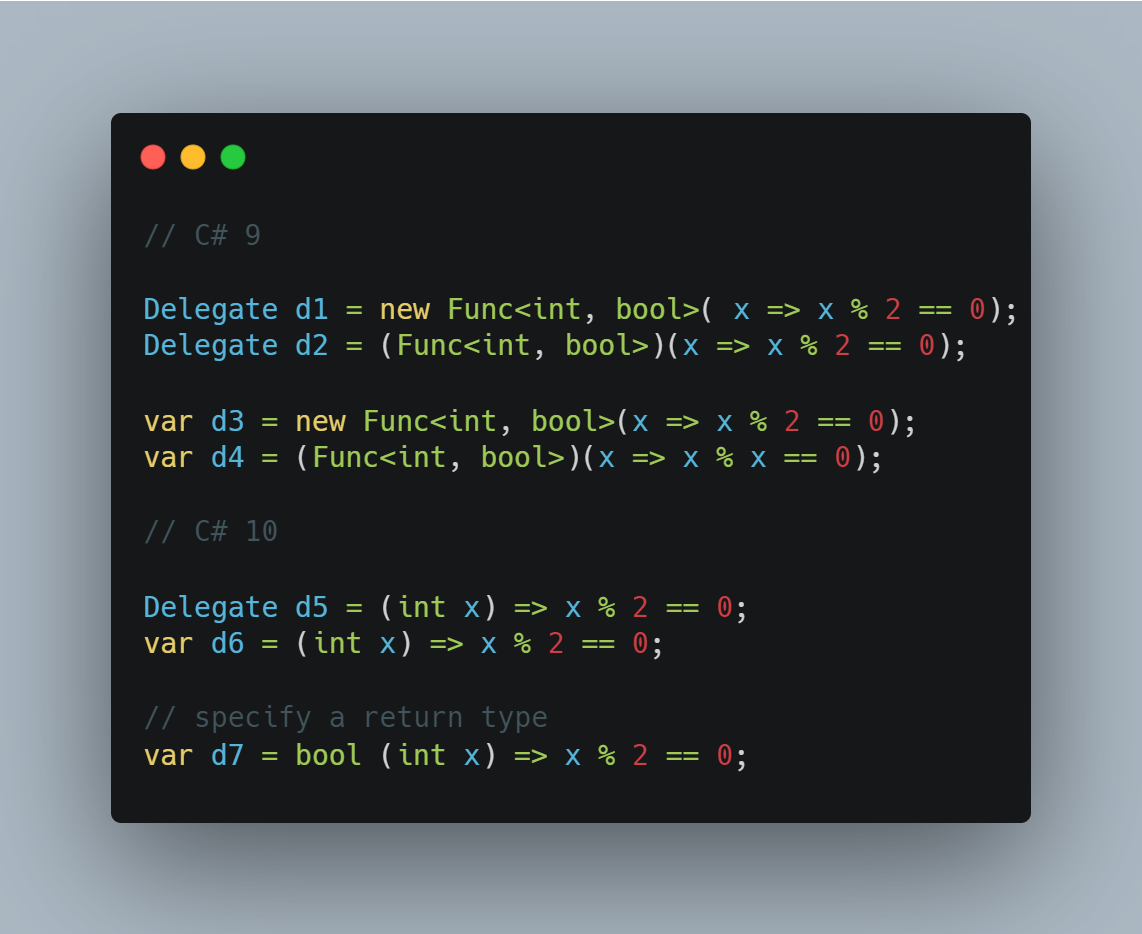
What is a natural delegate type? As shown in the next figure, before C# 10 it was not possible to assign a lambda expression to a variable of type Delegate or to use var without casting the lambda expression. With the natural delegate type of C# 10, this has been made possible.
GO with Newest .NET Core 6
To update an .NET 5 Web API application, all what’s needed is to change the .NET version and update the NuGet packages. However, you can take advantage of new features. With .NET 6, you can implement the same functionality with a lot less boilerplate code. C# 10 adds great features to reduce boilerplate code. Here you’ve seen file-scoped namespaces, global usings, implicit usings, and natural delegate types. Using the Minimal API with .NET 6, the boilerplate code needed to create REST APIs has been reduced. .NET and C# features nicely integrate.
Enjoy learning and programming!

Javier is Content Specialist and also .NET developer. He writes helpful guides and articles, assist with other marketing and .NET community work


