
What is ASP.NET Core Identity?
ASP.NET Core Identity is an API that supports user interface (UI) login functionality and manages users, passwords, profile data, roles, claims, tokens, email confirmation, and more. The classes in the Identity API handle a lot of complexities related to authentication, authorization, and security. We can configure ASP.NET Core Identity to use a SQL Server database to store user information and Entity Framework Core can be used to communicate with the database. The API also helps in generating fully functional forms such as Login, Register, Forgot Password, etc. Following is the list of features provided by ASP.NET Core Identity.
- SQL Server Database schema for storing users, claims & roles.
- UI for login, register, reset passwords, profile management, etc.
- Create/Modify/Delete Users
- Create/Modify/Delete User Claims
- Password validation and rules.
- Password Hashing
- User account lockout
- Generating password-reset tokens.
- Multi-Factor Authentication
- Managing External Identity providers (for example Facebook, Google, Twitter).
Creating a Project with ASP.NET Core Identity
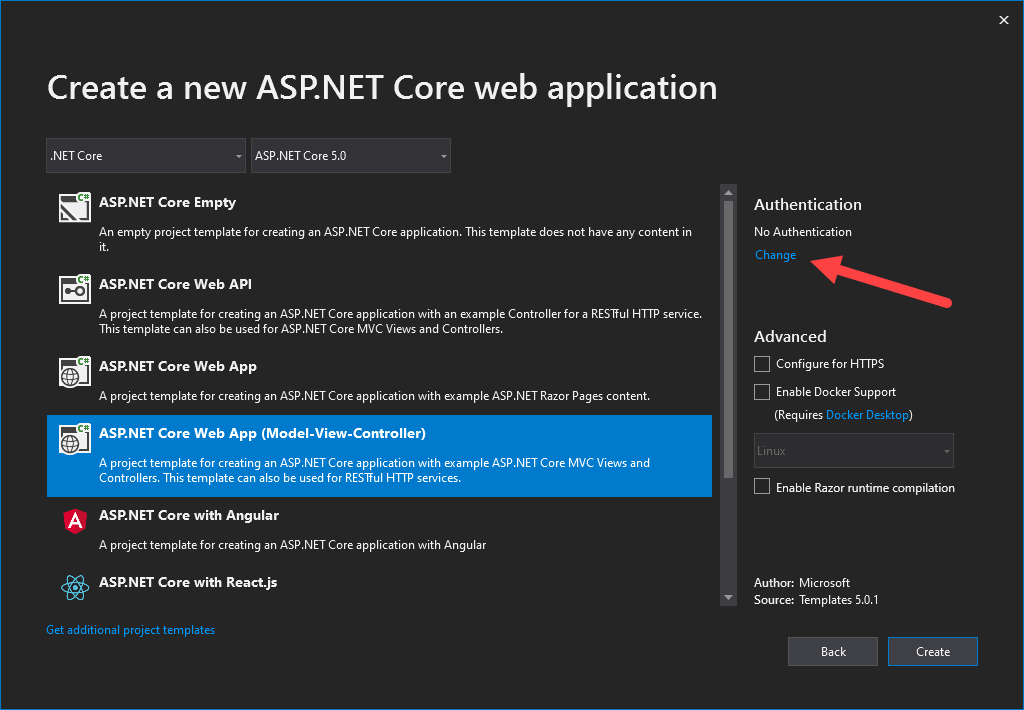
Create a new ASP.NET Core MVC web application in Visual Studio 2019. By default, the project has no authentication so you need to click the Change link to change the authentication type.
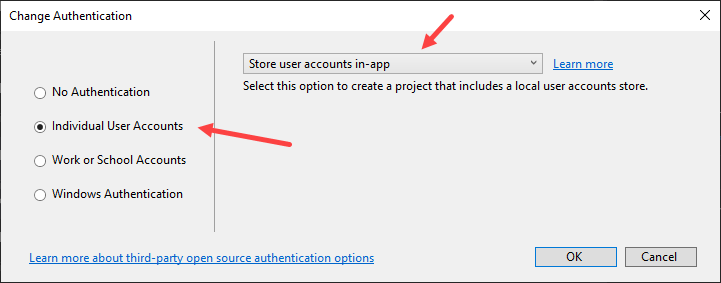
In the Change Authentication dialog, you need to click Individual User Accounts and make sure that the Store user accounts in-app option is selected.
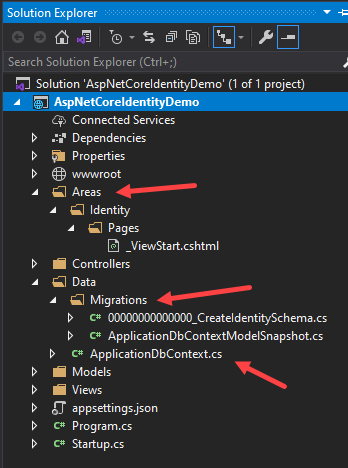
A new project will be created with an area named Identity, an ApplicationDbContext, and some Entity Framework Core migrations which we will use shortly to create a SQL Server database.
If you will open the Startup.cs file at this point, you will notice that the ApplicationDbContext is configured in the ConfigureServices method.
services.AddDbContext<ApplicationDbContext>(options =>options.UseSqlServer(Configuration.GetConnectionString("DefaultConnection")));
The ApplicationDbContext inherits from the IdentityDbContext. which in turn inherits from the DBContext. The IdentityDbContext contains the DbSet Properties for various identity related entities such as IdentityRole, IdentityUser, IdentityUserClaim, IdentityUserLogin etc.
You will also notice the call to AddDefaultIdentity method that configures the Identity services and we can use the options object to customize the behavior of the Identity as per our application requirement.
services.AddDefaultIdentity<IdentityUser>(options =>options.SignIn.RequireConfirmedAccount =true).AddEntityFrameworkStores<ApplicationDbContext>();
The Identity API has an Authentication Middleware that authenticates the users and we can add this middleware in the ASP.NET Core Middleware pipeline using the UseAuthentication extension method. You can see that both authentication and authorization middleware are automatically added in the Configure method of the Startup.cs file.
app.UseAuthentication();app.UseAuthorization();
The Identity API uses the Entity Framework Core and SQL Server and we need to specify the database connection string in appsettings.json to connect our application with SQL Server.
"ConnectionStrings": {"DefaultConnection": "Server=[DB_SERVER];Database=AspNetCoreIdentityDemo;Trusted_Connection=True;MultipleActiveResultSets=true"}
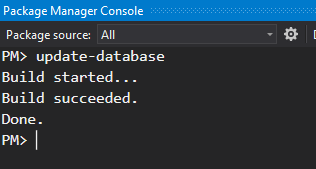
Now, open the SQL Server and explore the database and the tables generated automatically for us.
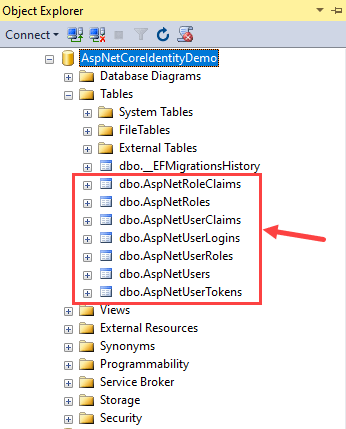
The following table will give you an overview of each of the above tables and the entity it maps to.
| Table Name | Mapped Entity | Description |
| AspNetUsers | IdentityUser | This is the primary table that stores user information |
| AspNetUserClaims | IdentityUserClaim | This table holds the claims associated with the user. |
| AspNetUserLogins | IdentityUserLogin | This table holds the information about 3rd party/external logins |
| AspNetUserTokens | IdentityUserToken | This table stores tokens received from the external login providers. |
| AspNetUserRoles | IdentityUserRole | This table contains the roles assigned to the user |
| AspNetRoles | IdentityRole | This table stores the user roles |
| AspNetRoleClaims | IdentityRoleClaim | This table holds the claims that are assigned to the Role |
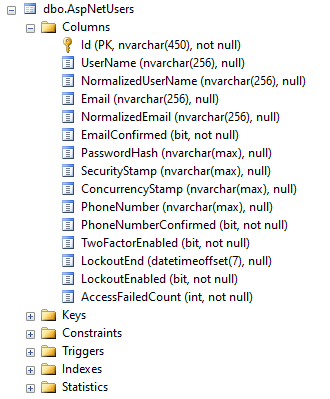
One of the most importable tables is AspNetUsers table and you can see that this table has user information e.g. UserName, Email, PasswordHash, etc.
Testing User Registration and Login Features
It is now time to run the application and walk through the features provided to us with absolute no C# code written from our side. When you will run the application, you will see the home page similar to the following screenshot.
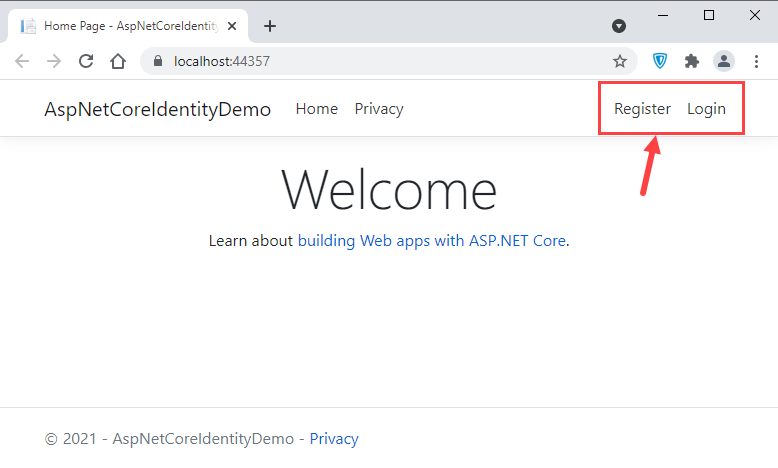
Notice the Register and Login links are shown on the top navigation bar. We haven’t registered any user in the database yet so to register a new user click the Register link and you will see the following user registration page.
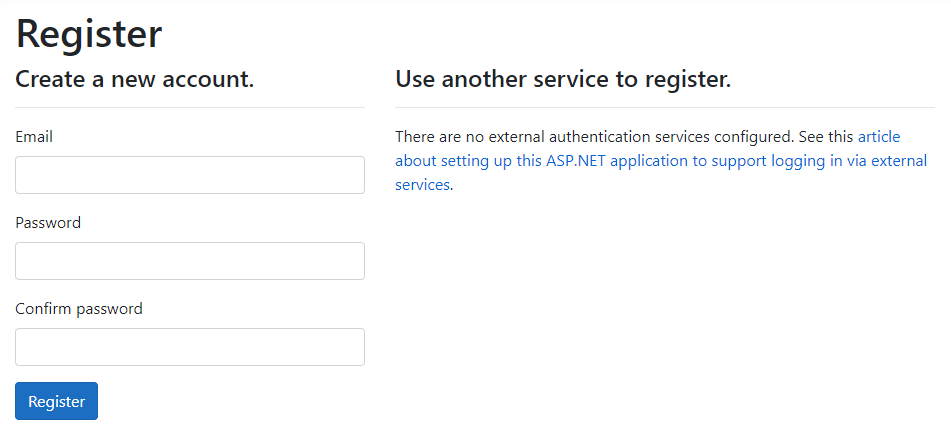
To create a new user, you need to provide an email and password. You also need to follow the predefined password policy and if you want to change the password policy then you can do that using the IdentityOptions object in the ConfigureServices method of Startup.cs file.
services.Configure<IdentityOptions>(options =>{options.Password.RequireDigit =true;options.Password.RequireLowercase =true;options.Password.RequireNonAlphanumeric =true;options.Password.RequireUppercase =true;options.Password.RequiredLength = 6;options.Password.RequiredUniqueChars = 1;});
Once the user is successfully registered, the Identity API can send the confirmation email but as we haven’t configured the email service yet so you can click the confirm link shown on the Register confirmation page. At this point, you can open the database and you will see the user information stored in the AspNetUsers table.
Next, you can click the Login link that will open the following login page. Try to log in with the credentials of the user registered above.
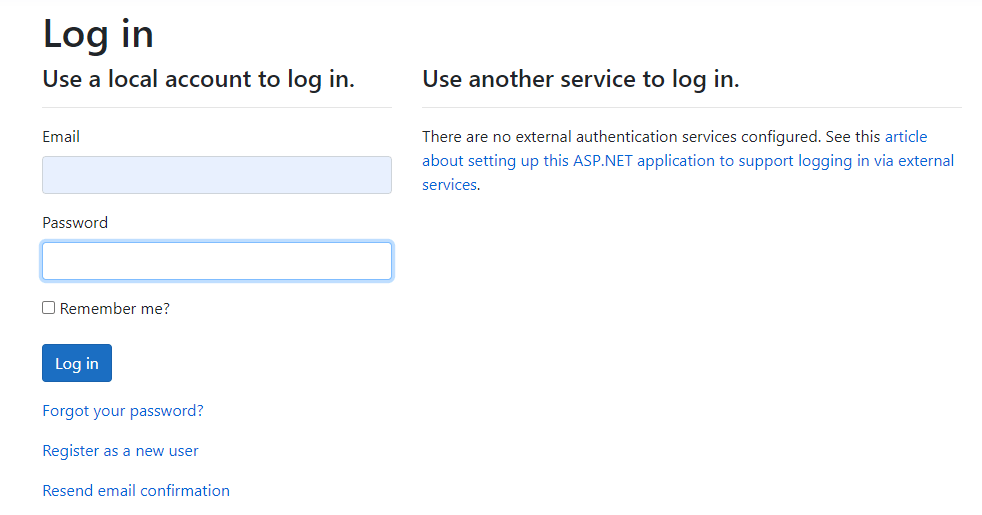
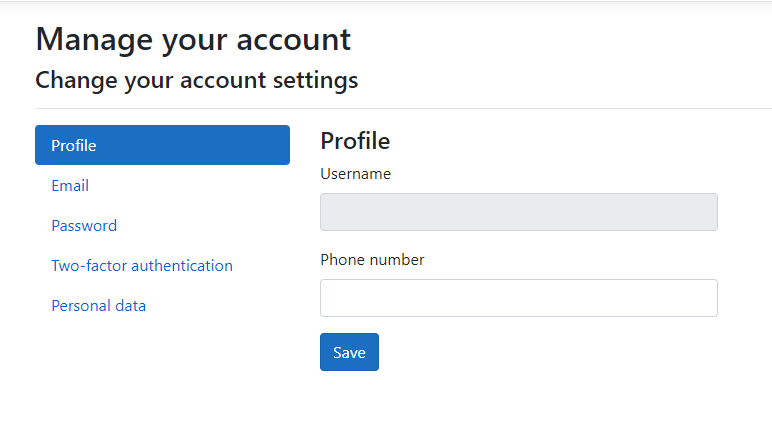
Once you are logged in, you will see the email and Logout links on the top navigation bar. Clicking the email link will take you to the following profile page where you can update user data, passwords, etc.
Scaffold ASP.NET Core Identity UI
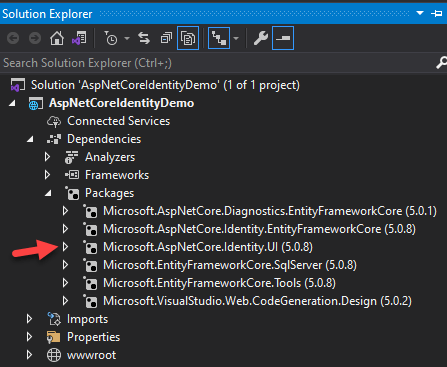
We have already explored the working examples of Register, Login, and other Identity related pages but you will not find these pages in the solution explorer. All these forms and pages are served from Microsoft.AspNetCore.Identity.UI package which is included in your project by default and you can find its reference in the list of dependencies.
If you want to customize the Register, Login, Register Confirmation, etc. pages then you can use the scaffold feature to generate the source code of one or more pages.
To use scaffolding, Right Click on the Project in Solution Explorer and choose Add > New Scaffold Item… menu option. In the Add New Scaffolded Item dialog box select Identity and click Add button.
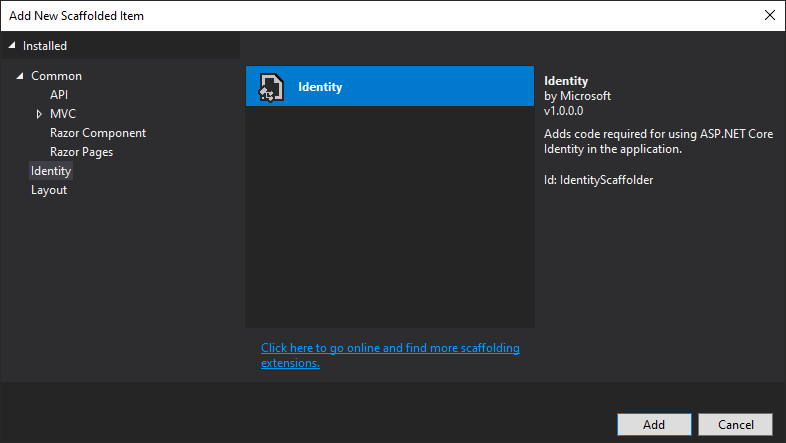
You will be presented with the following Add Identity dialog box.
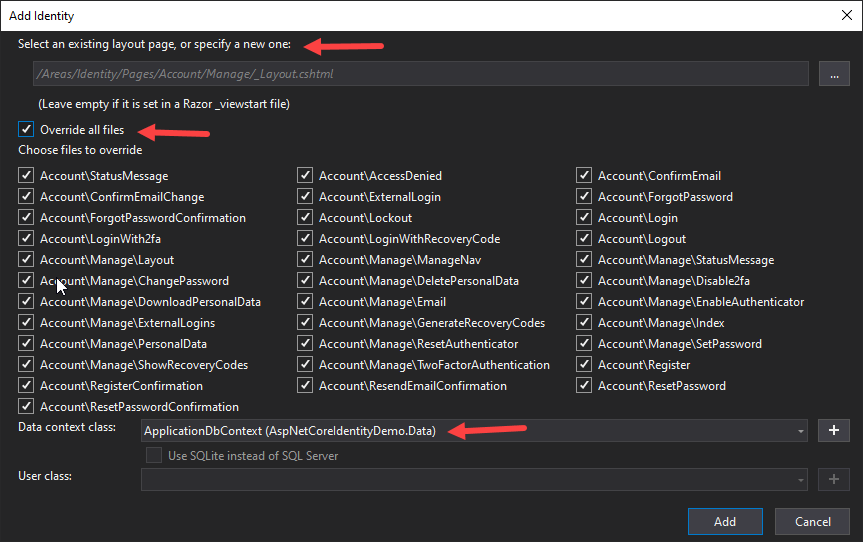
In the Add Identity dialog
- You can select an existing or a new layout page for the generated pages.
- You can override all or selected pages
- You can select the Data Context class e.g. ApplicationDbContext
- You can select the user class (in case we want to use your custom User class).
When you are done click the Add button to start the scaffolding process. The scaffolding process will generate the selected files in the project and you can view them in Solution Explorer.
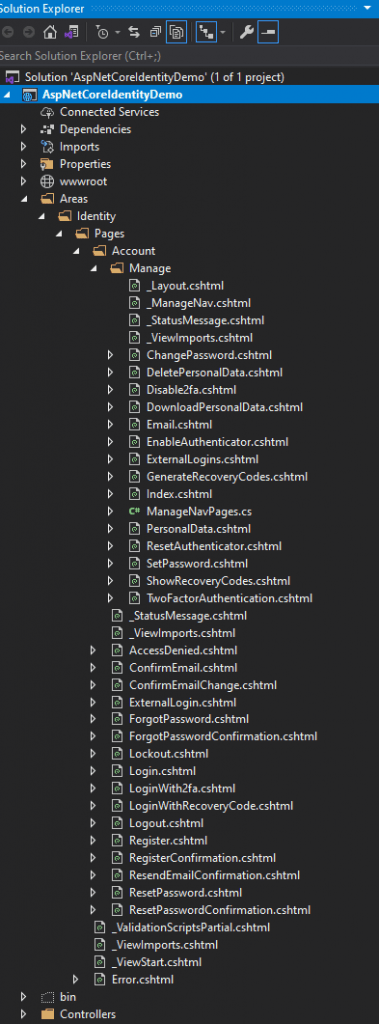
This is surely a huge time saver because you don’t need to add all these files yourself. They all have boilerplate code in them which can be customized or modified according to your application requirements.
Summary
In this tutorial, I gave you the basic overview of adding ASP.NET Core Identity and related features in a new ASP.NET Core web project. You learned how to use the default Login, Register pages as well as how to generate the source code of those pages for customizations. If you find it useful, you can share it with your community.


Javier is Content Specialist and also .NET developer. He writes helpful guides and articles, assist with other marketing and .NET community work

