
In previous article, we have explained how to setup SSL Let’s Encrypt via Plesk control panel. In this article, we will learn how to enable SSL in Visual Studio.
Steps to enable HTTPS in a Visual Studio
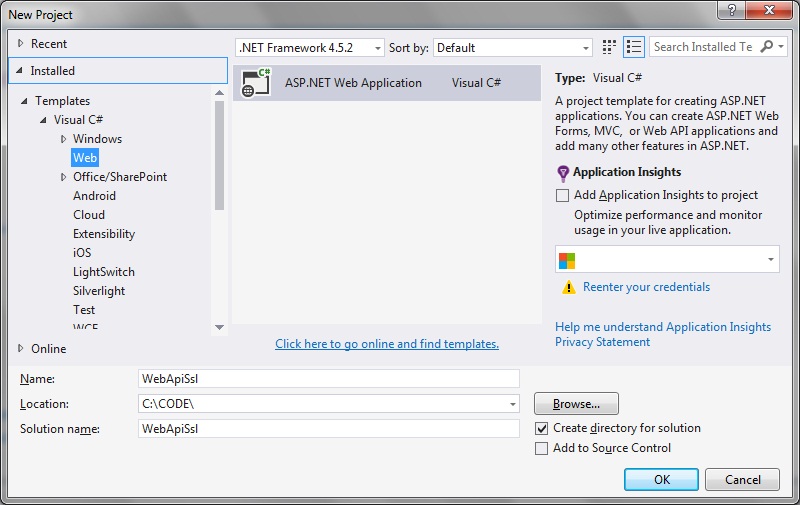
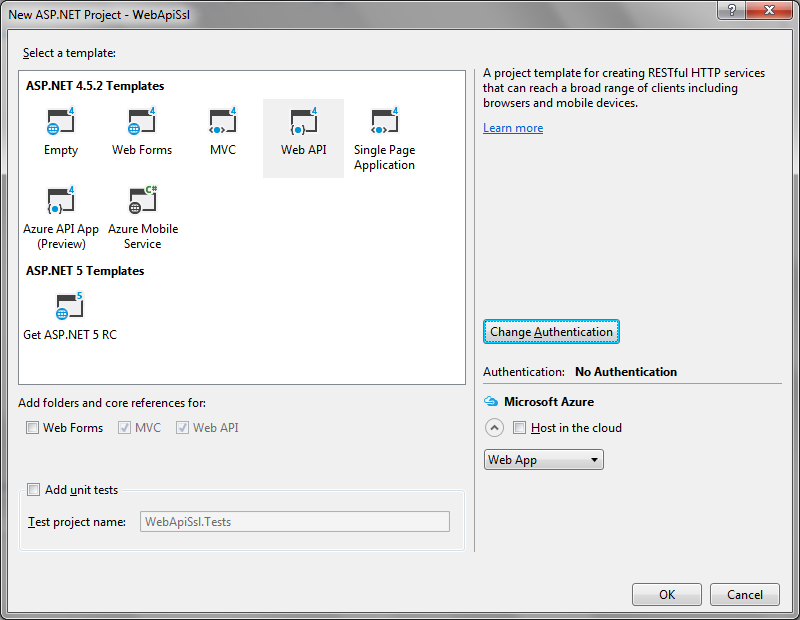
1. Create Web Api project in Visual Studio:
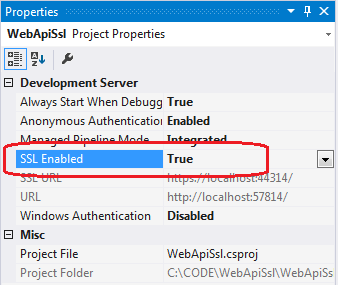
2. Select/click on the Web API project name in the solution explorer, and then click on the Properties tab. Set ‘SSL Enabled’ to true:
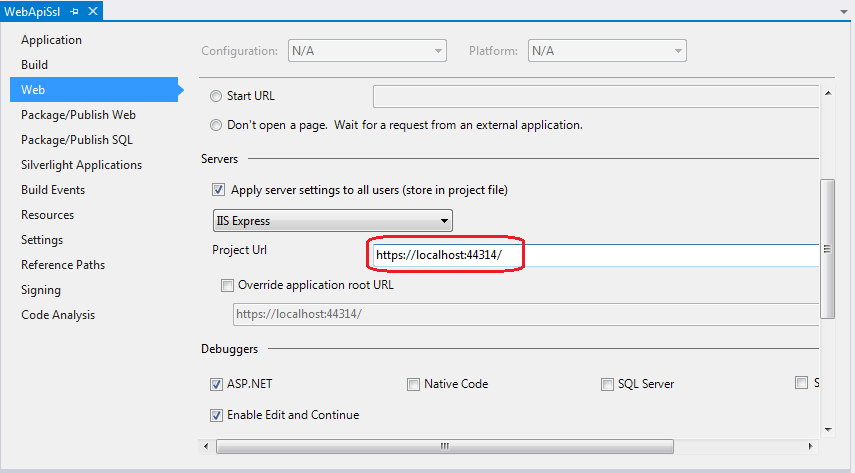
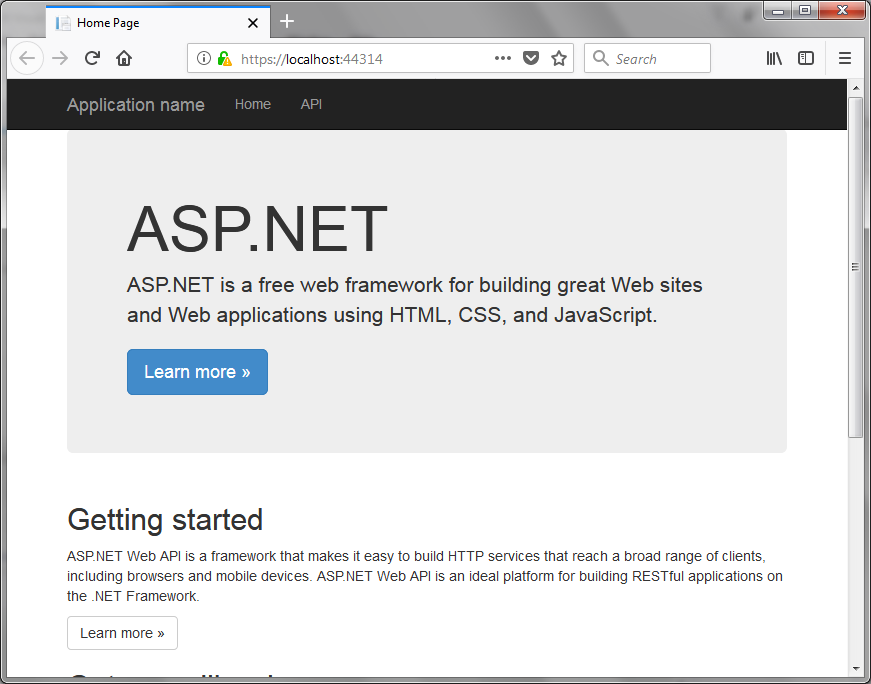
The HTTPS url for the application will also be displayed in the same properties window. The address is https://localhost:44314/ in the example above. Go to the project properties window after copying that URL.
3. Go to the Web tab and replace the Project Url property with the copied https address:
4. Build and run the application
Error Message that You Receive
The likelihood is that a message stating that the localhost address is unreliable and that you should proceed to the website at your own risk appears in the browser. Here’s a Firefox illustration:
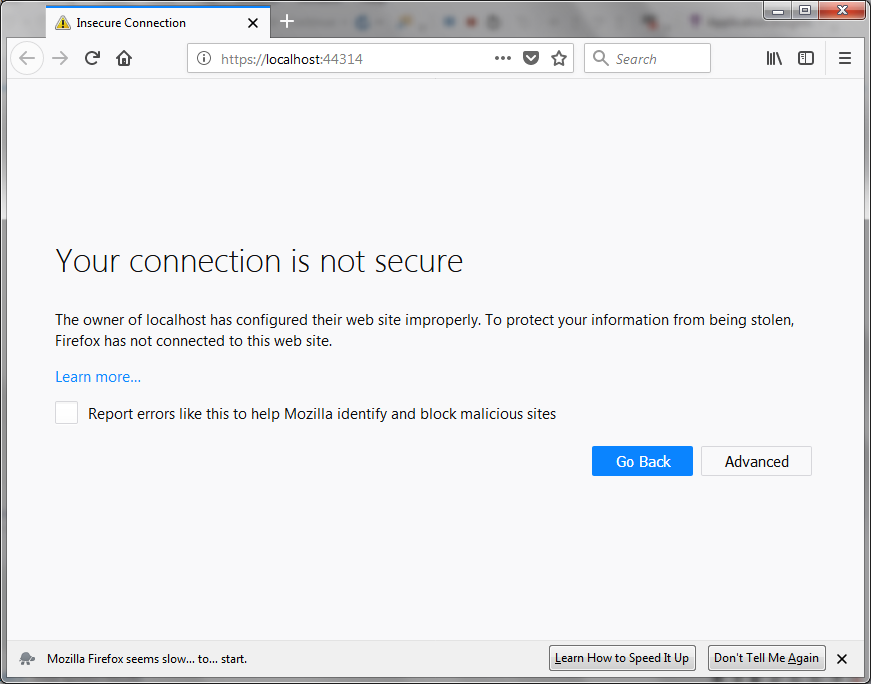
The problem is that the certificate automatically installed by Visual Studio is untrusted.
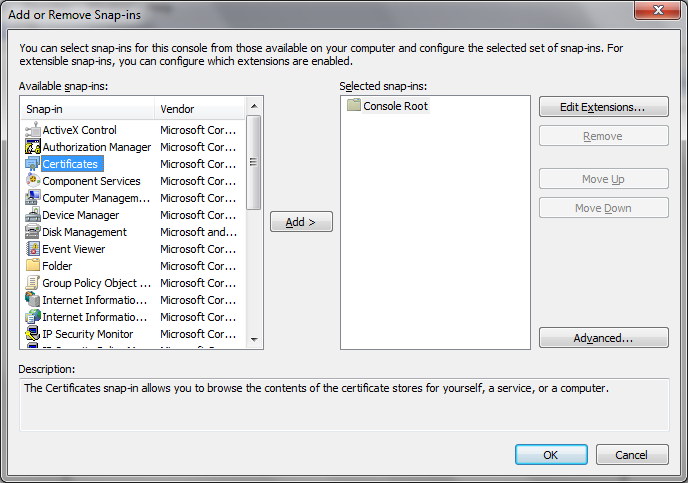
In the search programs and files, type ‘mmc’ (Microsoft Management Console):

Select File > Add/Remove Snap-in. Select Certificates > Add:
Select Computer account:
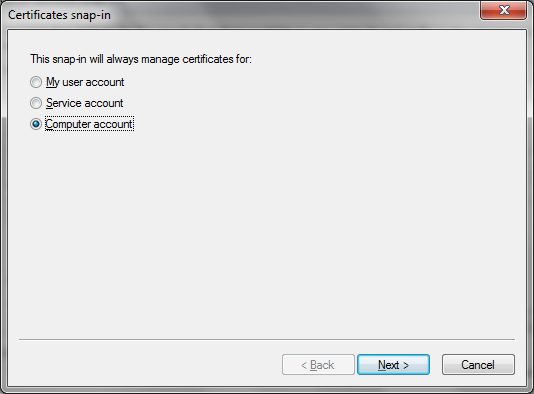
Click Finish and OK.
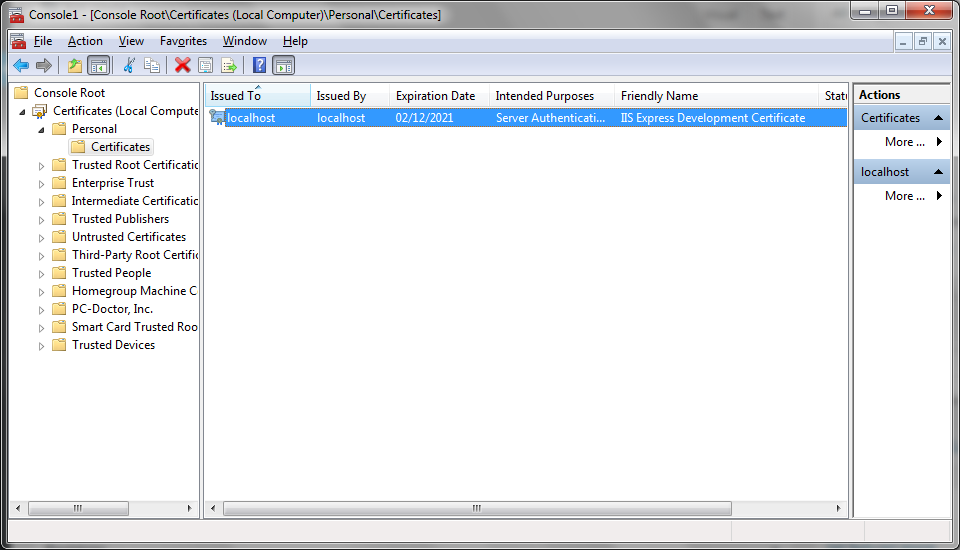
Locate the IIS certificate in the Personal folder of the computer-level certificates in the certificates snap-in.
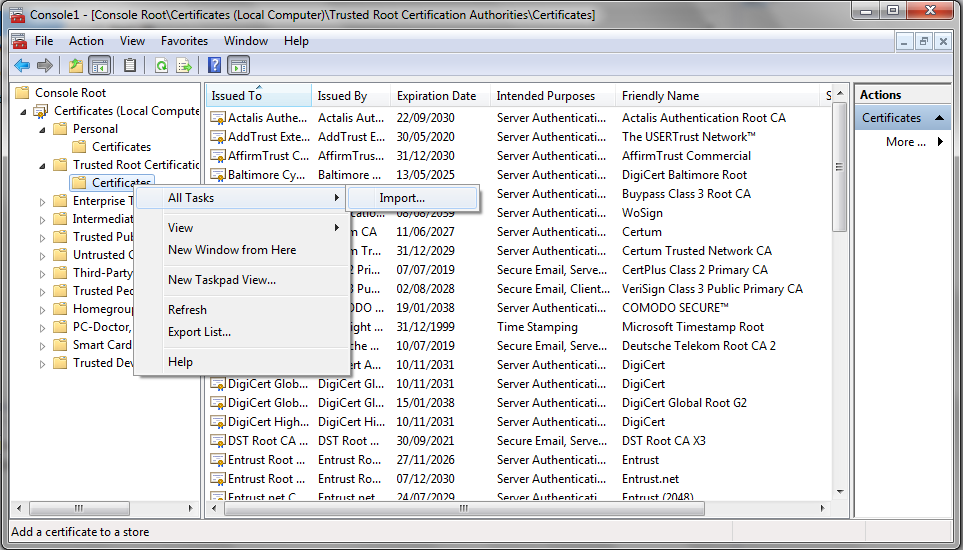
The certificate must be imported into the trusted root certification authorities folder, shown below the folder just below “Personal”.
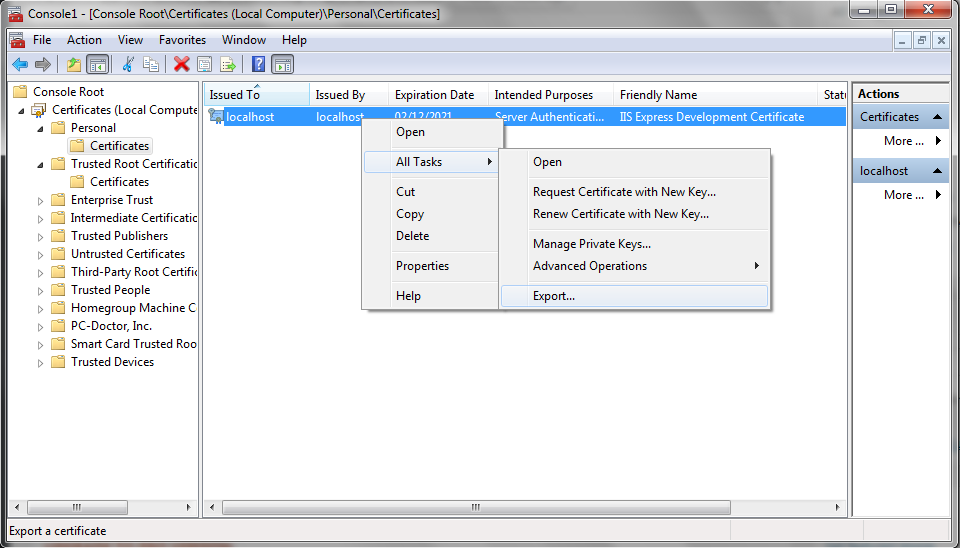
Right-click the certificate, then select All Tasks, Export… from the context menu.
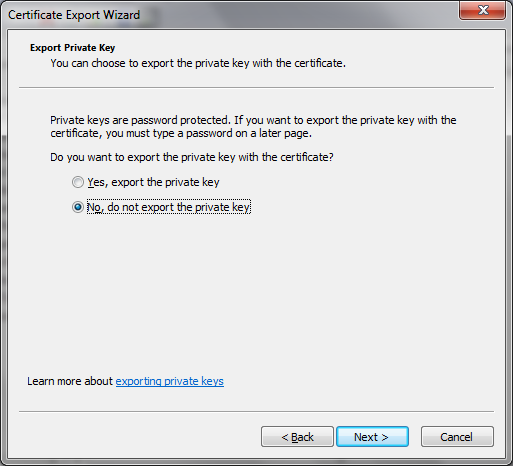
Click Next on the certificate export wizard.
Leave the “Do not export the private key” option untouched, click Next.
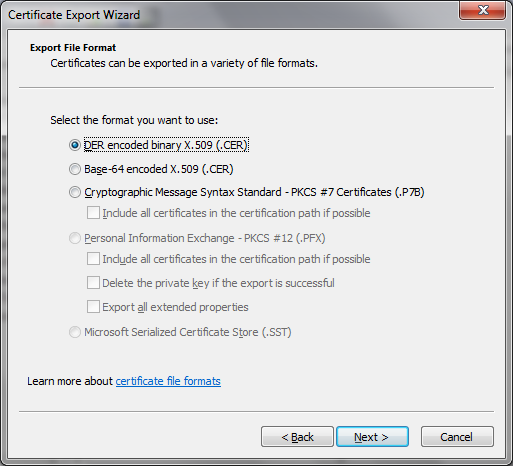
On the following screen, accept the default, keeping “DER encoded binary X.509” selected, and then click Next.
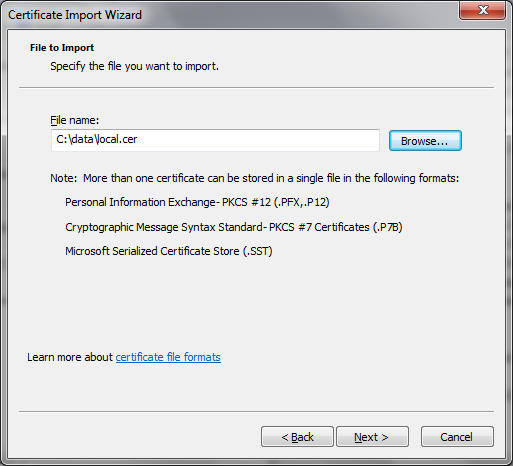
The exported file’s name and location must then be specified. Save it with the name “localhost” and in an accessible location:

Click Next and then Finish.
There should be a popup message saying that the export was successful.
Now right-click the folder called Trusted Root Certification Authorities and select All Tasks, Import…
Browse to the certificate you saved just before.
As you proceed through the wizard, click Next while accepting all of the default values that are presented to you. The success of the import should be indicated by a message. To get Firefox to work with this site, you might need to add a security exception.
Conclusion
Now, you have learned how to setup an SSL certificate in Visual Studio.
Get your ASP.NET hosting as low as $1.00/month with ASPHostPortal. Our fully featured hosting already includes
- Easy setup
- 24/7/365 technical support
- Top level speed and security
- Super cache server performance to increase your website speed
- Top 9 data centers across the world that you can choose.


Andriy Kravets is writer and experience .NET developer and like .NET for regular development. He likes to build cross-platform libraries/software with .NET.

