You may refer to our previous post about remote database application for MySQL database. In this article, we will show you how to connect a MySQL database using MySQL Connector for .NET.
Before we start, please make sure you have installed:
- Visual Studio 2008 or Visual Studio 2010
- MySQL database on your local machine
- Use the MySQL database admin tool that allows you to create databases and run SQL statements. I am using phpMyAdmin which is a web interface.
- Download and install the MySQL Connector.
Steps to Connect MySQL Database Using C#.NET
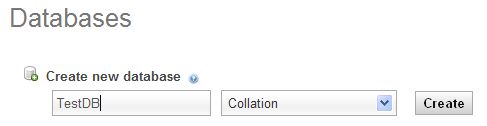
1. Open the MySQL Admin page and create a new database.
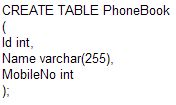
2. Create a new table
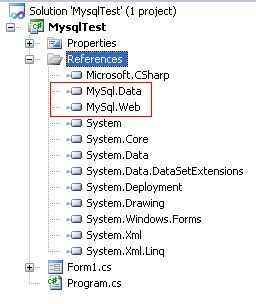
3. Open Visual Studio after creating the new table, select New Project, give the project a name, and it will launch. Next, select Solution Explorer (F4), then right-click on “Reference” to add a new reference to the project. Both of those.dll files (MySql.dll for Windows apps and MySql.web.dll for Web apps) should be added as references to the project.
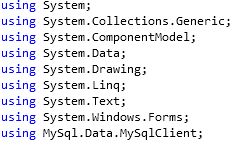
4. Add the namespace to the project
5. Create MySQL connection string.
string MyConnectionString = "Server=localhost;Database={database};Uid={user};Pwd={password};"
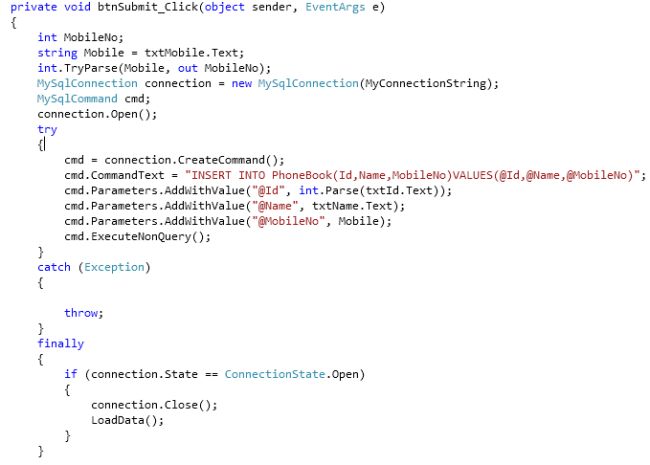
6. The data will be inserted into the MySQL table using the following code.
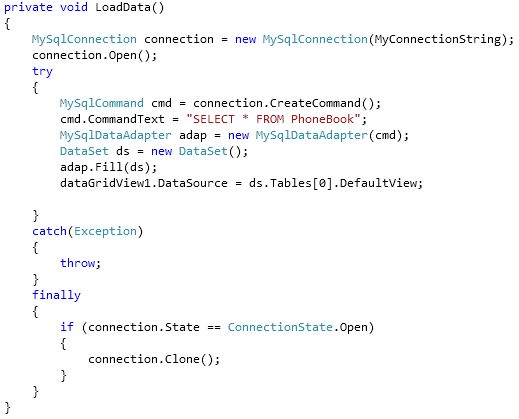
7. The data from the table will be loaded and bound into the grid view in the subsequent function.
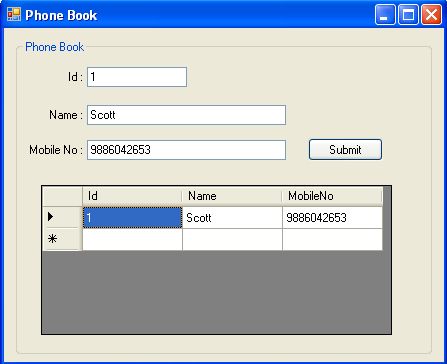
8. The final result is shown in the following form.
Conclusion
We hope that simple tutorial above can give you good insight about how to setup connection to MySQL using C#.NET. We will back with other great tutorial. Thank you and Happy coding!

Javier is Content Specialist and also .NET developer. He writes helpful guides and articles, assist with other marketing and .NET community work