
In this article, I will explain how I did to deploy Angular Web and ASP .Net Core API in the same folder in IIS.
1. Structure of the Deployment folder
Even though the purpose is to keep the UI and API in the same place, we should separate the two part in that common folder. So, let’s create a folder called api inside the directory of my website.
-MyWebsite
   -api
2. Configurations on IIS
Step 1: Create Virtual Directories
- Open IIS
- Expand Sites > Default Web Site
- Right click on Default Web Site and click on Add Virtual Directory. Here enter your website name.
- Right click on the newly created Virtual Directory, create another Virtual Directory and called api
- Right click on each Virtual Directory and Convert to Application
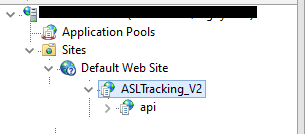
Once it’s done, your directories will be similar to below:
Step 2: Change Authentications
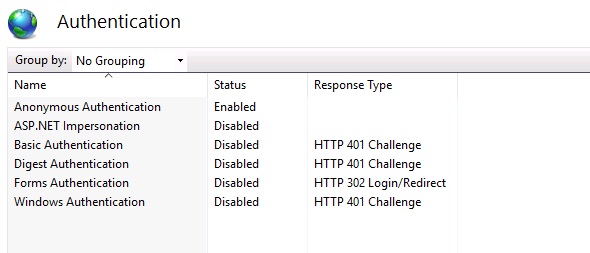
Your application can be either Windows or Anonymous Authenticated. So it’s up to you to enable these two options based on your needs. However, the ASP .NET Impersonation must be disabled.
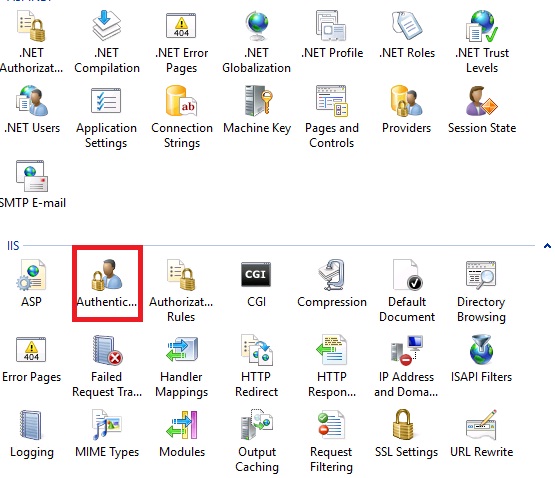
- In IIS left panel, click on each applications created (ASLTracking_V2 and api)
- Double click on Authentication icon in Features View pane
- Right click on ASP .NET Impersonation and select Disabled
Note: If ASP .NET Impersonation is not available, make sure to install everything under Internet Information Services in Turn Windows features on or off. Once it’s done, delete the virtual directories created and create a new one again.
Step 3: Application Pool
It’s ok for me to use Default Application Pool. However, to add a new Application Pool, you can do the following:
- Right click on Application Pools in IIS left panel
- Click on Add Application Pool
- Configure your Application Pool as desired
- Go back to both applications created, make sure they use the new application pool (Right Click > Manage Application > Advanced Settings)
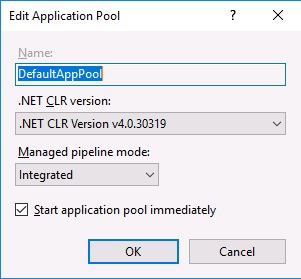
I’m using Default Application Pool with below settings:
3. Deploy your ASP .NET Core API to the api folder
Note: Depends on Visual Studio version, these screens might be different. I’m using VS 2019.
Note: It’s necessary to make your app offline during publishing. I can’t publish sometimes due to “File in Use” error.
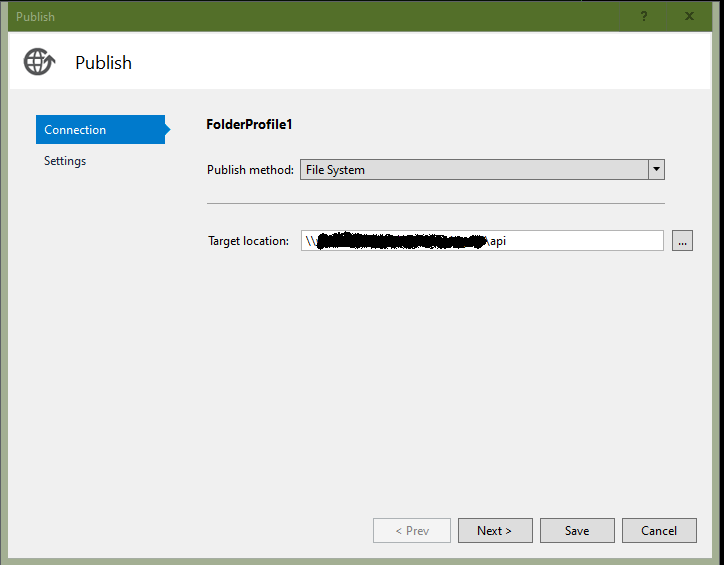
- Right click on the project file in Visual Studio, then click on Publish…
- Click on New to add a new Publish Profile or you can just Edit the existing one by clicking on More actions > Edits
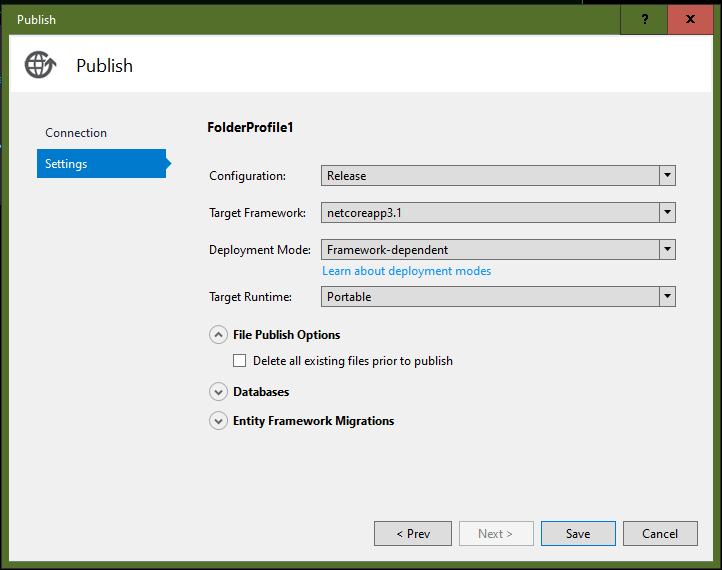
- Configure the settings as below. Note that Target Runtime is Portable.
- Once done, click on Save.
- Click on Publish on Publish screen in Visual Studio.
4. Deploy your Angular Web to the main folder
Note: Since your API is now in api folder, the API path in your Angular project must change to include “/api”.
- In Visual Studio Code, open a new Terminal. Run below command. Make sure to have –base-href /YourAppName/
ng build --base-href /YourAppName/
- The published files will be found in dist/yourappname folder.
- Copy all Files and Folders in this folder to the main folder in IIS.
Once it’s done, your website is now ready. If you feel this post is useful, please feel free to share it. Thank you. Happy Coding!


Yury Sobolev is Full Stack Software Developer by passion and profession working on Microsoft ASP.NET Core. Also he has hands-on experience on working with Angular, Backbone, React, ASP.NET Core Web API, Restful Web Services, WCF, SQL Server.

