Stripe is one of the most popular payment processing system. We also use Stripe as our payment processor, instead of Paypal and 2Checkout.
Why Use Stripe?
There are 2 reasons that we recommend Stripe as your Payment gateways
1. Better Service Charge Rates
| ## Service | PayPal | Stripe |
|---|---|---|
| Transaction fees [1] | 2.9% + 30¢ | 2.9% + 30¢ |
| Charge cards from your website | $30 / month [2] | Free |
| Chargeback | $20 | $15 |
| American Express | 3.5% [3] | Same flat rate |
| Micropayments (less than $10) | 5% + .05¢ | Same flat rate |
| Refund | Fixed fee [4] | Free |
| International cards | 1% [5] | Free [6] |
| Authorize card | 30¢ [7] | Free |
| Recurring Billing | $10 / month | Free |
| Advanced Fraud Protection | $10 / month [8] | Free [9] |
| Accept Apple Pay © | Not available | Free |
2) Rapid Integration and Startup with Payment Card Industry (PCI) compliant Payment system
You do not have to store your customer’s card related information on the server side!
Simples Steps to Setup Stripe
We will advise you how to use Stripe with ASP.NET MVC framework.
To get started, first sign up with Stripe which is a very simple process where all you have to provide is a valid email address and a password for your account.
Once you sign up and confirm your email address, Stripe provides you with a set of Test API keys. Basically you get a “Publishable API” key and a “Secret API” key.
Publishable API keys are meant solely to identify your account with Stripe, they aren’t secret. In other words, they can safely be published in places like your Stripe.js JavaScript code, or in an Android or iPhone app. Publishable keys only have the power to create tokens.
Secret API keys should be kept confidential and only stored on your own servers. Your account’s secret API key can perform any API request to Stripe without restriction. – Stripe
Integration Stripe with ASP.NET MVC
After you have your keys ready, in your ASP.NET project install Nugget package “Stripe.NET“.

Next, in your MVC controller, add a method to create a view like below:
public ActionResult Index()
{
var stripePublishKey = ConfigurationManager.AppSettings["stripePublishableKey"];
ViewBag.StripePublishKey = stripePublishKey;
return View();
}
Here, basically I am getting the Publishable API key provided by Stripe and passing it to my View.
Next, add the corresponding view for this method:
<form action="/Payment/Charge" method="POST">
<article>
<label>Amount: $5.00</label>
</article>
<script src="//checkout.stripe.com/v2/checkout.js"
class="stripe-button"
data-key="@ViewBag.StripePublishKey"
data-locale="auto"
data-description="Sample Charge"
data-amount="500">
</script>
</form>
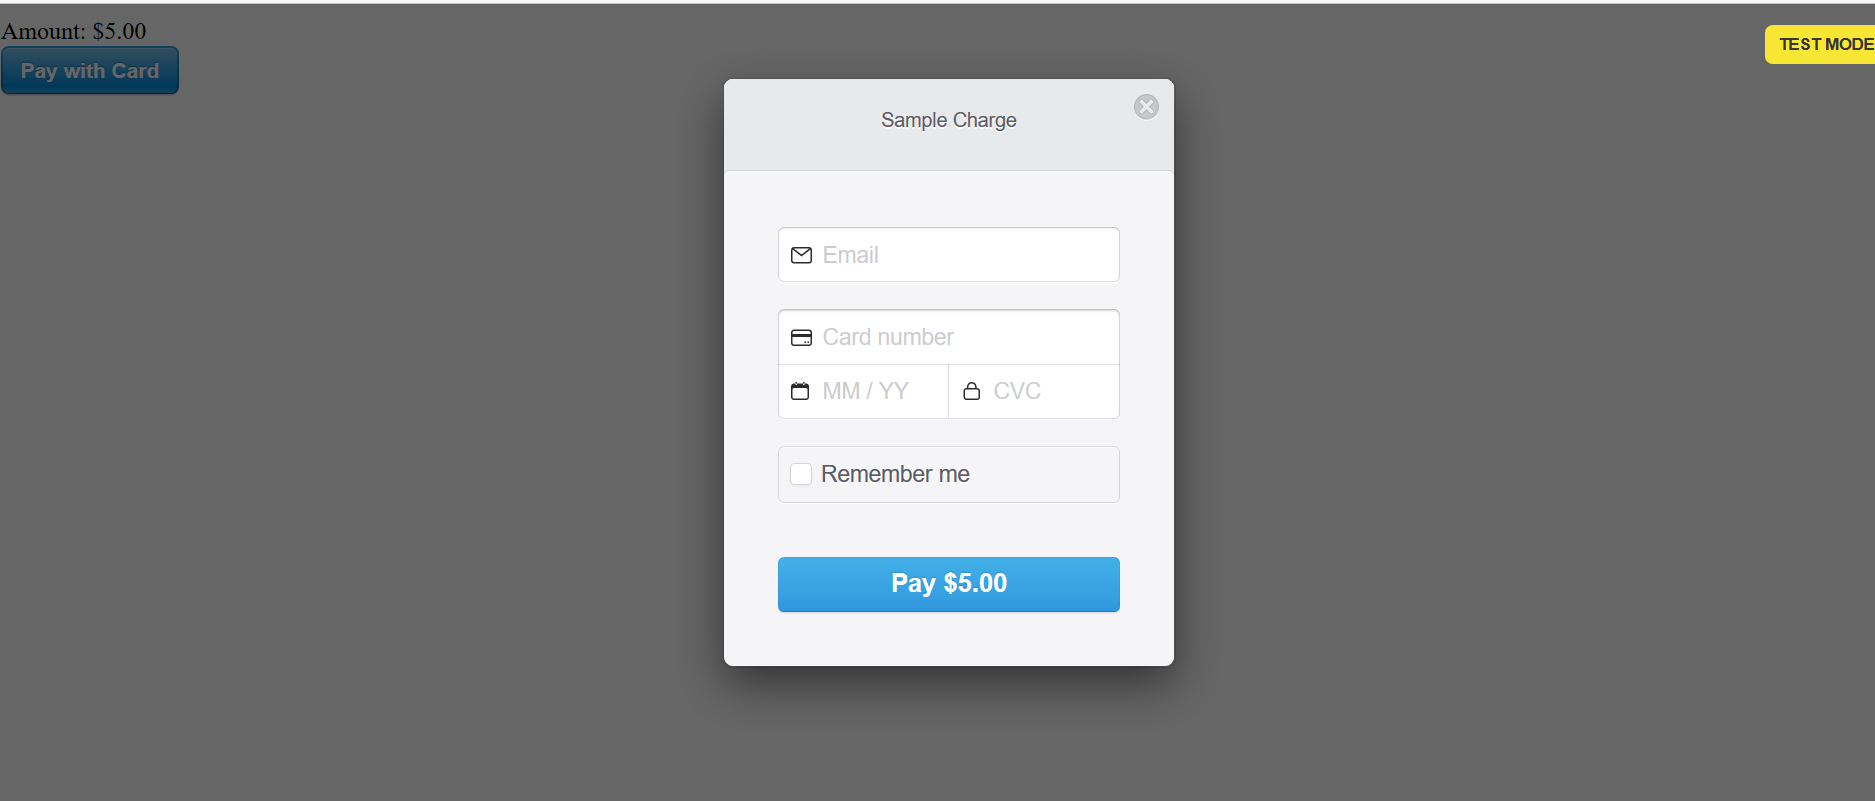
This creates a User Interface view with a label and a Stripe Checkout button for our designated App key.

The button generation and the click event is handled by the Stripe’s “checkout.js” script. User can click to display the credit card overlay which is automatically validated by Stripe’s API error handling.

If the card is validated, it returns back a token to our application that we should handle on the server side.
public ActionResult Charge(string stripeEmail, string stripeToken)
        {
            var customers = new StripeCustomerService();
            var charges = new StripeChargeService();

            var customer = customers.Create(new StripeCustomerCreateOptions
            {
                Email = stripeEmail,
                SourceToken = stripeToken
            });

            var charge = charges.Create(new StripeChargeCreateOptions
            {
                Amount = 500,//charge in cents
                Description = "Sample Charge",
                Currency = "usd",
                CustomerId = customer.Id
            });

            // further application specific code goes here

            return View();
        }
The Charge method handles the incoming POST request that Checkout performs on the frontend. First a Stripe customer is created and then the charges.Create method is invoked, providing the Customer ID to associate the transaction with the customer. Payment amount is specified in cents.
We should write application specific codes to make database adjustment related to the purchase made by our User after the Sripe charge is made.
Finally, we need to configure the Stripe API key which can be done adding the following ling of code in the “Global.asax” file.
StripeConfiguration.SetApiKey(ConfigurationManager.AppSettings["stripeSecretKey"]);
That’s all the code we need to get started with Stripe Checkout!
Testing
For testing the API, Stripe has provided a list of sample Credit Cards that you can use for development.
Conclusion
Yes…. That’s only brief tutorial how easy to integrate Stripe payment in your application. Maybe in next tutorial, I will discuss it more detail about this Stripe. Hope you enjoy this article!

Andriy Kravets is writer and experience .NET developer and like .NET for regular development. He likes to build cross-platform libraries/software with .NET.


