
The ability to find and fix bugs before releasing the software into production makes debugging one of the most crucial aspects of software development. Instead of using Console.WriteLine() statements at every intersection of your code, use VS Code’s many built-in functionalities, which include debugging tools to speed up and simplify the debugging process.
In this article, you will learn how to install the Microsoft C# extension, make debug configuration files, and set breakpoints in order to set up VS Code to debug C# and.NET Core applications.
Requirements
Before start, you need to install:
- ASP.NET Core SDK installed locally, which you can do by visiting the official .NET website.
- The latest version of VS Code installed on your system.
- C# extension by Microsoft installed
Microsoft’s C# extension offers strong yet portable development tools to enable cross-platform C# development in VS Code. Additionally, this extension offers wonderful features like:
- Support for C# editing, including Syntax Highlighting, IntelliSense, and numerous other features.
- Support for debugging .NET Core applications
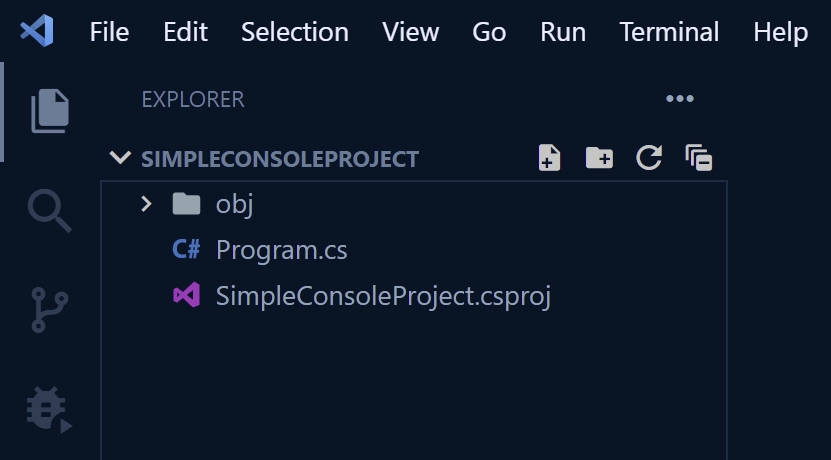
1. Create a Simple C# Console Application
Let’s use the.NET CLI to create a straightforward C# console project using the dotnet new <TEMPLATE>command, where <TEMPLATE> is the application type, in order to avoid making the debugging process overly complicated.
Use the command dotnet new console --name <NAME> to create the C# console application. The <NAME> parameter specifies the name of the C# console project and the directory to be created. If the <NAME> parameter is omitted, the current directory name will be used by default.
dotnet new console --name SimpleConsoleProject && cd SimpleConsoleProject && code.The aforementioned commands will launch the.NET project scaffolding tool, produce a basic Hello World starter console application, configure it, and launch the newly produced project in Visual Studio Code.
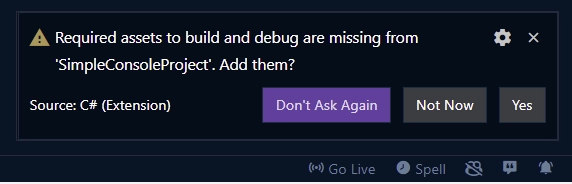
The C# extension will display a popup with the message Required assets to build and debug are missing from ‘SimpleConsoleProject’ as soon as Visual Studio Code has finished configuring the workspace environment. Add them in? – Click Yes to automatically generate and output the launch.json and tasks.json files into a .vscode folder.
Note: This is only possible if you have the C# extension by Microsoft installed.
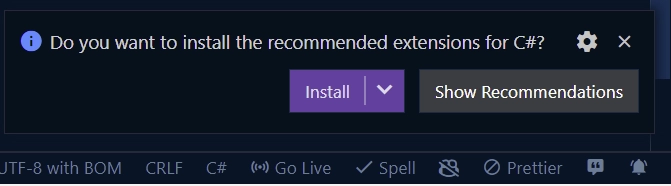
When you open a C# file in VS Code, it will prompt you to install the C# extension if you don’t already have it.
2. Create C#’s Build and Debug Assets.
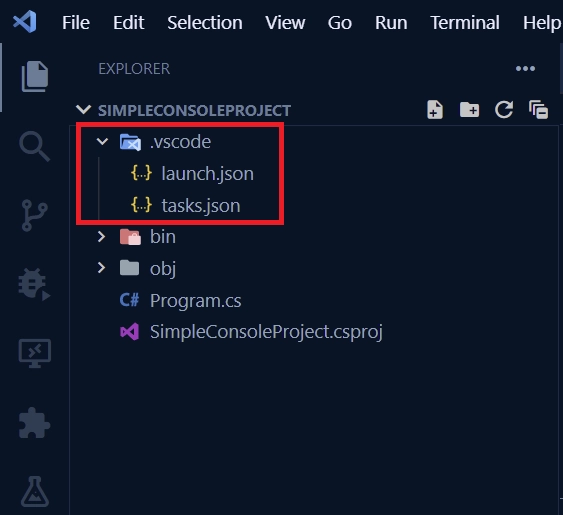
You can generate the build and debug files by clicking the Generate C# Assets for Build and Debug button on the debugger tab in VS Code’s left sidebar if you somehow missed the popup notification to do so.

The files required to build, debug, and launch the C# application will be generated when the button is clicked.
The tasks.json file contains the configurations for tasks (e.g. build, publish, watch, launch, etc) that are to be executed by VS Code.
The launch.json file contains the debugging configuration information.
Visual Studio Code can build and launch the project in debug mode thanks to these two files.
Now open the VS Code debugger panel and the launch.json file. To view the available tasks on the debugger panel, select the dropdown menu next to the play button.
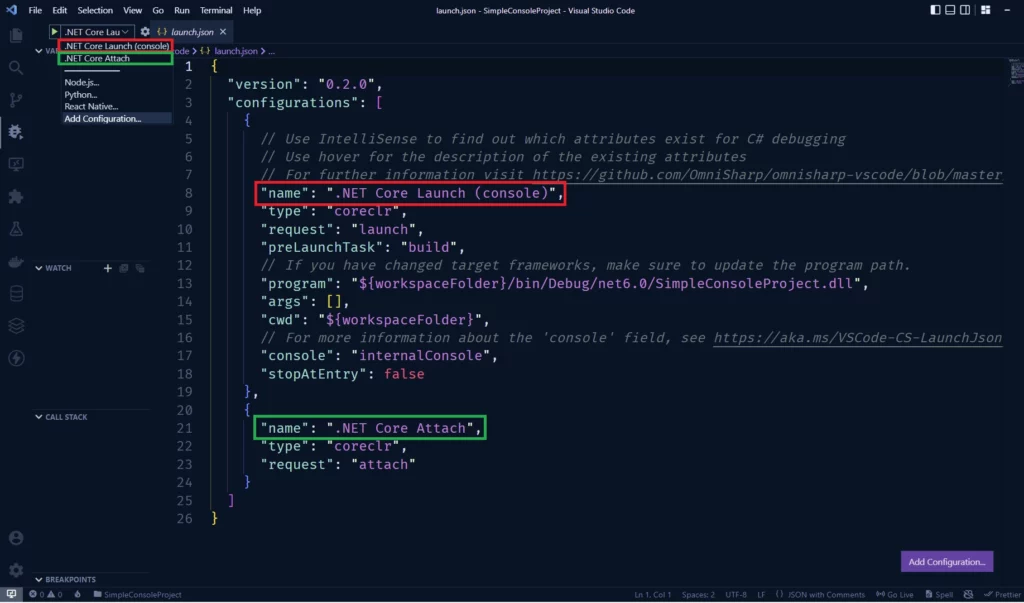
.vscode/launch.json
${workspaceFolder}/bin/Debug/net6.0/SimpleConsoleProject.dll , which is the .dll that will be generated when we build the application. The "args":[] property allows you to pass arguments to the main method as well.In contrast to Visual Studio, which uses an external console, it also uses the internal console.
The VS Code debugger can be connected to an active instance of a.NET application using the second configuration (.NET Core Attach).
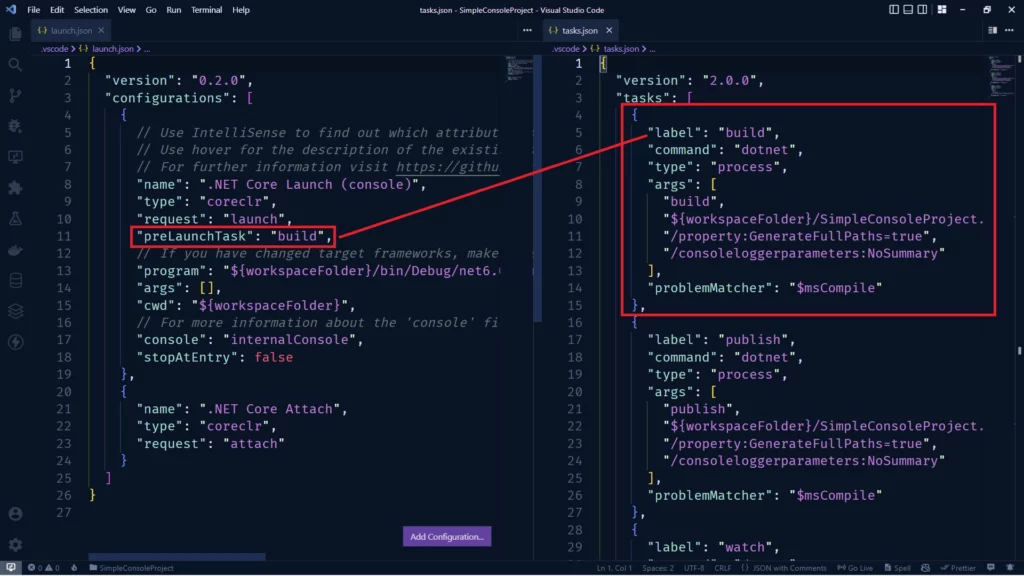
Now open the tasks.json and the launch.json files side-by-side to help us understand them better.
We have the "preLaunchTask": "build" in the launch.json file which corresponds to the "label": "build" task in the tasks.json .
The "label": "build" task runs the dotnet build command and specifies the project to build in the "args": [] property.
We also have two additional tasks "label": "publish" and "label": "watch" .
.vscode/tasks.json
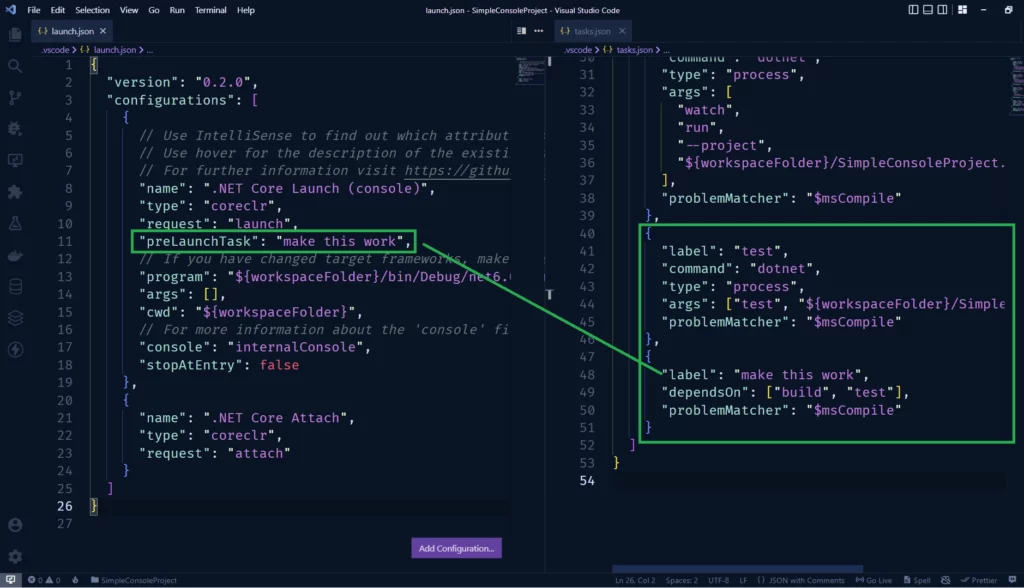
You are also allowed to add your own tasks. For example: create a task called "label": "test" and "label": "make this work" that will depend on the build and test tasks.
Next, add the "label": "make this work" task to the "preLaunchTask": "" property in the launch.json file.
3. Create a Breakpoint
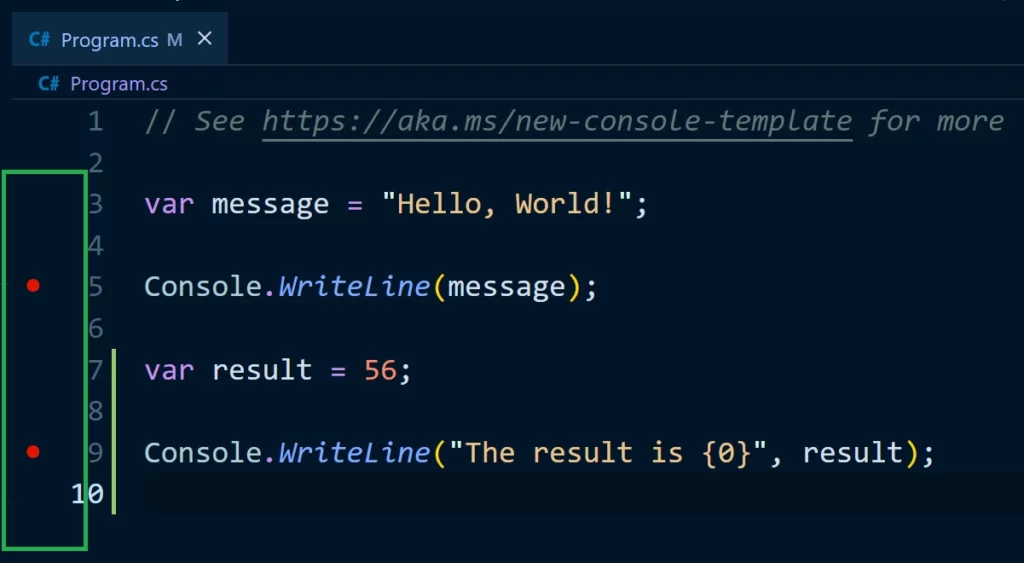
A breakpoint is a place in the code where you want the code to stop running so that you can inspect the memory addresses and get a thorough understanding of the memory’s current state.
For instance, the code will run and freeze at line 5 if you set a breakpoint at that location and run the program in debugging mode.
Click on the gutter next to the line numbers in the editor to set a breakpoint. Red circles will appear on each line as you move your mouse over the gutter.
To set a breakpoint on that line, click the red circle on the gutter where you want to stop the execution of the code.
4. Start VS Code Debugger
Now, launch the debugger by pressing F5 or the play button located in the VS Code debugger panel. The program will run with the first breakpoint’s code paused, allowing you to check the status of the variables in the VARIABLES pane.
Additionally, you can view the values of the variable by hovering your mouse over the line of the current breakpoint, which is highlighted in yellow.
Next, move the code execution line by line using the debugger’s navigation buttons.
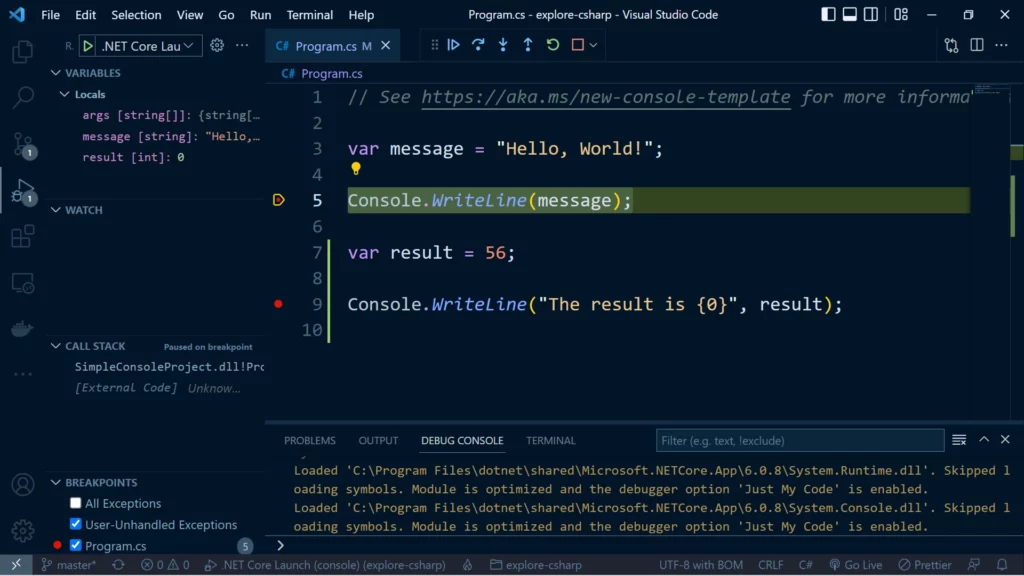
You can view the value of a variable or an expression from the current state of the program using the WATCH panel in Visual Studio Code. If you want to see some information as your program is being run from line to line, the WATCH panel can be helpful.
5. Install Recommended VS Code Extensions
Let’s talk about the various extensions that I suggest you use when writing C# and DotNet code. These are the extensions I will install without hesitation in order to give Visual Studio Code an IDE-like experience.
1. Roslynator
4. C# Namespace Autocompletion
Conclusion
You learned how to set up VS Code to debug C# and.NET programs in this thorough tutorial. With this information, you can begin easily debugging your projects in VS Code.
If you are looking for fast and secure ASP.NET hosting, you can visit our site at https://www.asphostportal.com. Our fully featured hosting already includes
- Easy setup
- 24/7/365 technical support
- Top level speed and security
- Super cache server performance to increase your website speed
- Top 9 data centers across the world that you can choose.


Yury Sobolev is Full Stack Software Developer by passion and profession working on Microsoft ASP.NET Core. Also he has hands-on experience on working with Angular, Backbone, React, ASP.NET Core Web API, Restful Web Services, WCF, SQL Server.

