
In this tutorial I will explain to you how to use API Key to secure your ASP.NET Core Web API in 2 different ways: Custom Attribute and Custom Middleware.
Keep in mind that using API Key Authentication should be limited to the service clients or well-known clients, in other words, it is not recommended that you use the API Key Authentication to actually authenticate your users, it is mainly used to identify and authorize a project or service that is connecting to your APIs.
So it will keep a secure link between your APIs and the client of your APIs (other business that is accessing your APIs).
If you wish to include user authentication and authorization, then you should apply token-based authentication, such as OAuth 2.0, it is a significantly important topic that requires a separate tutorial.
So let’s keep the introduction short and jump right into the API Key Authentication of your ASP.NET Core Web APIs.
Open Visual studio 2022, and create a new project and choose ASP.NET Core Web Application, make sure you are using the latest version of Visual Studio 2022 (17.3.x)
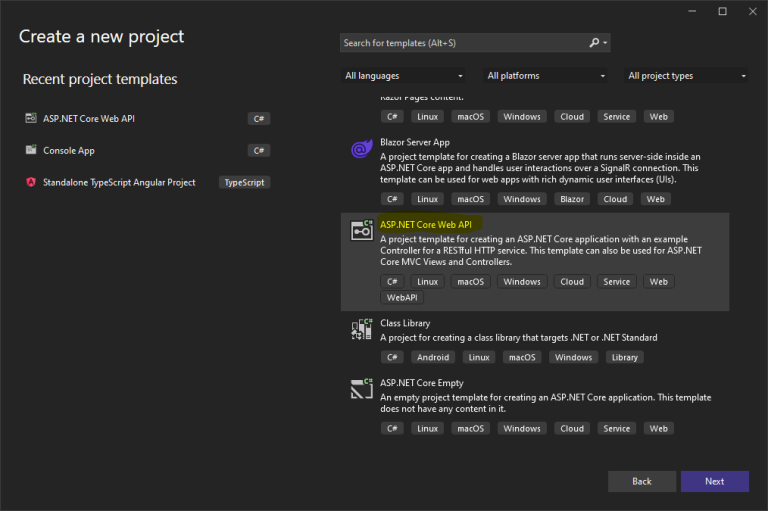
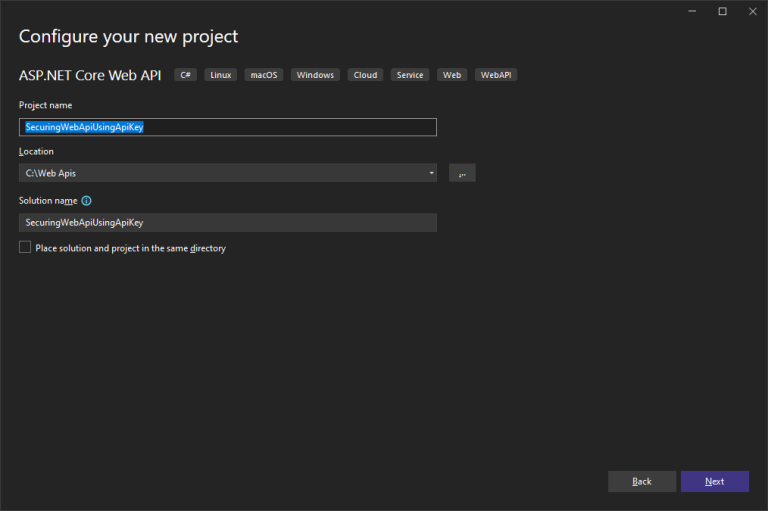
and then give it a name like ‘SecuringWebApiUsingApiKey’ then press Next:
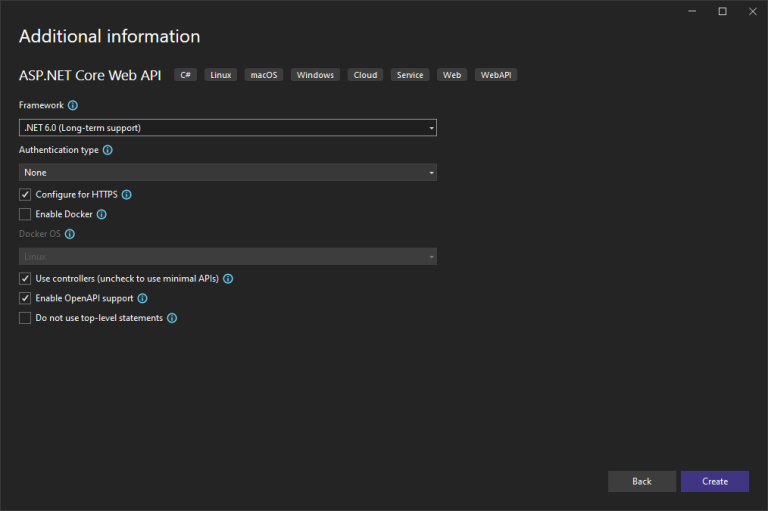
From the following screen choose the .NET Framework, which is .NET 6.0. Keep the rest of options as default and press Create:
Wait a moment until Visual studio prepares and initializes your new project and make it ready for you.
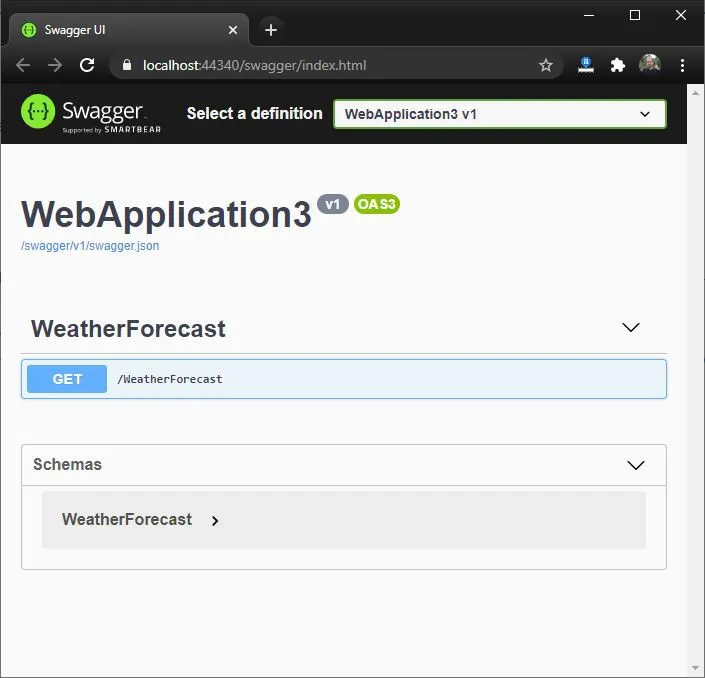
Just to make sure everything is set and ready on your localhost, press F5 or click on the Run button to smoke test your initial application.
If you see something like the below, then you are all set and ready to start with this tutorial.
Keep the default template WeatherforecastController intact, since we will be using it to showcase how we can secure ASP.NET Web API using API Key Authentication.
There are several ways to implement the API Key Authentication, however in this tutorial I will explain to you 2 ways to achieve it:
API Key Authentication Using Custom Attributes
Now we want to introduce a new custom attribute that will inherit from ASP.NET Core Attributes and it will implement the IAsyncActionResult interface
We will verify that the ApiKey header exists, has a value and its value is actually the correct API Key, unless otherwise we will return a 401 Unauthorized response to the client indicating that the request is not authorized to access the endpoint.
So in our example, let’s go ahead and add an Attribute:
Right click on your project and choose add New Folder
Give it a name, like Attributes
then right click on Attributes folder, and choose add then New item …
Let’s name the Attribute as ApiKeyAttribute.
Now you should have a new class under Attributes folder as below:
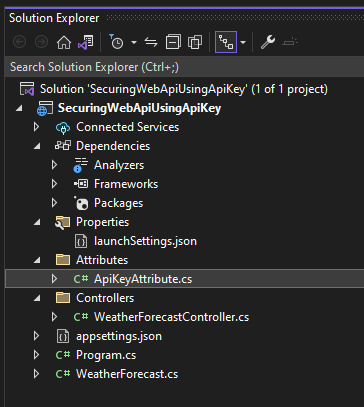
We will be using this attribute to decorate the controller so that any request that is routed to the attributed controller will be redirected to ApiKeyAttribute
Your custom attribute will be inheriting from the base abstract class Attribute of global System.Attribute, which will transform your class into a custom attribute,
And also you will be implementing the IAsyncActionFilter Interface so that your custom attribute will be able to intercept the call request, process it and then route the request back to the controller.
Now let’s see what we will do in this custom attribute:
using Microsoft.AspNetCore.Mvc;
using Microsoft.AspNetCore.Mvc.Filters;
using Microsoft.Extensions.Configuration;
using Microsoft.Extensions.DependencyInjection;
using System;
using System.Threading.Tasks;
namespace SecuringWebApiUsingApiKey.Attributes
{
    [AttributeUsage(validOn: AttributeTargets.Class)]
    public class ApiKeyAttribute : Attribute, IAsyncActionFilter
    {
        private const string APIKEYNAME = "ApiKey";
        public async Task OnActionExecutionAsync(ActionExecutingContext context, ActionExecutionDelegate next)
        {
            if (!context.HttpContext.Request.Headers.TryGetValue(APIKEYNAME, out var extractedApiKey))
            {
                context.Result = new ContentResult()
                {
                    StatusCode = 401,
                    Content = "Api Key was not provided"
                };
                return;
            }
            var appSettings = context.HttpContext.RequestServices.GetRequiredService<IConfiguration>();
            var apiKey = appSettings.GetValue<string>(APIKEYNAME);
            if (!apiKey.Equals(extractedApiKey))
            {
                context.Result = new ContentResult()
                {
                    StatusCode = 401,
                    Content = "Api Key is not valid"
                };
                return;
            }
            await next();
        }
    }
}
so let me explain what we are doing:
[AttributeUsage(validOn: AttributeTargets.Class)]
this decoration is also an Attribute that indicates and specifies where the ApiKeyAttribute will be used, in our case we have specified that ApiKeyAttribute will only be used on classes , like Controllers.
The AttributeTargets is an enum that applies flags, so you can use the pipe | operator (bitwise or) to specify more usages for your custom attribute, so the below would indicate the the ApiKeyAttribute can be used on both classes and/or methods (Controller and/or action method)
[AttributeUsage(validOn: AttributeTargets.Class | AttributeTargets.Method)]
Ok, so now allow me to explain the first logical section of the code:
if (!context.HttpContext.Request.Headers.TryGetValue(APIKEYNAME, out var extractedApiKey))
{
    context.Result = new ContentResult()
    {
         StatusCode = 401,
         Content = "Api Key was not provided"
    };
    return;
}
Now if the header doesn’t include the ApiKey as key, then we will return a 401 Unauthorized response code with a message indicating that the API Key was not provided.
You can leave the Content field empty or just simply return UnauthorizedResult instead of ContentResult without having to specific the StatusCode and the Content and that will just return 401 without any message.
If the ApiKey header was sent, we will then move to the next step which is validating that the value of the ApiKey header matches the ApiKey defined in our API project.
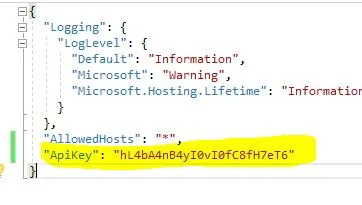
Now, let’s go and create an API Key. For this sake of this tutorial, we will be adding the API Key inside the appsettings.json file, which is the settings file that resides in your ASP.NET Core Web API Project.
so let’s open it and add the ApiKey setting, as the below:
Notes:
It is always important to choose an API Key that is strong enough (a combination of a random and unique long number of alpha numeric characters), just to make it easier to guess and random.
Another note, never share the same API Key with more than 1 client, the intent of the API Key is to authenticate the client or the project, so you need to keep it unique per client.
Now let’s go back to our example and explain the rest of the method:
There are several ways to read the appsettings.json file in ASP.NET Core Web API Project, but you can rely on the dependency injection and configuration extensions libraries of Microsoft to get the load the settings file and read its values:
var appSettings = context.HttpContext.RequestServices.GetRequiredService<IConfiguration>();
var apiKey = appSettings.GetValue<string>(APIKEYNAME);
Now we have obtained our API Key value that is defined within the appsettings.json file, we will match it versus the extracted API Key value from the request headers collection. If both match, then we are good to route the request to the controller to run its intended http action (get, post…etc)
Otherwise, we will fail the request with a 401 Unauthorized response and a message indicating that the client is unauthorized.
if (!apiKey.Equals(extractedApiKey))
            {
                context.Result = new ContentResult()
                {
                    StatusCode = 401,
                    Content = "Unauthorized client"
                };
                return;
                }
The Decoration
Now, the final part we want here is that we need to decorate our Controller with the ApiKey Attribute so that we can authenticate the client that is calling our endpoint
So open WeatherForecastController and add [ApiKey] above the WeatherForecastController class:
[ApiKey]
public class WeatherForecastController : ControllerBase
Make sure to include the new namespace at the top of the controller class:
using SecuringWebApiUsingApiKey.Attributes;
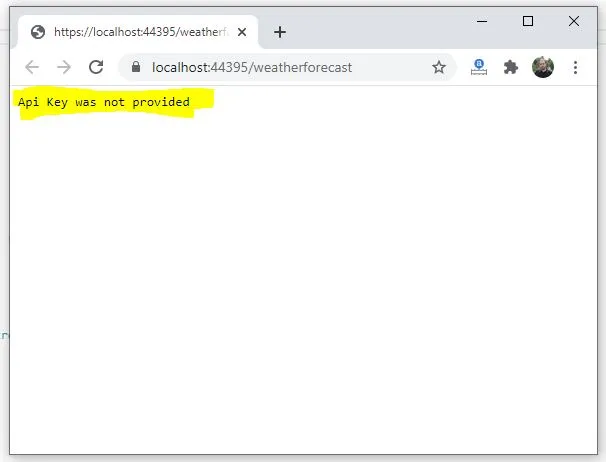
Now let’s run our application and notice the message on the browser:
Testing on Postman
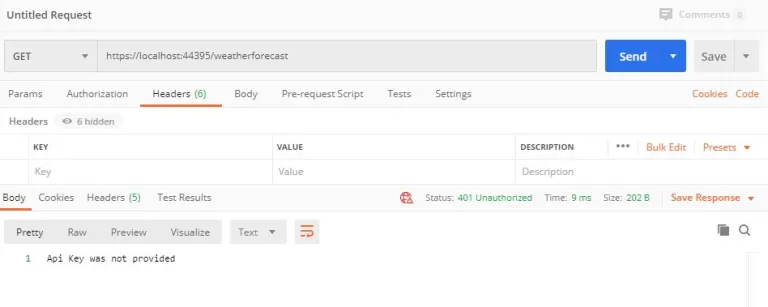
To have a better visibility on what’s happening and control our testing parameters we will be using Postman.
Keep the localhost running on your browser, and open Postman.
Now, let’s try to run the same URL without sending anything in the headers, notice the status is: 401 Unauthorized and the response body is showing the message “Api Key was not provided”
401 Unauthorized. Api Key was not provided.
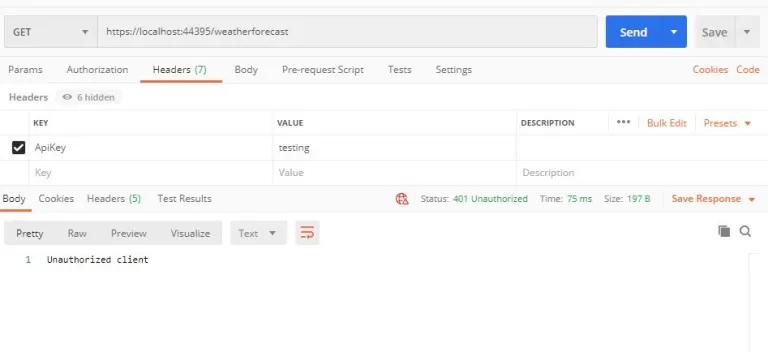
Now let’s try to send the correct header name but with the wrong value, you will get the same Status as 401 , but the message will be different, because it passed the first step of having the actual ApiKey header sent, but its value is not correct:
401 Unauthorized. Unauthorized Client.
Now let’s make our client pass the validation by sending the correct API Key in the header:
200 OK
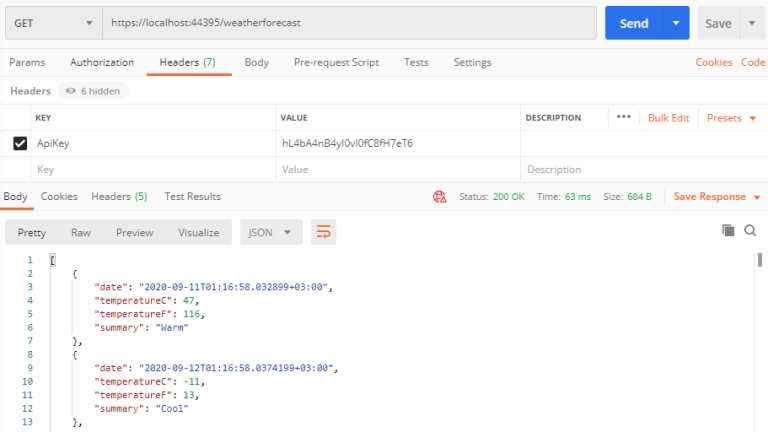
And now we have a response code of 200 OK and the response body is the actual data returned by the default GET method of /weatherforecast endpoint.
API Key Authentication Using a Custom Middleware
With a custom ASP.NET Core Middleware you are able to intercept and process the request object in a single place.
You can intercept each and every request that comes to your published web APIs and tap into the request headers collection and search for the API key header and validate its value.
So we will be doing almost exactly the same logic which we did in our custom attribute but this time within a middleware.
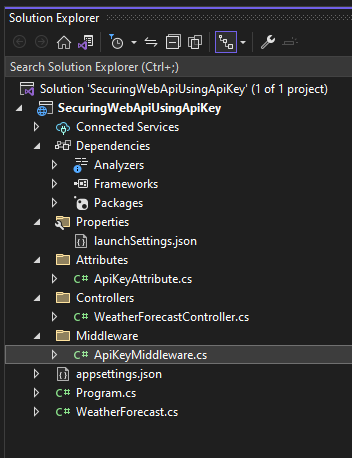
Let’s begin by creating a new folder with name ‘Middleware’ and then followed by a class file with name ApiKeyMiddleware:
What defines a middleware is its constructor that takes an instance of RequestDelegate Class, this instance is actually the pipeline passed between the ASP.NET Core Middleware collection. so this custom middleware will also receive this instance of pipeline and do some operations on it.
The next important thing is the InvokeAsync method that you need to define in this middleware so that it will contain the main process and in our case the main process will be to search and validate the ApiKey header name and value within the httpcontext request headers collection, so this need to be passed in the method argument.
using Microsoft.AspNetCore.Http;
using Microsoft.Extensions.Configuration;
using Microsoft.Extensions.DependencyInjection;
using System.Threading.Tasks;
namespace SecuringWebApiUsingApiKey.Middleware
{
    public class ApiKeyMiddleware
    {
        private readonly RequestDelegate _next;
        private const string APIKEYNAME = "ApiKey";
        public ApiKeyMiddleware(RequestDelegate next)
        {
            _next = next;
        }
        public async Task InvokeAsync(HttpContext context)
        {
            if (!context.Request.Headers.TryGetValue(APIKEYNAME, out var extractedApiKey))
            {
                context.Response.StatusCode = 401;
                await context.Response.WriteAsync("Api Key was not provided. (Using ApiKeyMiddleware) ");
                return;
            }
            var appSettings = context.RequestServices.GetRequiredService<IConfiguration>();
            var apiKey = appSettings.GetValue<string>(APIKEYNAME);
            if (!apiKey.Equals(extractedApiKey))
            {
                context.Response.StatusCode = 401;
                await context.Response.WriteAsync("Unauthorized client. (Using ApiKeyMiddleware)");
                return;
            }
            await _next(context);
        }
    }
}
It is somehow similar to what we have done in the custom attribute, but the main difference that you will notice here is that we cannot directly set the Response object of the context but we have to assign the statuscode and message separately.
context.Response.StatusCode = 401;
await context.Response.WriteAsync("Api Key was not provided. (Using ApiKeyMiddleware)");
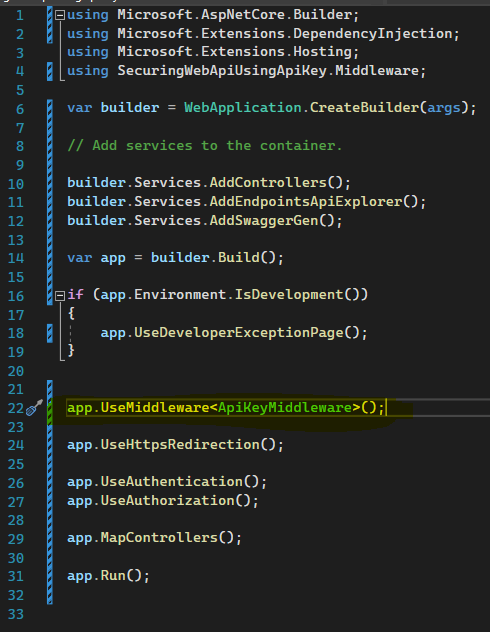
Now the middleware has to be injected or included to our pipeline, we will do this in the Program.cs class
Add the following line:
app.UseMiddleware<ApiKeyMiddleware>();
And below is how your program.cs file should look like, while injecting the ApiKeyMiddleware into the app pipline:
This way you will be applying this custom API Key Middleware over your every single controller in your project, not just specific controller or method like the custom attributes.
A middleware is also very useful in other situations such as where you want to apply logging and general exception handling over your all APIs. There are so many use cases for to use the ASP.NET Core Middleware.
So now, just before you run the application again, just make sure to remove the [ApiKey] attribute from your WeatherForecastController so that we can test the new middleware
Now let’s run the application and see.
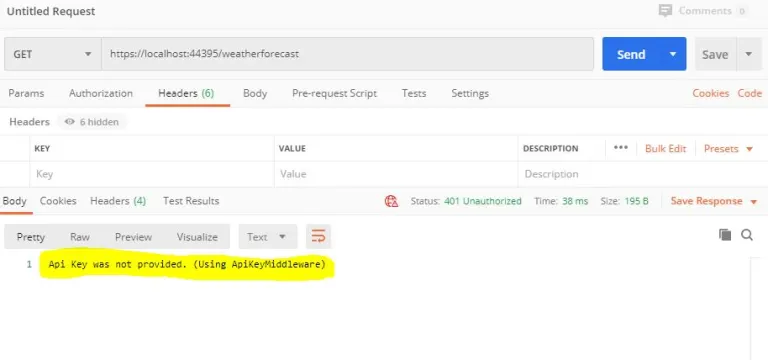
401 Unauthorized. Api Key was not provided. (Using ApiKeyMiddleware)
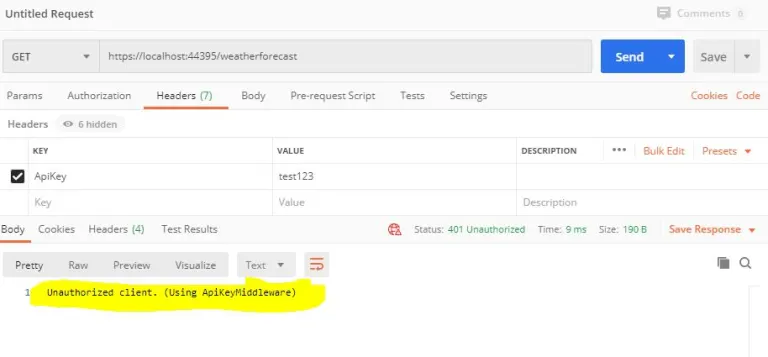
401 Unauthorized. Unauthorized Client. (Using ApiKeyMiddleware)
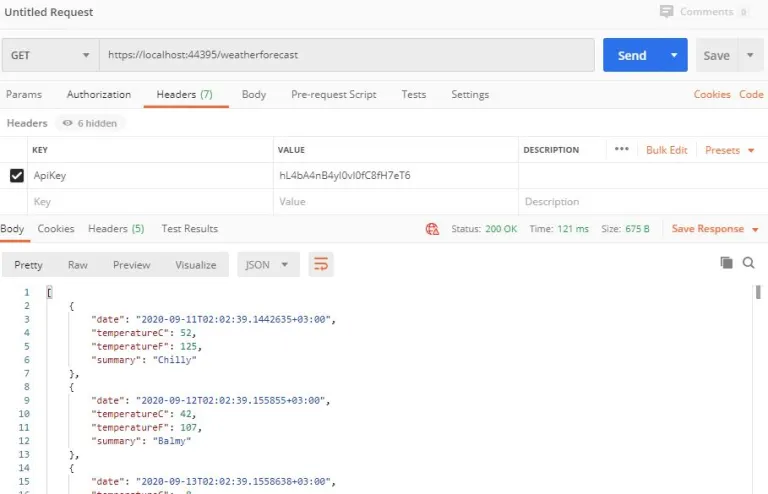
200 OK
This way you will be applying the http message handler over your every single endpoint not just specific like the custom attributes, where you can decorate the endpoints of your choice with the custom attribute to check for the API key.
Summary
We have discussed and explained by example of how you can secure ASP.NET Core Web API using API Key Authentication. This tutorial showed 2 ways of implementing the API Key Authentication: Custom Attributes and Custom Middleware. Both are very good and effective ways to achieve this sort of authentication between your APIs and your APIs client. Hope you enjoy this article.


Andriy Kravets is writer and experience .NET developer and like .NET for regular development. He likes to build cross-platform libraries/software with .NET.

