This article will show you how to integrate ASP.NET MVC application with Stripe payment gateway.
If you were to create a new web application of any complexity you probably wouldn’t want to use .NET webforms to create it.
These days you’d choose to utilise MVC. However, there are lots of legacy ecommerce sites out there built on webforms which may want to take advantage of the excellent Stripe payment processing facilities.
Stripe documentation itself doesn’t give much, or in fact any, help for integrating their platform in .NET webforms applications.
This article describes how to do that.
Steps Integration Stripe with ASP.NET MVC
1. Register a Stripe account https://stripe.com
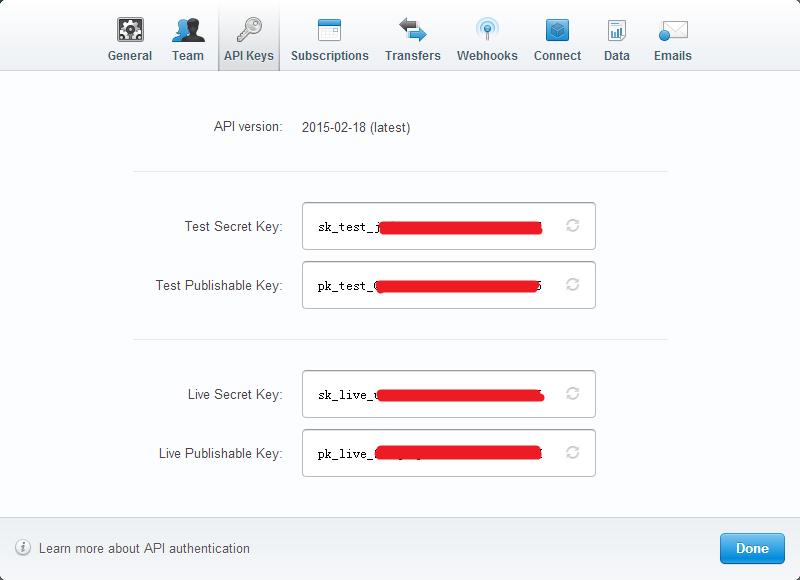
Initially, the account is in TEST mode, you need to activate the account to enter LIVE mode; click “Your Account” -> “Account Settings”, the following pop-up box appears:

If it is TEST mode, please use Test Secret Key and Test Publishable Key, otherwise please use the two keys related to LIVE; how to use it, please continue to read
2. Install Stripe
Use NuGet to install Stripe, you will find Stripe and Stripe.net through the search, please install Stripe. The specific process is skipped!
Can go tohttps://github.com/nberardi/stripe-dotnetDownload the source code
3. Integrated payment
<form action="/ChargeController/Charge"
    <script src="https://checkout.stripe.com/checkout.js" type="text/javascript"
        data-key="your-test-publishable-key"
        data-image="your-website-image,size 128*128"
        data-name="Demo Site"
        data-description="2 widgets (£20.00)"
        data-currency="GBP"
        data-amount="2500" />
</form>
Embed the above Script into the form, there will be a ‘Pay with Card‘ button; Of course, you can also use custom buttons according to your needs. For details, please refer to the official website of Stripe.
Click the button, fill out the Dialog in the payment information that pops up, after filling in correctly, a stripeToken will be generated, and POST to the ChargeController/Charge along with other content of the form.
4. Perform payment
[HttpPost]
public ActionResult Charge(FormCollection form)
{
    string token = form["stripeToken"];
    string email = form["stripeEmail"];

    string apiKey = "sk_test_xxxxxxxxxxxxxxx";
    var stripeClient = new Stripe.StripeClient(apiKey);

    dynamic response = stripeClient.CreateChargeWithToken(2000, token, "NOK", email);
    if (response.IsError == false && response.Paid)
    {
        // success
        string id = response.Id;//Payment Id
                         bool livemode = response.LiveMode;//Payment mode
                         long created = response.Created;//Payment time
                         string status = response.Status;//Payment status
                         object source = response.Source;//Payment source (credit card, etc.)
                         string source_id = response.Source.Id;//Card Id
                         string source_last4 = response.Source.Last4;//The last four digits of the card
                         string source_brand = response.Source.Brand;//Card brand (Visa, etc.)
                         string source_funding = response.Source.Funding;//Funding (Creadit, etc.)
                         int source_exp_month = response.Source.Exp_Month; //Card expiration month
                         int source_exp_year = response.Source.Exp_Year;//Year of card expiration
                         string source_name = response.Source.Name;//payer email name
        return RedirectToAction("Index", "Home");
    }
    return View();
}
At this point, a payment process has been completed. Happy coding!

Andriy Kravets is writer and experience .NET developer and like .NET for regular development. He likes to build cross-platform libraries/software with .NET.


