
Do you have e-commerce website? Or online store? Maybe you want to use Paypal as your shopping cart. The following is short tutorial about how to integrate your Asp.net MVC with Paypal payment gateway.
Steps by Steps to Integrate ASP.NET MVC with Paypal
1. You can sign up with Paypal first
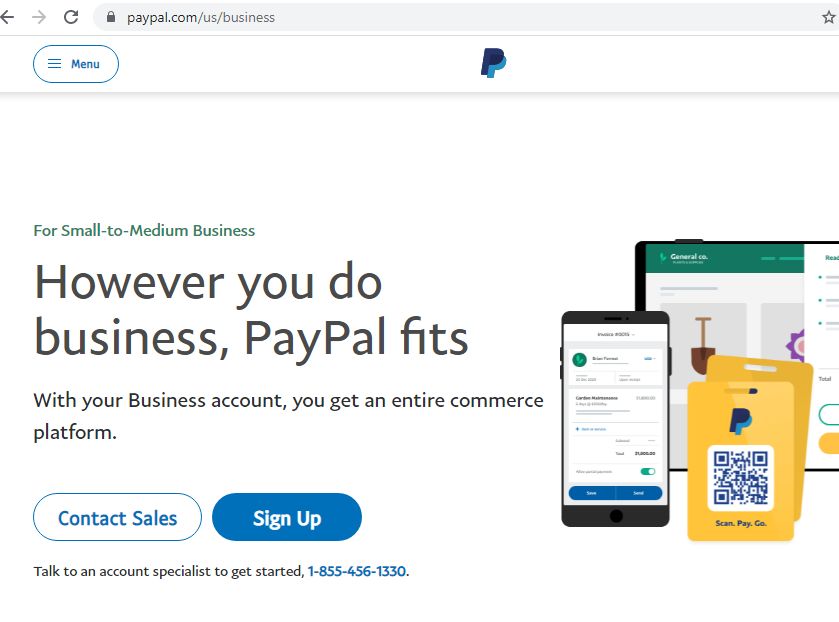
2. You can then click sign up and you can choose Business account. Please see figure below:

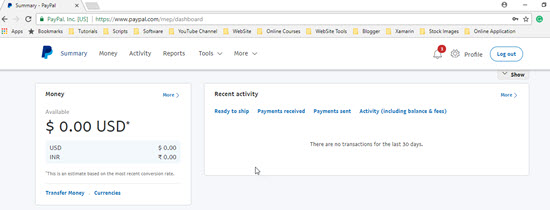
3. PayPal will ask to link your bank account which will be used for withdrawing the amount from PayPal to the bank. For bank account verification, PayPal will send two small deposits to your bank.
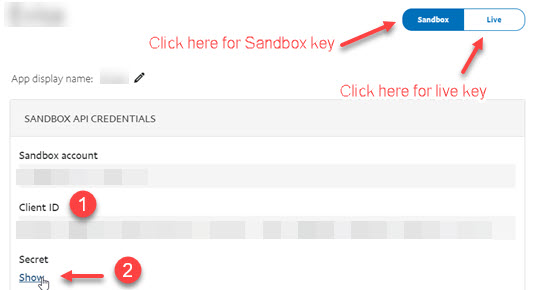
<configSections>
    <section name="paypal" type="PayPal.SDKConfigHandler, PayPal" />
  </configSections>
  <!-- PayPal SDK settings -->
  <paypal>
    <settings>
      <add name="mode" value="sandbox" />
      <add name="connectionTimeout" value="360000" />
      <add name="requestRetries" value="1" />
      <add name="clientId" value="Add-Your-ClientID-Here" />
      <add name="clientSecret" value="Add-Your-ClientSecret-Key-Here" />
    </settings>
  </paypal>
12. Add a new class named it as PaypalConfiguration and add below code.
publicstaticclassPaypalConfiguration
    {
//Variables for storing the clientID and clientSecret key
publicreadonlystaticstring ClientId;
publicreadonlystaticstring ClientSecret;
//Constructor
static PaypalConfiguration()
        {
var config = GetConfig();
            ClientId = config["clientId"];
            ClientSecret = config["clientSecret"];
        }
// getting properties from the web.config
publicstatic Dictionary<string, string> GetConfig()
        {
return PayPal.Api.ConfigManager.Instance.GetProperties();
        }
privatestaticstring GetAccessToken()
        {
// getting accesstocken from paypal
string accessToken = new OAuthTokenCredential
        (ClientId, ClientSecret, GetConfig()).GetAccessToken();
return accessToken;
        }
publicstatic APIContext GetAPIContext()
        {
// return apicontext object by invoking it with the accesstoken
            APIContext apiContext = new APIContext(GetAccessToken());
            apiContext.Config = GetConfig();
return apiContext;
        }
    }
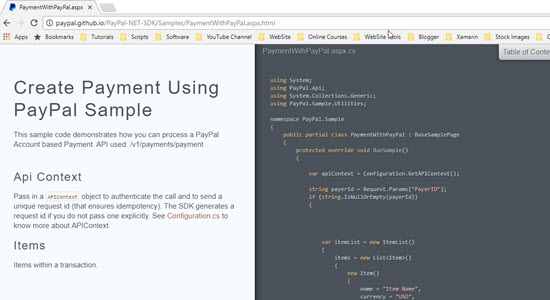
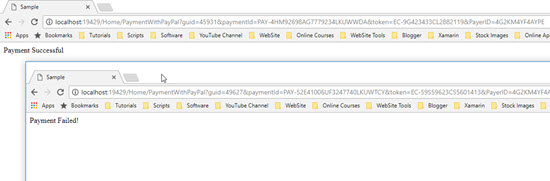
13. Now add an action method named it as PaymentWithPaypal which will be used for redirecting to PayPal payment gateway and for executing the transaction. Basically PaymentWithPaypal action redirect used to the PayPal’s payment page and once user click on pay, it will provide Payer ID which will be used for executing the transaction.
public ActionResult PaymentWithPaypal(string Cancel = null)
        {
//getting the apiContext
            APIContext apiContext = PaypalConfiguration.GetAPIContext();
try
            {
//A resource representing a Payer that funds a payment Payment Method as paypal
//Payer Id will be returned when payment proceeds or click to pay
string payerId = Request.Params["PayerID"];
if (string.IsNullOrEmpty(payerId))
                {
//this section will be executed first because PayerID doesn't exist
//it is returned by the create function call of the payment class
// Creating a payment
// baseURL is the url on which paypal sendsback the data.
string baseURI = Request.Url.Scheme + "://" + Request.Url.Authority +
"/Home/PaymentWithPayPal?";
//here we are generating guid for storing the paymentID received in session
//which will be used in the payment execution
var guid = Convert.ToString((new Random()).Next(100000));
//CreatePayment function gives us the payment approval url
//on which payer is redirected for paypal account payment
var createdPayment = this.CreatePayment(apiContext, baseURI + "guid=" + guid);
//get links returned from paypal in response to Create function call
var links = createdPayment.links.GetEnumerator();
string paypalRedirectUrl = null;
while (links.MoveNext())
                    {
                        Links lnk = links.Current;
if (lnk.rel.ToLower().Trim().Equals("approval_url"))
                        {
//saving the payapalredirect URL to which user will be redirected for payment
                            paypalRedirectUrl = lnk.href;
                        }
                    }
// saving the paymentID in the key guid
                    Session.Add(guid, createdPayment.id);
return Redirect(paypalRedirectUrl);
                }
else
                {
// This function exectues after receving all parameters for the payment
var guid = Request.Params["guid"];
var executedPayment = ExecutePayment(apiContext, payerId, Session[guid] asstring);
//If executed payment failed then we will show payment failure message to user
if (executedPayment.state.ToLower() != "approved")
                    {
return View("FailureView");
                    }
                }
            }
catch (Exception ex)
            {
return View("FailureView");
            }
//on successful payment, show success page to user.
return View("SuccessView");
        }
private PayPal.Api.Payment payment;
private Payment ExecutePayment(APIContext apiContext, string payerId, string paymentId)
        {
var paymentExecution = new PaymentExecution() { payer_id = payerId };
this.payment = new Payment() { id = paymentId };
returnthis.payment.Execute(apiContext, paymentExecution);
        }
private Payment CreatePayment(APIContext apiContext, string redirectUrl)
        {
//create itemlist and add item objects to it
var itemList = new ItemList() { items = new List<Item>() };
//Adding Item Details like name, currency, price etc
            itemList.items.Add(new Item()
            {
                name = "Item Name comes here",
                currency = "USD",
                price = "1",
                quantity = "1",
                sku = "sku"
            });
var payer = new Payer() { payment_method = "paypal" };
// Configure Redirect Urls here with RedirectUrls object
var redirUrls = new RedirectUrls()
            {
                cancel_url = redirectUrl + "&Cancel=true",
                return_url = redirectUrl
            };
// Adding Tax, shipping and Subtotal details
var details = new Details()
            {
                tax = "1",
                shipping = "1",
                subtotal = "1"
            };
//Final amount with details
var amount = new Amount()
            {
                currency = "USD",
                total = "3", // Total must be equal to sum of tax, shipping and subtotal.
                details = details
            };
var transactionList = new List<Transaction>();
// Adding description about the transaction
            transactionList.Add(new Transaction()
            {
                description = "Transaction description",
                invoice_number = "your generated invoice number", //Generate an Invoice No
                amount = amount,
                item_list = itemList
            });
this.payment = new Payment()
            {
                intent = "sale",
                payer = payer,
                transactions = transactionList,
                redirect_urls = redirUrls
            };
// Create a payment using a APIContext
returnthis.payment.Create(apiContext);
        }
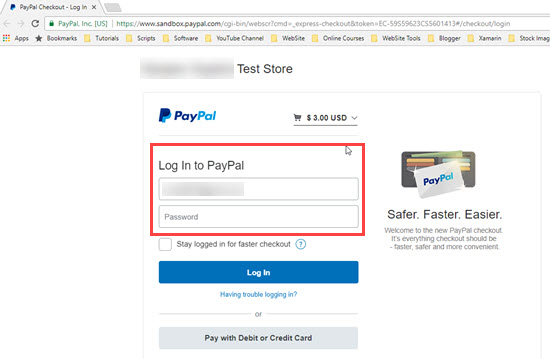
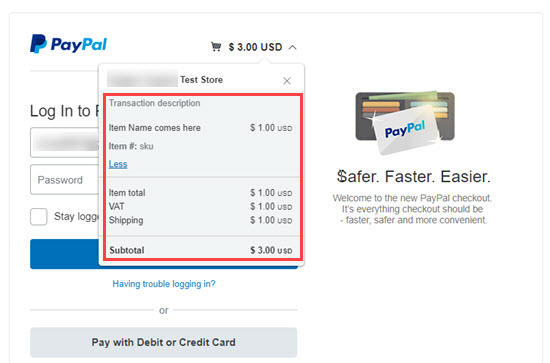
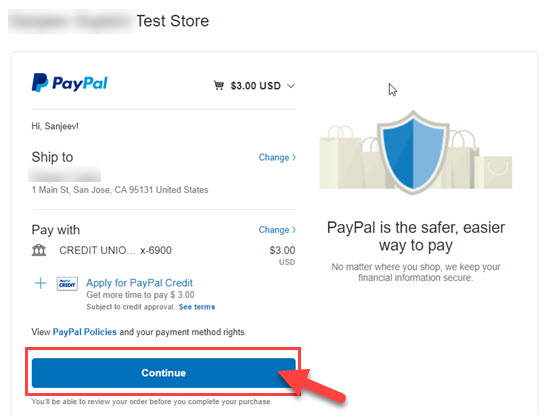
14. Now build and call PaymentWithPaypal action of Home controller. You will be redirected to the sandbox payment page of PayPal. Login here with the Business account created on sandbox in earlier steps.
Conclusion
From tutorial above, we hope that above tutorial can help you to integrate your payment gateway with your Asp.net application. We will back on other interesting tutorial.

Javier is Content Specialist and also .NET developer. He writes helpful guides and articles, assist with other marketing and .NET community work

