In this article, we will show how to create Asp.net Core 3.1 web application that acts like a chat application. Please just make sure you install Visual Studio and .NET Core 3.1 from Microsoft website.
Get Started
Once you have installed both VS and .NET Core 3.1, then please kindly follow this guidelines
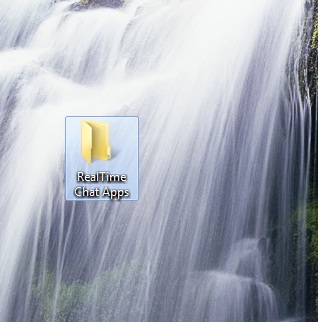
1. Create a folder at the location where you want to save the source code of your chat application. I create it on my desktop.
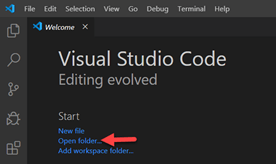
2. Open Visual Studio Code and open this folder
3. Open integrated terminal
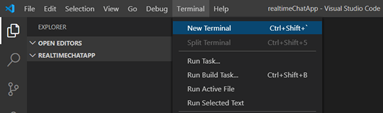
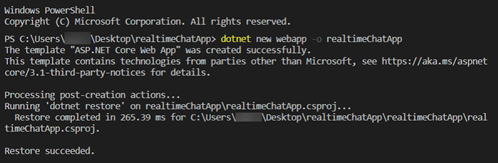
4. We will be using .NET Core CLI to create the new web application and install the required libraries. So, let’s first develop a Asp.NET Core Web application and copy the below command to the terminal and press Enter.
dotnet new webapp -o realtimeChatApp
5. Now, hit the following command to move your terminal active directory to the project directory
cd realtimeChatApp
![]()
6. We will use a new tool known as “Libman” or Library manager. It is a Client-side content manager tool for web apps. To learn more about it, you can follow the following article.
https://devblogs.microsoft.com/aspnet/library-manager-client-side-content-manager-for-web-apps/
7. Install Libman in your project directory. Hit the following command in the terminal.
dotnet tool install -g Microsoft.Web.LibraryManager.Cli
![]()
Note: The above screenshot shows an error because for the purpose of this demo, I already installed this on my system. When you install on your system, this command will install this tool at the Global level.
8. Install signalR library using Libman in your project directory. Please hit the below command in terminal.
libman install @microsoft/signalr@latest -p unpkg -d wwwroot/js/signalr-js --files dist/browser/signalr.js --files dist/browser/signalr.min.js
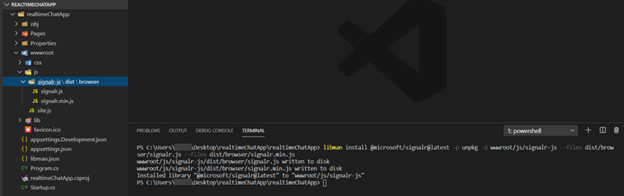
In the screenshot above, you can see that once I hit the command, on the left pane, a Libman.json file is created. Also, the path that I mentioned is automatically created in wwwroot folder and corresponding files are copied there. This is the flexibility that we get with Libman.
Now, we are done with all the setup. Let’s code.
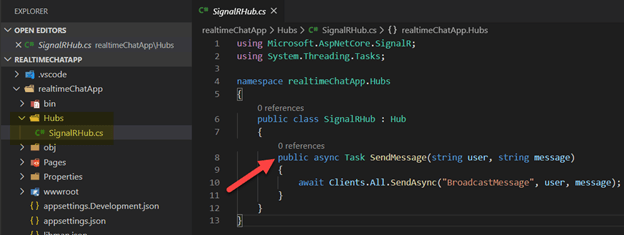
9. At the very first, we need to create a SignalR hub that will create a persistent connection between the client and the server.
Create a folder named “Hubs” and create a new file with name “SignalRHub.cs”. Replace the code with the following code in the file.
using Microsoft.AspNetCore.SignalR;
using System.Threading.Tasks;

namespace realtimeChatApp.Hubs
{
          public class SignalRHub : Hub
          {
                  public async Task SendMessage(string user, string message)
                  {
                          await Clients.All.SendAsync("BroadcastMessage", user, message);
                  }
          }
}
In the above code, we are inheriting from “Hub” class which is a part of .NET Core SignalR library. This will make persistent connections.
Final Code should look like this with the same folder structure as shown.
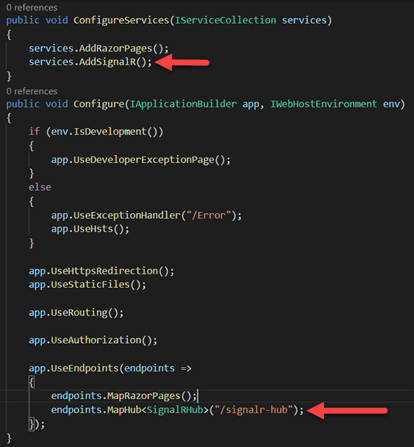
10. Since we have created the Hub, we need to refer this hub in the Startup.cs file so that when the application runs, it starts the SignalR connection to this hub and our client code can subscribe to it.
Open Startup.cs file and make the following highlighted changes.
Now, we have successfully configured the server code. We need a client page, that can send and receive messages from this Hub. We will achieve this with the signalR.js library that we installed with Libman.
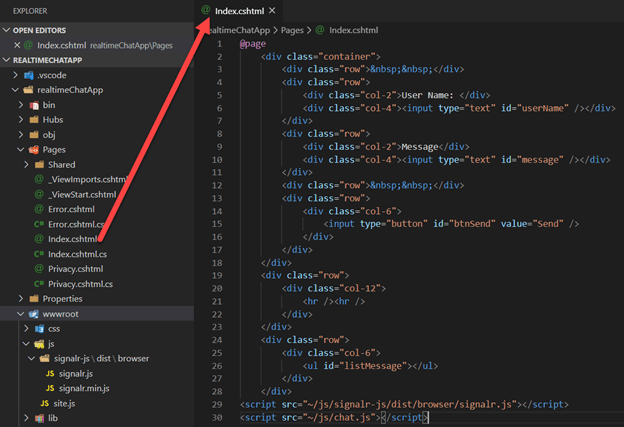
11. We will create a UI screen where user can enter his name, enter the message and click a send button.
Go to Pages -> Index.cshtml and replace the code with the following code.
@page <div class="container"> <div class="row"> </div> <div class="row"> <div class="col-2">User Name: </div> <div class="col-4"><input type="text" id="userName" /></div> </div> <div class="row"> <div class="col-2">Message</div> <div class="col-4"><input type="text" id="message" /></div> </div> <div class="row"> </div> <div class="row"> <div class="col-6"> <input type="button" id="btnSend" value="Send" /> </div> </div> </div> <div class="row"> <div class="col-12"> <hr /><hr /> </div> </div> <div class="row"> <div class="col-6"> <ul id="listMessage"></ul> </div> </div>

As you can see in the screenshot below, we are referencing two JS files. Once is the Signalr.js file that we installed with Libman and other is Chat.js.
Chat.js is that file where we will write our Javascript code that will connect to the Hub to send and receive messages with persistent connection.
12. Now, create a file with name “chat.js” in the js folder in wwwroot and replace with the following code.
"use strict";
// Creating a connection to SignalR Hub
var connection = new signalR.HubConnectionBuilder().withUrl("/signalr-hub").build();
// Starting the connection with server
connection.start().then(function() {}).catch(function(err) {
return console.error(err.toString());
});
// Sending the message from Client
document.getElementById("btnSend").addEventListener("click", function(event) {
var username = document.getElementById("userName").value;
var message = document.getElementById("message").value;
connection.invoke("SendMessage", username, message).catch(function(err) {
return console.error(err.toString());
});
event.preventDefault();
});
// Subscribing to the messages broadcasted by Hub every time when a new message is pushed to it
connection.on("BroadcastMessage", function(user, message) {
var finalMessage = message.replace(/&/g, "&").replace(/</g, "<").replace(/>/g, ">");
var displayMsg = user + " : " + finalMessage;
var li = document.createElement("li");
li.textContent = displayMsg;
document.getElementById("listMessage").appendChild(li);
});
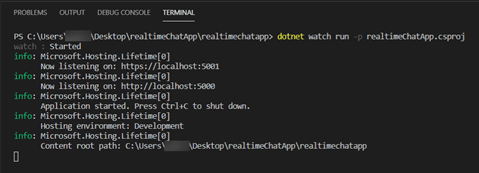
Last Step: Run the application with the following command.
dotnet watch run -p realtimeChatApp.csproj
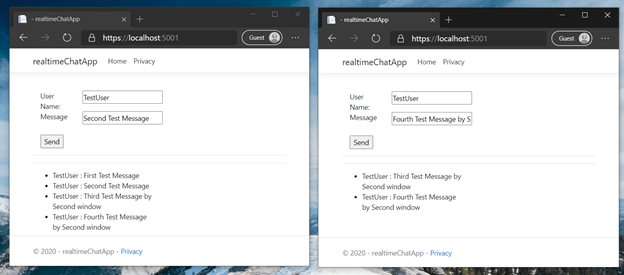
Now, Go to your browser and run http://localhost:5000. You will be able to see the UI page that we created. Below is the output.
If you notice above, we have two clients that are connecting to same hub. When one client sends the message, it is broadcasted to all connected clients.

Javier is Content Specialist and also .NET developer. He writes helpful guides and articles, assist with other marketing and .NET community work