
This article will explain how to create and deploy dotnet templates that can be used from Visual Studio or the dotnet CLI.
Folder Structure
When creating dotnet templates, the folder structure of the template is crucial. It is necessary to create the .template.config file inside the content folder. When Visual Studio is installed, a template.json file and an icon.png image are contained in this folder and are shown there. The template.json’s json structure then contains a few necessary objects and properties. Different kinds of templates can be made.
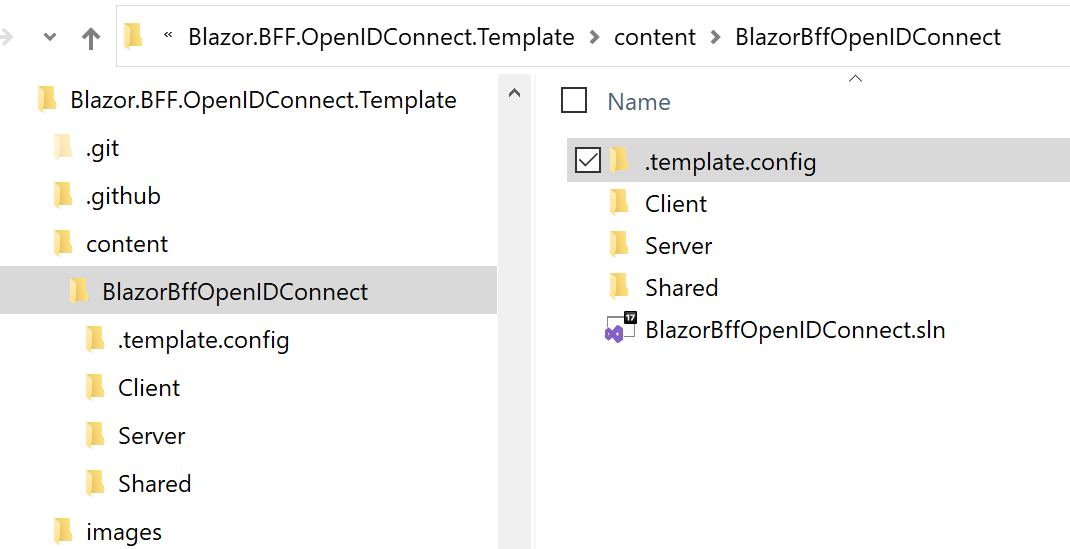
An example of a template I made for a Blazor ASP.NET Core solution with three projects is the Blazor.BFF.OpenIDConnect.Template project, which uses OpenID Connect to implement the backend for frontend security architecture.
{
    "author": "damienbod",
    "classifications": [
        "AspNetCore",
        "WASM",
        "OpenIDConnect",
        "OAuth2",
        "Web",
        "Cloud",
        "Console",
        "Solution",
        "Blazor"
    ],
    "name": "ASP.NET Core Blazor BFF hosted WASM OpenID Connect",
    "identity": "Blazor.BFF.OpenIDConnect.Template",
    "shortName": "blazorbffoidc",
    "tags": {
        "language": "C#",
        "type":"solution"
    },
    "sourceName": "BlazorBffOpenIDConnect",
    "preferNameDirectory": "true",
    "guids": [
        "CFDA20EC-841D-4A9C-A95C-2C674DA96F23",
        "74A2A84B-C3B8-499F-80ED-093854CABDEA",
        "BD70F728-398A-4A88-A7C7-A3D9B78B5AE6"
    ],
    "symbols": {
        "HttpsPortGenerated": {
          "type": "generated",
          "generator": "port",
          "parameters": {
            "low": 44300,
            "high": 44399
          }
        },
        "HttpsPortReplacer": {
          "type": "generated",
          "generator": "coalesce",
          "parameters": {
            "sourceVariableName": "HttpsPort",
            "fallbackVariableName": "HttpsPortGenerated"
          },
          "replaces": "44348"
        }
    }
}
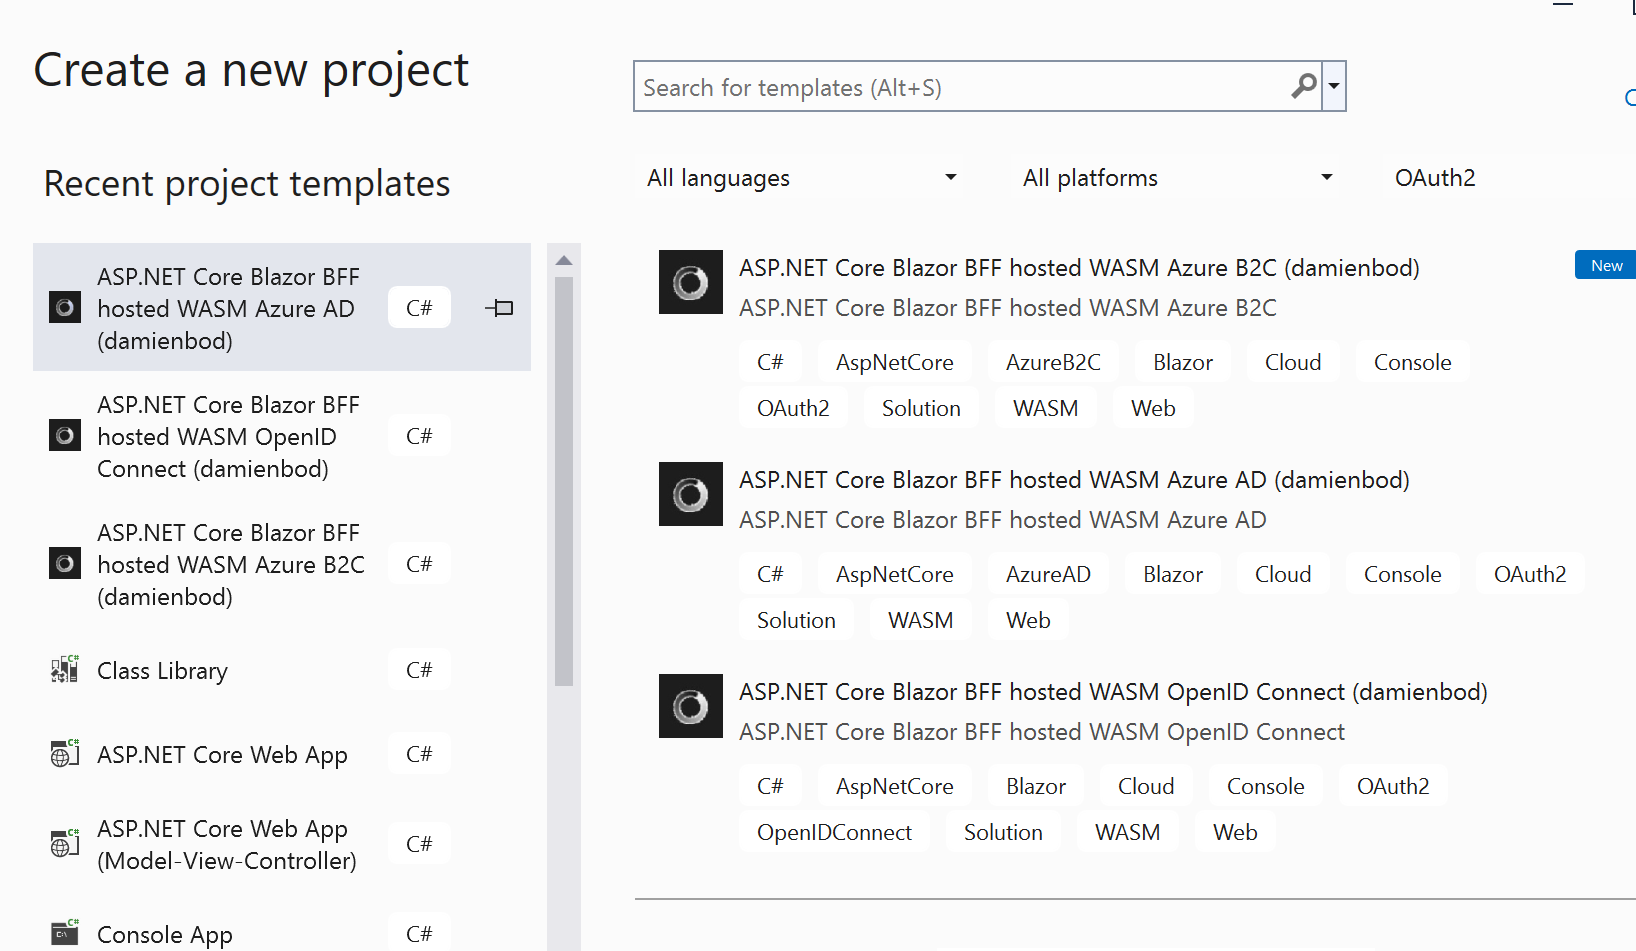
To display the template in Visual Studio, the tags object needs to be properly set. Solution, Project, or Item must be selected as the type property. The template will still install and run from the CLI if the type property is set with the correct value, but it won’t be visible in Visual Studio.
"tags": {
  "language": "C#",
  "type":"solution" // project, item
},
HTTP Ports
Whenever I build a new project or solution from a template, I like to update the HTTP ports. Since the user would have to add a value in Visual Studio, I do not want to add a parameter for the HTTP port. Without any input from the user, the template will produce nothing. Anywhere in a launchSettings.json file where the port 44348 is found, this will be updated with a new value inside the range. Only if the port number is already present in the template will this function. It must correspond to your content!
"symbols": {
    "HttpsPortGenerated": {
      "type": "generated",
      "generator": "port",
      "parameters": {
        "low": 44300,
        "high": 44399
      }
    },
    "HttpsPortReplacer": {
      "type": "generated",
      "generator": "coalesce",
      "parameters": {
        "sourceVariableName": "HttpsPort",
        "fallbackVariableName": "HttpsPortGenerated"
      },
      "replaces": "44348"
    }
}
Solution GUIDs
The GUIDs are used to replace the existing solution GUIDs from the solution file with new random GUIDs when creating a new solution using the template. The GUIDs must exist in your solution file, otherwise there is nothing to replace.
"guids": [
   "CFDA20EC-841D-4A9C-A95C-2C674DA96F23",
   "74A2A84B-C3B8-499F-80ED-093854CABDEA",
   "BD70F728-398A-4A88-A7C7-A3D9B78B5AE6"
],
The template is made available as a Nuget package. For this, I employ a nuspec file. Using this, a nupkg file can be produced and uploaded to Nuget. A package could also be produced from a dotnet project file.
<?xml version="1.0" encoding="utf-8"?>
<package xmlns="http://schemas.microsoft.com/packaging/2012/06/nuspec.xsd">
    <metadata>
        <id>Blazor.BFF.OpenIDConnect.Template</id>
        <version>1.2.6</version>
        <title>Blazor.BFF.OpenIDConnect.Template</title>
        <license type="file">LICENSE</license>
        <description>Blazor backend for frontend (BFF) template for WASM ASP.NET Core hosted</description>
<projectUrl>https://github.com/damienbod/Blazor.BFF.OpenIDConnect.Template</projectUrl>
        <authors>damienbod</authors>
        <owners>damienbod</owners>
        <icon>./BlazorBffOpenIDConnect/.template.config/icon.png</icon>
        <language>en-US</language>
        <tags>Blazor BFF WASM ASP.NET Core</tags>
        <requireLicenseAcceptance>false</requireLicenseAcceptance>
        <summary>This template provides a simple Blazor template with BFF server authentication WASM hosted</summary>
        <releaseNotes>Improved template with http port generator, update packages</releaseNotes>
        <repository type="git" url="https://github.com/damienbod/Blazor.BFF.OpenIDConnect.Template" />
        <packageTypes>
            <packageType name="Template" />
        </packageTypes>
    </metadata>
</package>
Installing
The template can be installed using the dotnet CLI. The name of the template is defined in the template file. The dotnet CLI run can be used to create a new solution or project depending on your template type. The -n is used to define the name of the projects and the namespaces.
// install
dotnet new -i Blazor.BFF.OpenIDConnect.Template

// run
dotnet new blazorbffoidc -n YourCompany.Bff
If the tags type is properly set, the template will be visible in Visual Studio after installation using the dotnet CLI. If the appropriate icon.png file is placed in the .template.config folder, the icon will be shown.
Notes
Creating and using templates using the dotnet CLI is really powerful and very simple to use. There are a few restrictions which must be followed and the docs are a bit light. This github repo is a great starting point and is where I would go to learn and create your first template. If deploying the template to Visual Studio and using in the dotnet CLI, you need to test both. Entering HTTP port parameters does not work so good in Visual Studio as no default value is set if the user does not enter this. I was not able to get the VSIX extensions to work within a decent time limit but will probably come back to this at some stage. I had many problems with the target type and XML errors when deploying and so on. The dotnet CLI works great and can be used anywhere and the templates can be used in Visual Studio as well, this is enough for me. I think the dotnet CLI templates feature is great and makes it really used to get started faster when creating software solutions.


Javier is Content Specialist and also .NET developer. He writes helpful guides and articles, assist with other marketing and .NET community work

