In previous article, we have explained steps by steps to install Let’s Encrypt on IIS server. In this article, we will discuss how to create your custom CSR on Windows Server.
What Is CSR (Certificate Signing Request)?
A CSR is the first step to getting a new certificate. As the name says, CSR is the standard request format that most Certificate Authorities accept to issue the certificate. In the next section, we will show how to create a custom CSR on Windows Server.
What Information You Should Include in A CSR?
A Certificate Authority will use CSR to issue the certificate. So you should add the below information to your CSR while creating it.
| Common Name (CN) | The Fully Qualified Domain Name (FQDN). e.g. *.example.com, www.example.com, and mail.example.com. |
| Organization (O) | The legal name of your organization. Do not abbreviate and include any suffixes, such as Inc., Corp., or LLC. |
| Organizational Unit (OU) | The division of your organization handling the certificate. |
| City/Locality (L) | The city where your organization is located. This shouldn’t be abbreviated. |
| State/County/Region (S) | The state/region where your organization is located. This shouldn’t be abbreviated. |
| Country (C) | The two-letter code for the country where your organization is located. |
| Email Address | An email address used to contact your organization. |
Information about the key type and length. The most common key size is RSA 2048, but some CAs, including GlobalSign, support larger key sizes (e.g. RSA 4096+) or ECC keys.
How to Create a Custom CSR in a Windows Server?
To create a CSR in a Windows server,
1. Open MMC in the Windows server
Hit Win + R to open the Run utility
Type mmc and click on ‘OK’.
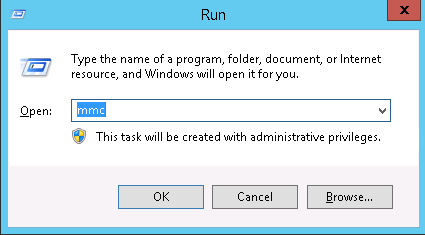
2. Add Certificate Snap-in
Go to File > Add/Remove Snap-in.
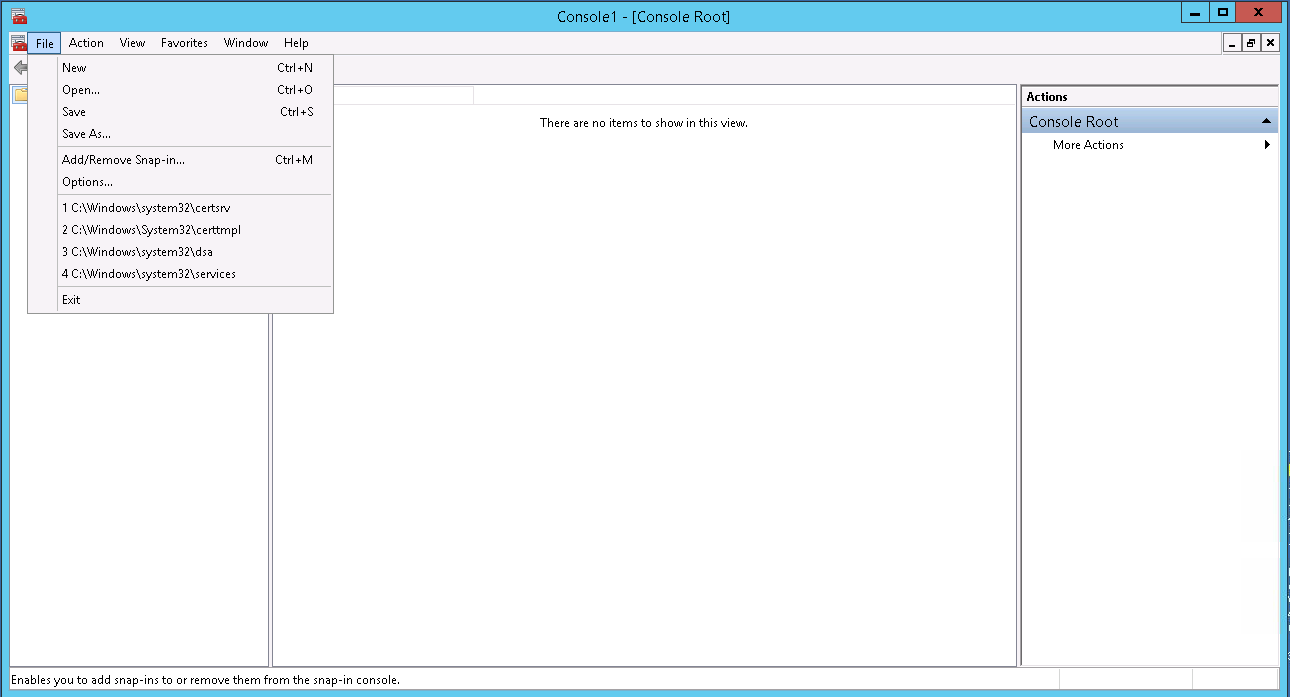
3. Select Certificates and press Add
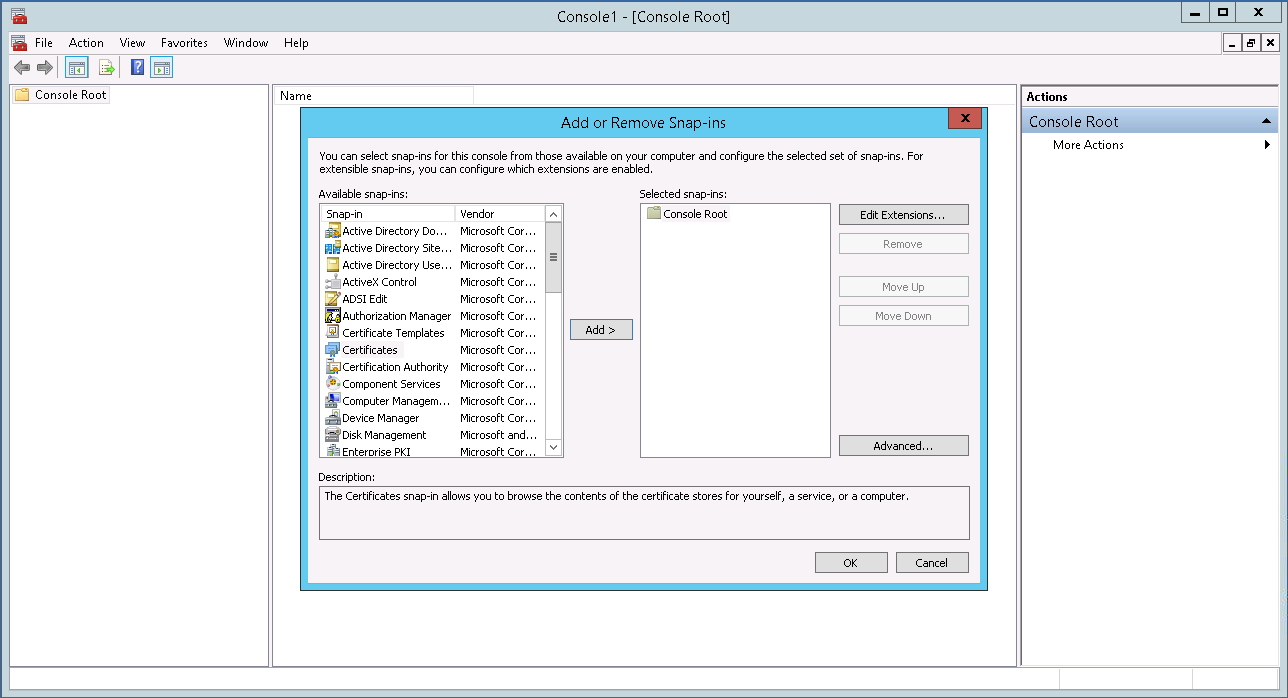
4. Select the User or Computer Certificate snap-in
Select the snap-in in which you want to create the certificate. For demonstration, we are choosing Compute account. Click Next.
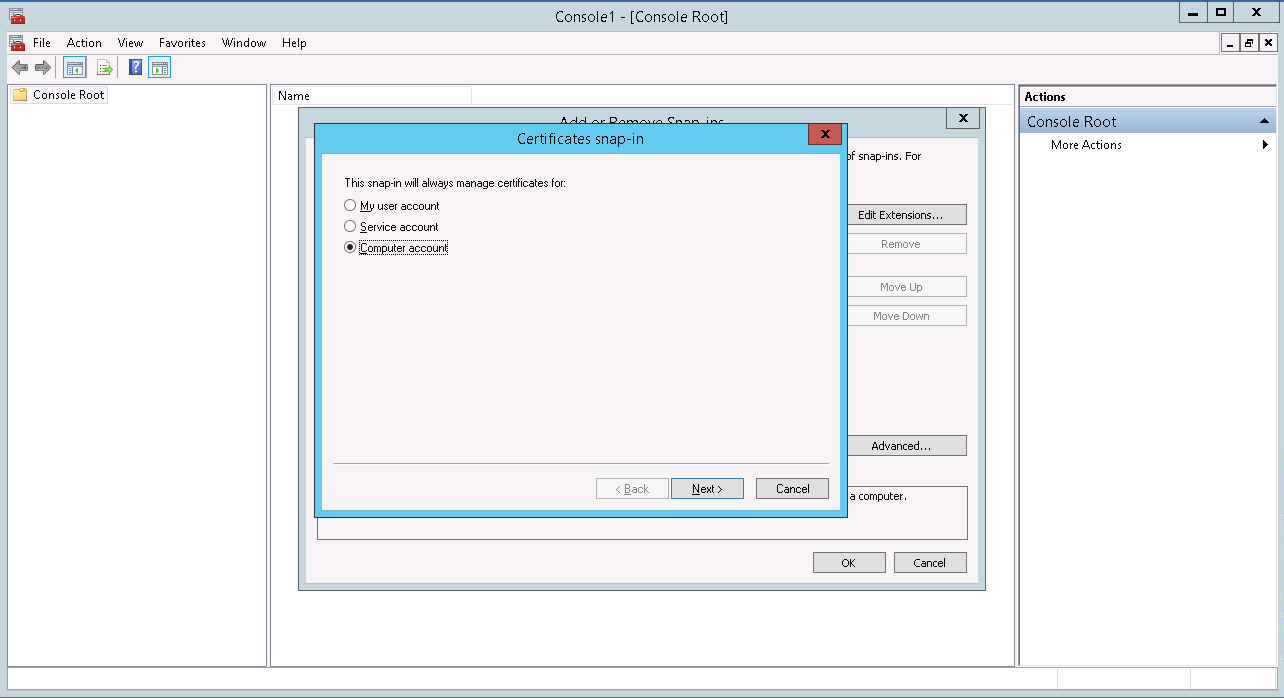
5. Select Local Computer
Select a local computer as you are going to create CSR on the same computer. Click Finish.
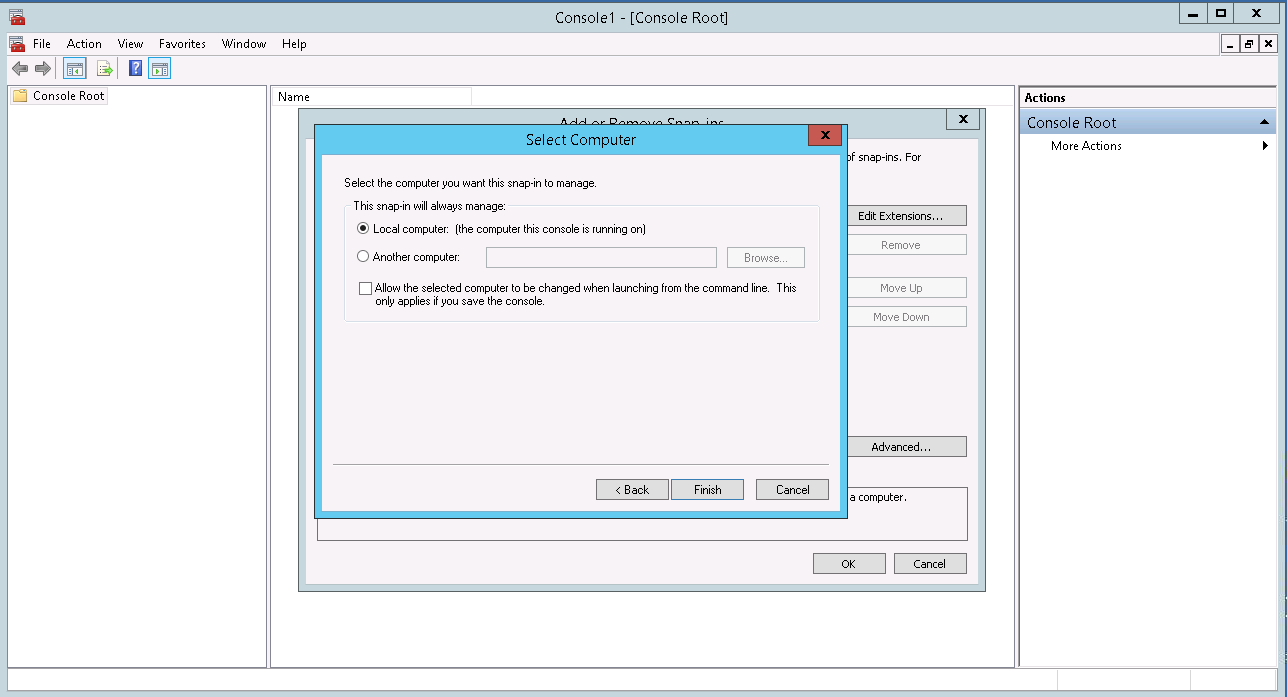
6. Select Certificate (Local Computer) and click Ok
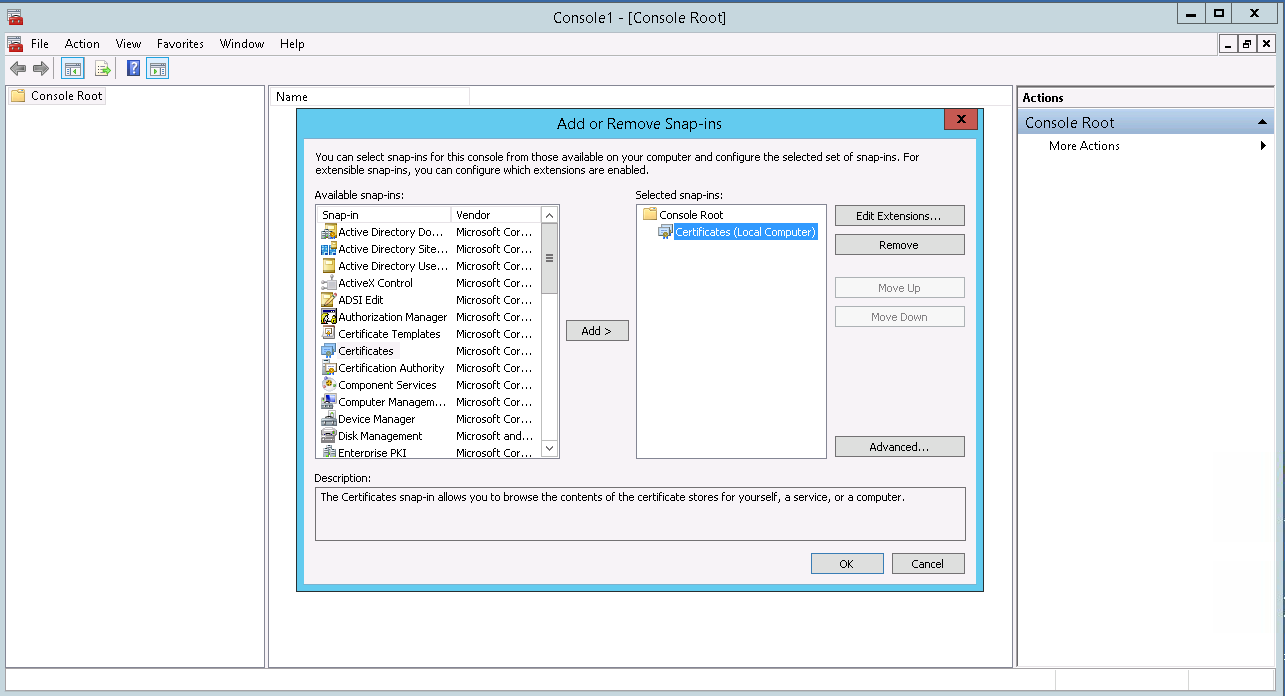
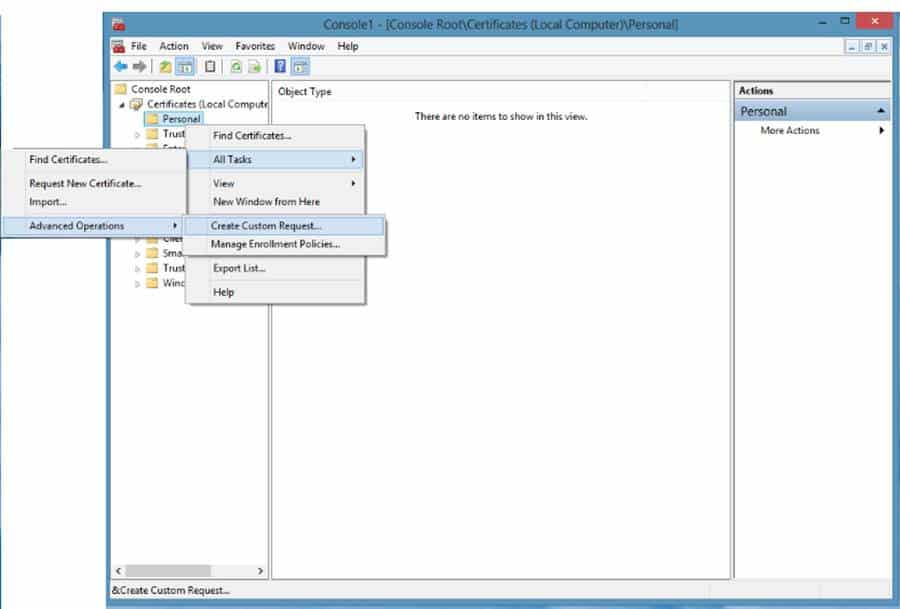
7. Create Custom Request
Access your MMC snap-in> right-click the Personal folder.
Select All Tasks > Advanced Operations > Create Custom Request.
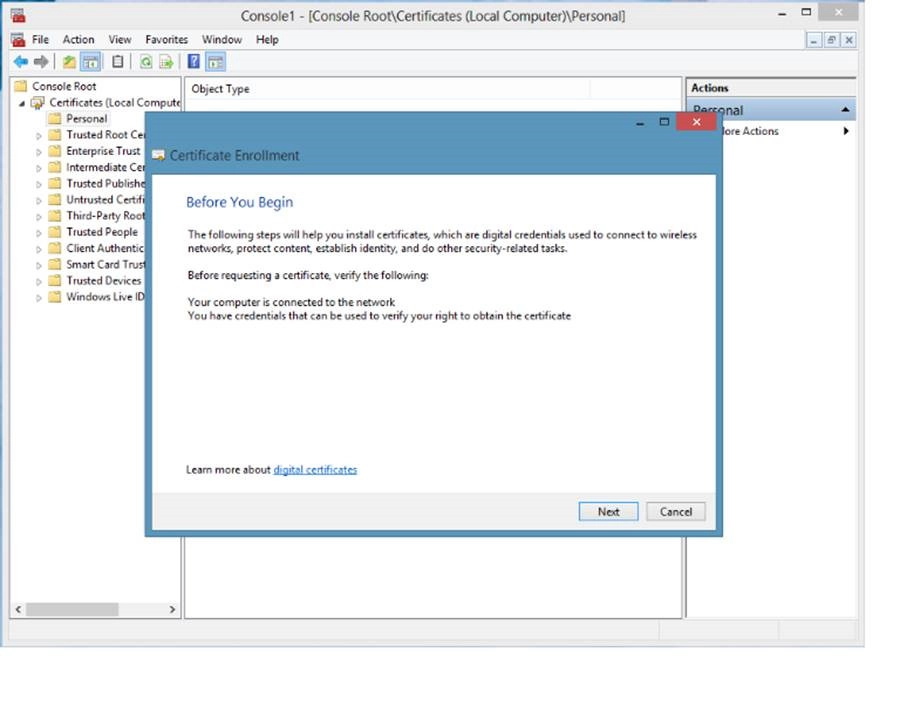
8. CSR generation wizard
The CSR generation wizard will open > Click Next.
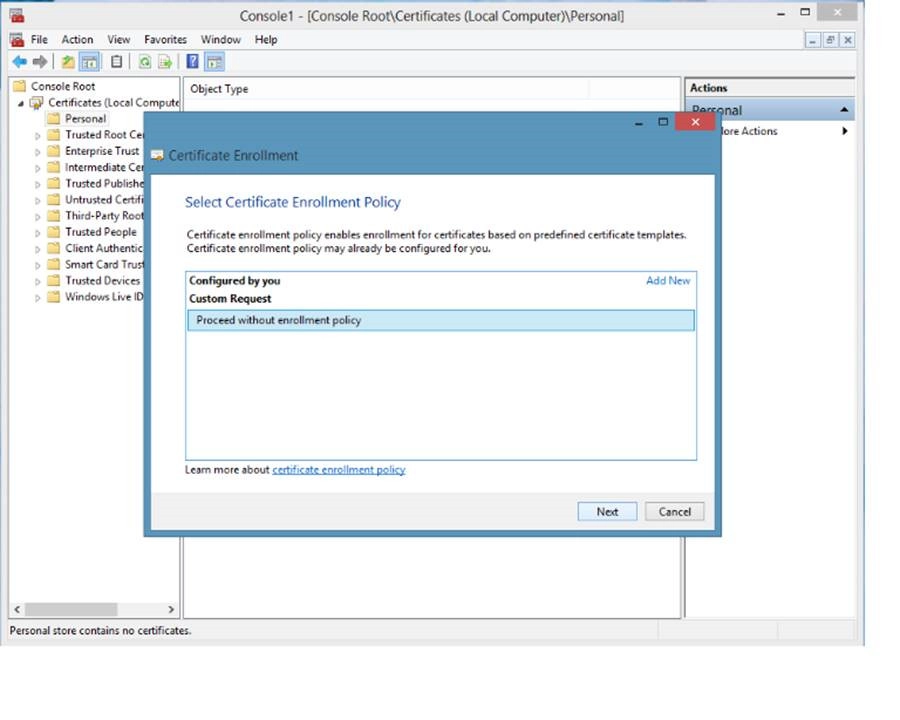
9. Proceed without enrollment policy
Select the option to Proceed without enrollment policy > Click Next.
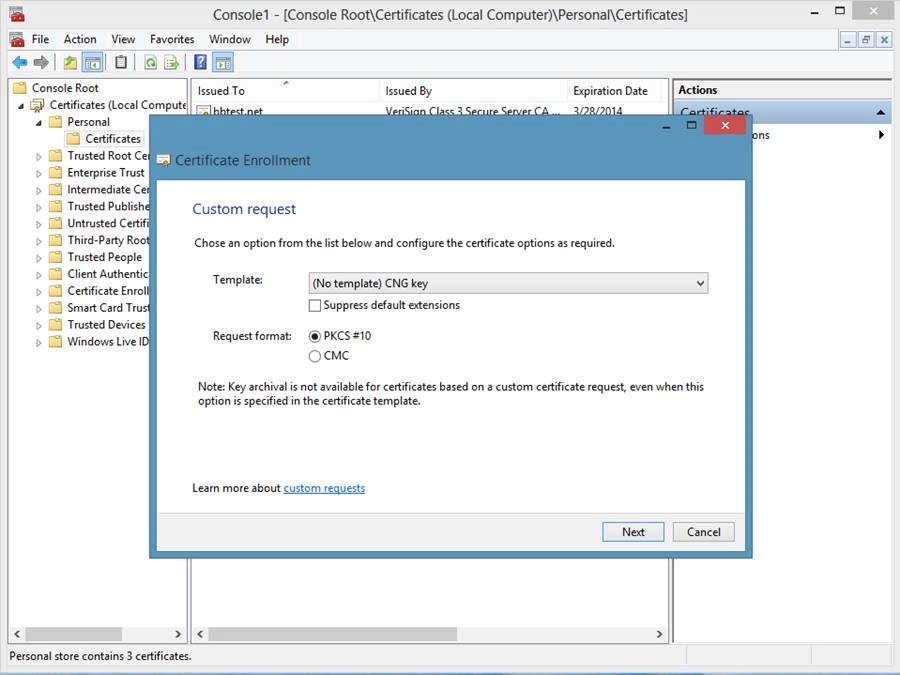
10. Click Next at the PKCS # 10 window.
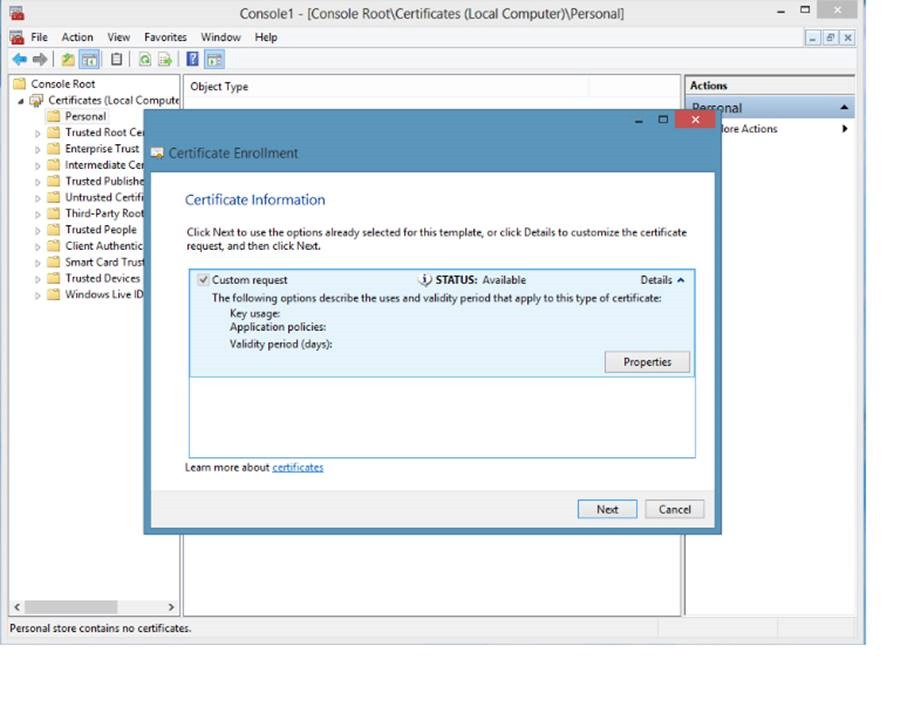
11. Edit Properties
From the Details drop-down menu > Click Properties.
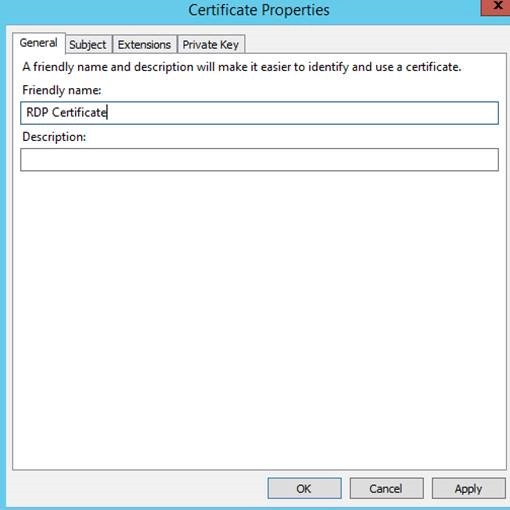
12. Enter a Friendly Name
13. Add the CSR contents:
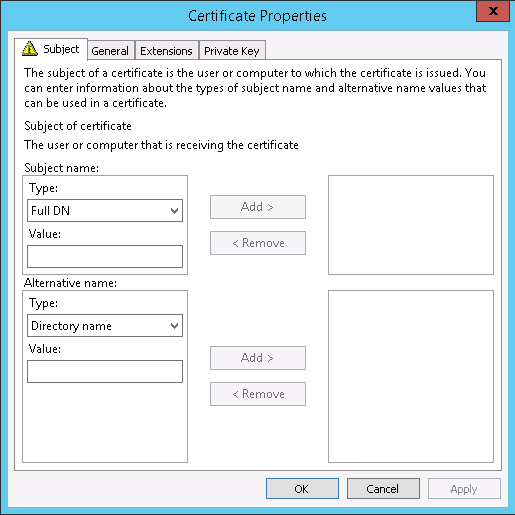
Access the Subject tab > in the Subject name: select the types from the dropdown list and add the values required for your CSR.
Example:
CN = <domain.corp.com>
DNS = <domain>
14. Set Private Key settings
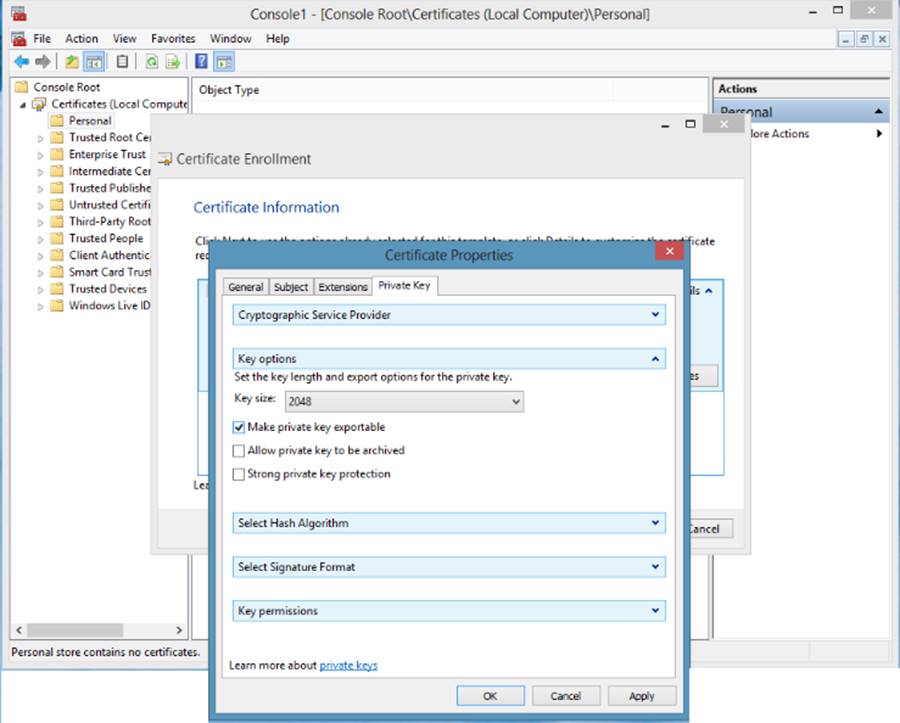
Click the Private Key tab > click the drop-down for Key options > select Key size: 2048 and check the option to Make private key exportable > Click OK.
15. Save the CSR file to a location.
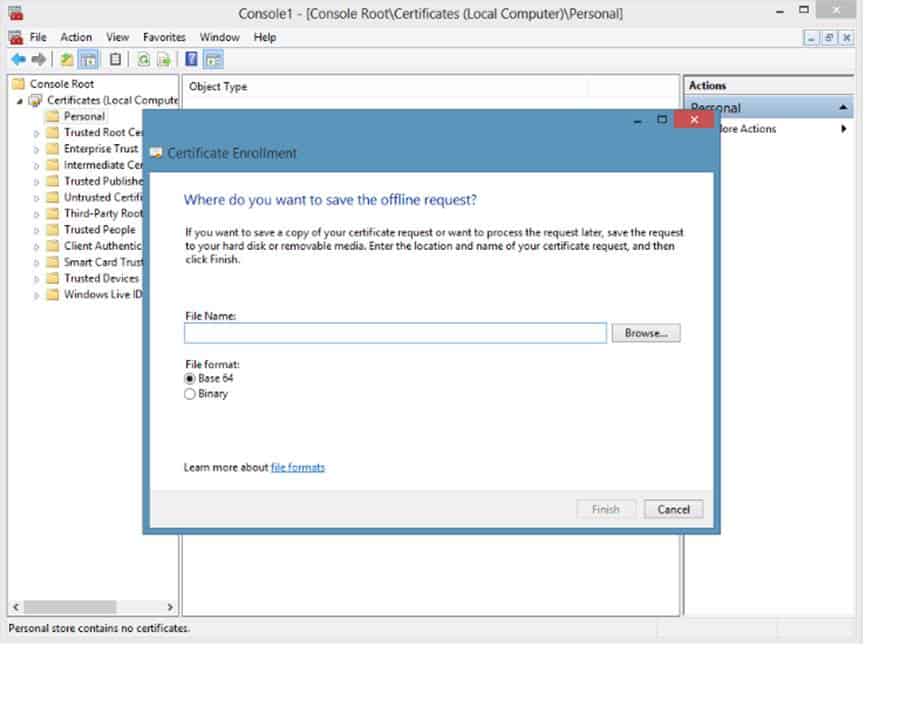
Select Base 64 and Click Next > Click Browse.
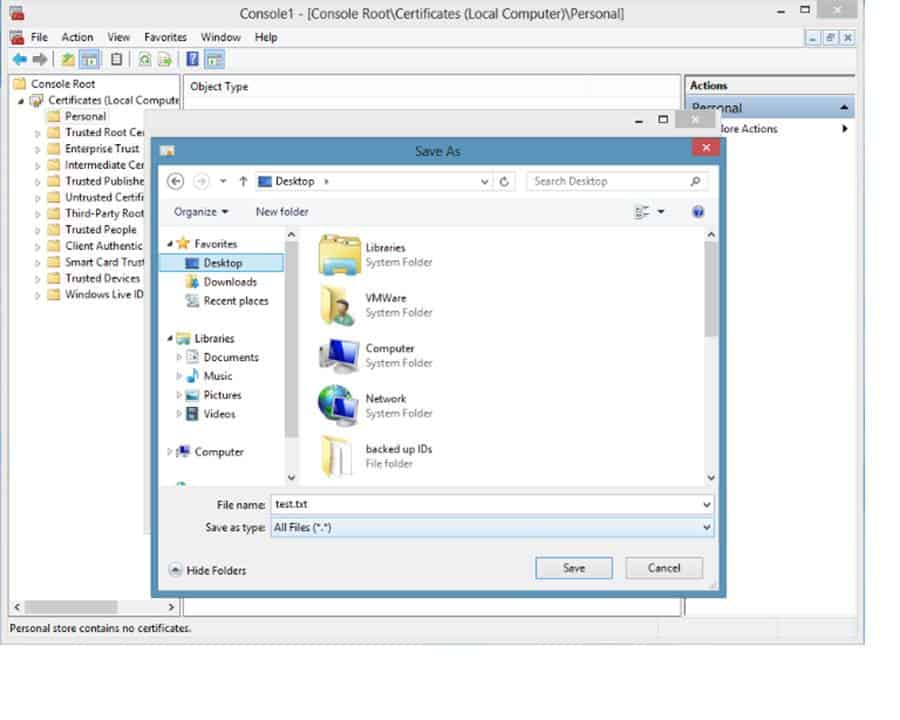
16. Select a location to save the CSR file. Enter a name for the file and click Save.
17. Click Finish.

18. The CSR file will be present at the location you saved it and can be used to request the SSL certificate as needed.
How Does a Typical CSR Look Like?
A CSR file is a long string of characters encoded in base-64 formats. Typically it can be read using any standard text editor. Here you can see how does a CSR look like. Whenever you copy the context, you should include:
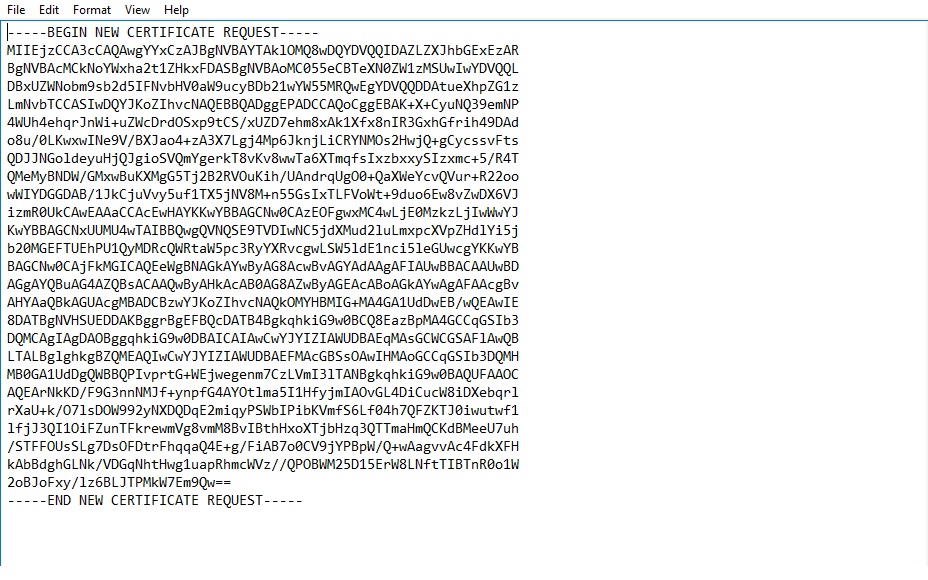
You can use CSR to generate any machine certificates, such as RDP, Ops Manager, and SSL. You may just need to choose the appropriate certificate template while submitting the CSR to the Certificate Authority.
How to Decode A CSR?
Sometimes, you may find yourselves in a position to validate the CSR. There are many ways to decode a CSR. But, for beginners, using online tools are the best way to decode CSRs. We want to introduce one such wonderful tool to you.
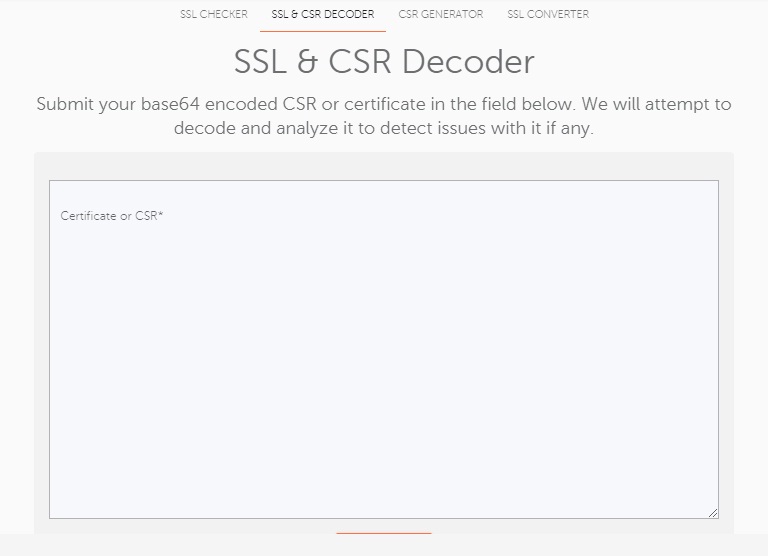
Copy and paste the content of your CSR here in the box and click Decode. It not just decodes the CSR but also reports any errors in it.
Conclusion
In above tutorial you have learned how to create custom CSR on Windows Server. If you find this article helpful, please feel free to share this article. We will back with other tutorial. Thank you!

Yury Sobolev is Full Stack Software Developer by passion and profession working on Microsoft ASP.NET Core. Also he has hands-on experience on working with Angular, Backbone, React, ASP.NET Core Web API, Restful Web Services, WCF, SQL Server.


