In this article, let’s build a simple login system complete with user authentication with JSON Web Token (JWT) using Angular and Express.
Angular Frontend Setup
First of all, make sure you have installed NodeJs on your machine. After that, run the following command in your command line to install angular/cli and then create a new Angular app. You can name your Angular app whatever name you like.
npm install -g @angular/cli
mkdir simple-angular
ng new my-simple-angular
cd my-simple-angular
ng serve
Express Backend Setup
Open another command line and run the following command to create the backend app with Express. Create a folder and make sure on the same level of my-simple-angular folder
mkdir back-end
cd back-end
npm init
It will ask for several inputs, input the name and leave the rest empty, answer Yes at the end.
Or you can run npm init -y for simplicity.
This will create the package.json file. Now we are going to get the packages that we need for this project.
npm install express --save
npm install nodemon
npm install cors
npm install mysql
npm install jsonwebtoken
npm install util
npm install md5
Now, create a file and name it app.js. This file will be our main file for now. Go to your package.json and under scripts, update like so.
{
  "name": "simple-angular",
  "version": "1.0.0",
  "description": "",
  "main": "index.js",
  "scripts": {
    "test": "echo \"Error: no test specified\" && exit 1",
    "start" : "nodemon app.js"
  },
  "author": "",
  "license": "ISC",
  "dependencies": {
    "express": "^4.17.1",
    "nodemon": "^2.0.3"
  }
}
The only extra thing I add here is the “start” under “scripts”.
In your app.js file, copy and paste the following.
const express = require('express');


const app = express();


app.listen(4000, () => {
console.log('listening on port 4000');
})
Run npm start. Great. Now, we have setup both Angular App and Express backend. Time to build all the front-end stuff on our Angular app like the login page, register page etc.
Angular Frontend AuthModule
Open your command line and go to your app folder in your Angular app. Run the following commands to create an Auth Module.
ng g module auth/auth
Now, you have another module called AuthModule, make sure to import this module in your app.module.ts
@NgModule({
  declarations: [
    AppComponent,

  ],
  imports: [
    BrowserModule,
    AppRoutingModule.
    AuthModule
  ],
  providers: [],
  bootstrap: [AppComponent]
})
export class AppModule { }
After that, create a couple of components in our Auth folder.
ng g component auth/components/login
ng g component auth/components/register
This will create two components and will be imported in the AuthModule. Check if you have this correctly.
@NgModule({
  declarations: [
    LoginComponent,
    RegisterComponent
  ],
  imports: [
    CommonModule
  ],
  exports : [
    LoginComponent,
    RegisterComponent
  ]
})
export class AuthModule { }
Open you app-routing.module and replace the Routes with the following.
const routes: Routes = [
  {path: 'login', component: LoginComponent},
  {path: 'register', component: RegisterComponent},
];
Adding Bootstrap 4 to our Angular app
Now your components are connected, we now have to construct the HTML for our navbar so we can navigate between these two pages. We are going to add Bootstrap 4 to our Angular app. Run the following code.
 npm install --save bootstrap
 npm install --save jquery
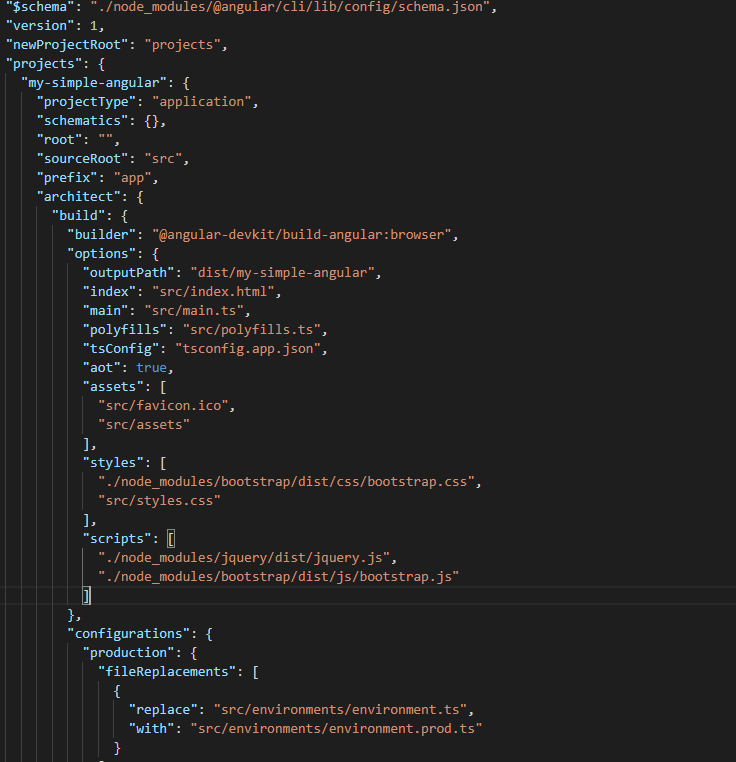
Open the angular.json file of your project and include:
node_modules/bootstrap/dist/css/bootstrap.css in the projects->architect->build->styles array,
node_modules/bootstrap/dist/js/bootstrap.js in the projects->architect->build->scripts array,
node_modules/jquery/dist/jquery.js in the projects->architect->build->scripts array
If you are using scss for your Angular application, add this as well in your src/styles.scss
/* You can add global styles to this file, and also import other style files */
@import "~bootstrap/dist/css/bootstrap.css"
Now go back to your app.component.html and replace with the following HTML to create a simple navbar.
<nav class="navbar navbar-expand-lg navbar-light bg-light">
  <a class="navbar-brand" href="#">Navbar</a>
  <button class="navbar-toggler" type="button" data-toggle="collapse" data-target="#navbarNav" aria-controls="navbarNav" aria-expanded="false" aria-label="Toggle navigation">
    <span class="navbar-toggler-icon"></span>
  </button>
  <div class="collapse navbar-collapse" id="navbarNav">
    <ul class="navbar-nav">
      <li class="nav-item active">
        <a class="nav-link" [routerLink] = "['']" routerLinkActive = "active">Home</a>
      </li>
      <li class="nav-item">
        <a class="nav-link" [routerLink] = "['login']" routerLinkActive = "active">Login</a>
      </li>
      <li class="nav-item">
        <a class="nav-link" [routerLink] = "['register']" routerLinkActive = "active" >Register</a>
      </li>

    </ul>
  </div>
</nav>
<router-outlet></router-outlet>
Now, we have to import the AuthModule into the AppModule or it will return an error.
In your app.module.ts. Add the following. Your module should looks like this.
import { BrowserModule } from '@angular/platform-browser';
import { NgModule } from '@angular/core';
import { RouterModule} from '@angular/router';
import { AppRoutingModule } from './app-routing.module';
import { AppComponent } from './app.component';
import { AuthModule } from './auth/auth/auth.module';
@NgModule({
  declarations: [
    AppComponent,
  ],
  imports: [
    BrowserModule,
    AppRoutingModule,
    RouterModule,
    AuthModule
  ],
  providers: [],
  bootstrap: [AppComponent]
})
export class AppModule { }
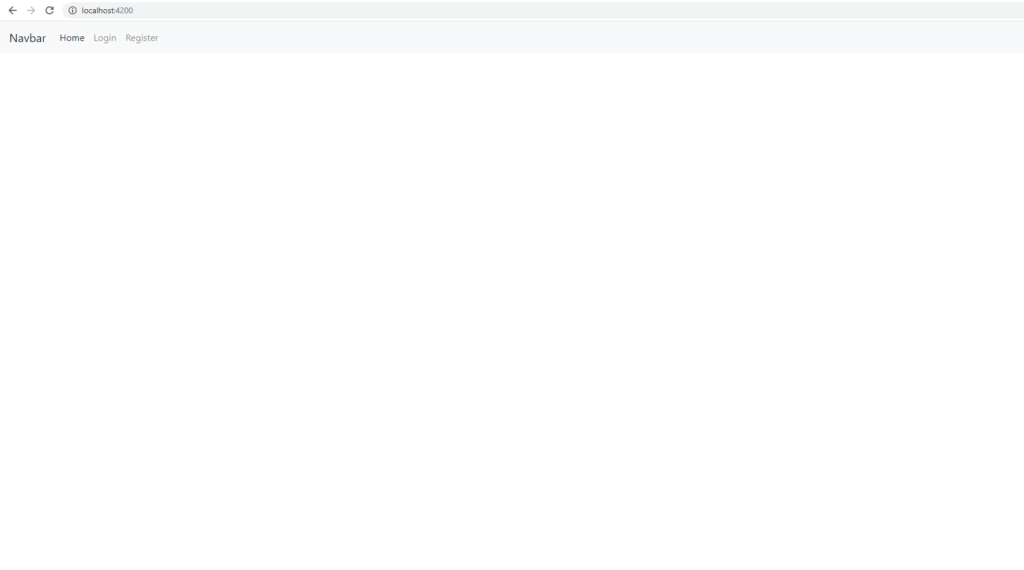
Run your angular app and you should have something like this. A navbar where you can navigate between login and navigate.
Creating Angular Services
Now, before we construct the HTML for our login and register page. We are going to create 4 services.
ng g service services/auth
ng g service services/api
ng g service services/interceptor-service
ng g service services/auth-guard
Open your api.service.ts file and paste the following code.
import { Injectable } from '@angular/core';
import { environment } from '../../environments/environment';
import { HttpClient } from '@angular/common/http';
import { map } from 'rxjs/operators';
@Injectable({
  providedIn: 'root'
})
export class ApiService {
  baseUrl = 'http://localhost:4000/';
  constructor(private _http: HttpClient) {
  }
  getTypeRequest(url) {
    return this._http.get(`${this.baseUrl}${url}`).pipe(map(res => {
      return res;
    }));
  }
  postTypeRequest(url, payload) {
    return this._http.post(`${this.baseUrl}${url}`, payload).pipe(map(res => {
    return res;
    }));
  }
putTypeRequest(url, payload) {
  return this._http.put(`${this.baseUrl}${url}`, payload).pipe(map(res => {
    return res;
  }));
  }
}
For auth.service.ts.
 import { Injectable } from '@angular/core';
@Injectable({
  providedIn: 'root'
})
export class AuthService {
  constructor() { }

   getUserDetails() {
    if(localStorage.getItem('userData')){
      return localStorage.getItem('userData')
    }else{
      return null
    }

  }
  setDataInLocalStorage(variableName, data) {
      localStorage.setItem(variableName, data);
  }
  getToken() {
      return localStorage.getItem('token');
  }
  clearStorage() {
      localStorage.clear();
  }
}
For auth-guard.service.ts.
import { Injectable } from '@angular/core';
import { ActivatedRouteSnapshot, RouterStateSnapshot, Router } from '@angular/router';
import { Observable } from 'rxjs';
import { AuthService } from './auth.service';
@Injectable({
  providedIn: 'root'
})
export class AuthGuardService {
  constructor(
    private _authService: AuthService,
    private _router: Router
  ) { }
  canActivate(next: ActivatedRouteSnapshot, state: RouterStateSnapshot): Observable<boolean> | Promise<boolean> | boolean {
    if (this._authService.getToken()) {
      return true;
    }
    // navigate to login page
    this._router.navigate(['/login']);
    // you can save redirect url so after authing we can move them back to the page they requested
    return false;
  }
}
Lastly, for interceptor-service.service.ts
import { Injectable } from '@angular/core';
import { HttpEvent, HttpHandler, HttpRequest, HttpResponse, HttpErrorResponse } from '@angular/common/http';
import { Observable } from 'rxjs';
import { AuthService } from './auth.service';
@Injectable()
export class InterceptorService {
  constructor(
    private _auth: AuthService
  ) {
  }
  intercept(
    request: HttpRequest<any>,
    next: HttpHandler
  ): Observable<HttpEvent<any>> {
    if (!request.headers.has('Content-Type')) {
      request = request.clone({ headers: request.headers.set('Content-Type', 'application/json') });
    }
    request = request.clone({ headers: request.headers.set('Accept', 'application/json') }).clone({
      setHeaders: {
        Authorization: `${this._auth.getToken()}`
      }
    });
    return next.handle(request);
  }
}
Now we have 4 services that we can use an injectable in any components in the App. The first service is the api.service which we will use to make an API call to our backend and the second one is for authentication purpose when user logs in.
The third one is the auth-guard which we will use later to make protected route. The last one is the interceptor which is use to intercept our request to append the JWT in our http request before the request is made.
Constructing the HTML for Login and Register pages
Paste the followings in login.component.html.
<div class = 'row m-0 w-100'>
    <div class = 'col-md-4 offset-4 mt-5' *ngIf = '!this.isLogin'>
        <h4>Login</h4>
        <form #myform = "ngForm" (ngSubmit) = "onSubmit(myform)" >
            <div class = 'form-group'>
                <input class = 'form-control' type = "text" name = "username" placeholder = "Username" ngModel>
            </div>

            <div class = 'form-group'>
                <input class = 'form-control' type = "password" name = "password" placeholder = "Password" ngModel>
            </div>
            <input class= 'btn btn-outline-info' type = "submit" value = "Login">
        </form>
    </div>
    <div class = 'col-md-4 offset-4 mt-5' *ngIf = 'this.isLogin'>

        <h1>You are logged in</h1>
        <button class = 'btn btn-outline-info' (click) = 'logout()'>Log-out</button>

    </div>
</div>
Open your login.component.ts
import { Component, OnInit } from '@angular/core';
import {NgForm} from '@angular/forms';
import { ApiService } from './../../../services/api.service'
import { AuthService } from './../../../services/auth.service'
import { Router } from '@angular/router';

@Component({
  selector: 'app-login',
  templateUrl: './login.component.html',
  styleUrls: ['./login.component.scss']
})
export class LoginComponent implements OnInit {
  isLogin: boolean = false
  errorMessage: any
  constructor(
    private _api: ApiService,
    private _auth: AuthService,
    private _router:Router
  ) { }

  ngOnInit() {

    this.isUserLogin();

  }


  onSubmit(form: NgForm) {
    console.log('Your form data : ', form.value);
    this._api.postTypeRequest('user/login', form.value).subscribe((res: any) => {

      if (res.status) {

        this._auth.setDataInLocalStorage('userData', JSON.stringify(res.data));
        this._auth.setDataInLocalStorage('token', res.token);
        this._router.navigate(['']);
      }
    })


  }

  isUserLogin(){

    if(this._auth.getUserDetails() != null){

        this.isLogin = true;
    }

  }

  logout(){
    this._auth.clearStorage()
    this._router.navigate(['']);
  }
}
Now, open your register.component.html. Copy and paste the following. Followed by register.component.ts
<div class = 'row m-0 w-100'>
    <div class = 'col-md-4 offset-4 mt-5' *ngIf = '!this.isLogin'>
        <h4>Register</h4>
        <form #myform = "ngForm" (ngSubmit) = "onSubmit(myform)" >
            <div class = 'form-group'>
                <input class = 'form-control' type = "text" name = "username" placeholder = "Username" ngModel>
            </div>
            <div class = 'form-group'>
                <input class = 'form-control' type = "email" name = "email" placeholder = "Email" ngModel>
            </div>

            <div class = 'form-group'>
                <input class = 'form-control' type = "password" name = "password" placeholder = "Password" ngModel>
            </div>
            <input class= 'btn btn-outline-info' type = "submit" value = "Register">
        </form>
    </div>
    <div class = 'col-md-4 offset-4 mt-5' *ngIf = 'this.isLogin'>
        <h5>You are logged in</h5>
    </div>
</div>
import { Component, OnInit } from '@angular/core';
import { ApiService } from './../../../services/api.service'
import { AuthService } from './../../../services/auth.service'
import {NgForm} from '@angular/forms';
import { Router } from '@angular/router';
@Component({
  selector: 'app-register',
  templateUrl: './register.component.html',
  styleUrls: ['./register.component.scss']
})
export class RegisterComponent implements OnInit {
  isLogin: boolean = false
  errorMessage: any
  constructor(
    private _api: ApiService,
    private _auth: AuthService,
    private _router:Router
  ) { }
  ngOnInit() {
    this.isUserLogin();
  }

  onSubmit(form: NgForm) {
    this._api.postTypeRequest('user/register', form.value).subscribe((res: any) => {
      if (res.status) {
        console.log(res)
        this._auth.setDataInLocalStorage('userData', JSON.stringify(res.data));
        this._auth.setDataInLocalStorage('token', res.token);
        this._router.navigate(['login']);
      } else {
        console.log(res)
        alert(res.msg)
      }
    });
  }
  isUserLogin(){

    if(this._auth.getUserDetails() != null){
        this.isLogin = true;
    }
  }
}
In the login and register component. What we are doing is we constructed a login/register box to allow user to input username and password. Onsubmit, we are making an API call to the back-end and on success response, we set a localStorage for the userData and the token.
Also, here is the final content of your app.module.ts
import { NgModule } from '@angular/core';
import { BrowserModule } from '@angular/platform-browser';
import { RouterModule } from '@angular/router';
import { AppRoutingModule } from './app-routing.module';
import { AppComponent } from './app.component';
import { AuthModule } from './auth/auth/auth.module';
@NgModule({
  declarations: [
    AppComponent,
  ],
  imports: [
    BrowserModule,
    AppRoutingModule,
    RouterModule,
    AuthModule
  ],
  providers: [],
  bootstrap: [AppComponent]
})
export class AppModule { }
Followed by auth.module.ts.
import { NgModule } from '@angular/core';
import { CommonModule } from '@angular/common';
import { LoginComponent } from '../components/login/login.component';
import { RegisterComponent } from '../components/register/register.component';
import {FormsModule, ReactiveFormsModule} from '@angular/forms'
import { HttpClientModule } from '@angular/common/http';
@NgModule({
  declarations: [
    LoginComponent,
    RegisterComponent
  ],
  imports: [
    CommonModule,
    ReactiveFormsModule,
    FormsModule,
    HttpClientModule

  ],
  exports: [
    LoginComponent,
    RegisterComponent
  ]
})
export class AuthModule { }
Express Backend – Creating the API Endpoint
Now, it’s time to prepare our back-end to handle our login and register logic. For database, we are going to use MySQL, so go ahead and create a table in your database called user.
CREATE TABLE `users` (
  `id` int(11) NOT NULL,
  `username` varchar(255) NOT NULL,
  `email` varchar(255) NOT NULL,
  `password` varchar(255) NOT NULL
) ENGINE=InnoDB DEFAULT CHARSET=utf8mb4;
Then, create another folder, name it routes and inside the routes folder create two files, name it as index.js and user.js like so.
Open your index.js and paste the following
const express = require('express');
const router = express.Router();


const user = require('./user');


router.use('/user', user);


module.exports = router;
Next, copy and paste the following into your user.js
const express = require('express');
const router = express.Router();
const md5 = require('md5');
const jwt = require('jsonwebtoken');
const mysql = require('mysql');
const con = mysql.createConnection({
  host: "localhost",
  user: "root",
  password: "",
  database: "simpleangular"
});
/* GET users listing. */
router.post('/register', async function (req, res, next) {
  try {
    let { username, email, password } = req.body;

    const hashed_password = md5(password.toString())
    const checkUsername = `Select username FROM users WHERE username = ?`;
    con.query(checkUsername, [username], (err, result, fields) => {
      if(!result.length){
        const sql = `Insert Into users (username, email, password) VALUES ( ?, ?, ? )`
        con.query(
          sql, [username, email, hashed_password],
        (err, result, fields) =>{
          if(err){
            res.send({ status: 0, data: err });
          }else{
            let token = jwt.sign({ data: result }, 'secret')
            res.send({ status: 1, data: result, token : token });
          }

        })
      }
    });


  } catch (error) {
    res.send({ status: 0, error: error });
  }
});
router.post('/login', async function (req, res, next) {
  try {
    let { username, password } = req.body;

    const hashed_password = md5(password.toString())
    const sql = `SELECT * FROM users WHERE username = ? AND password = ?`
    con.query(
      sql, [username, hashed_password],
    function(err, result, fields){
      if(err){
        res.send({ status: 0, data: err });
      }else{
        let token = jwt.sign({ data: result }, 'secret')
        res.send({ status: 1, data: result, token: token });
      }

    })
  } catch (error) {
    res.send({ status: 0, error: error });
  }
});
module.exports = router;
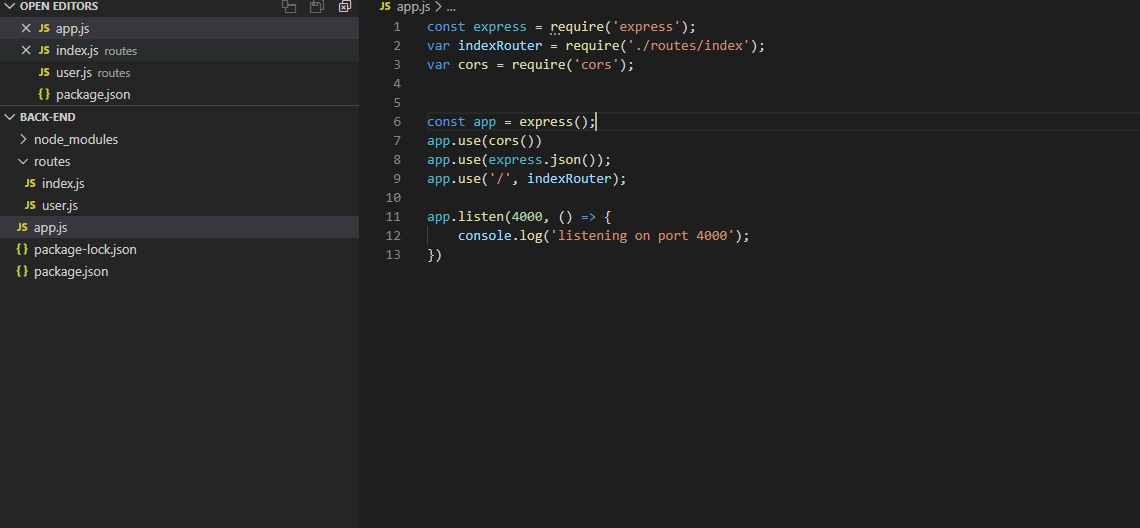
Finally, in your app.js, paste the following.
const express = require('express');
const indexRouter = require('./routes/index');
const cors = require('cors');
const app = express();
app.use(cors())
app.use(express.json());
app.use('/', indexRouter);
app.listen(4000, () => {
console.log('listening on port 4000');
})
Testing The Register and Login System
Now, let’s test out the register and login system that we have created. Make sure you have started both your Angular and Express apps.
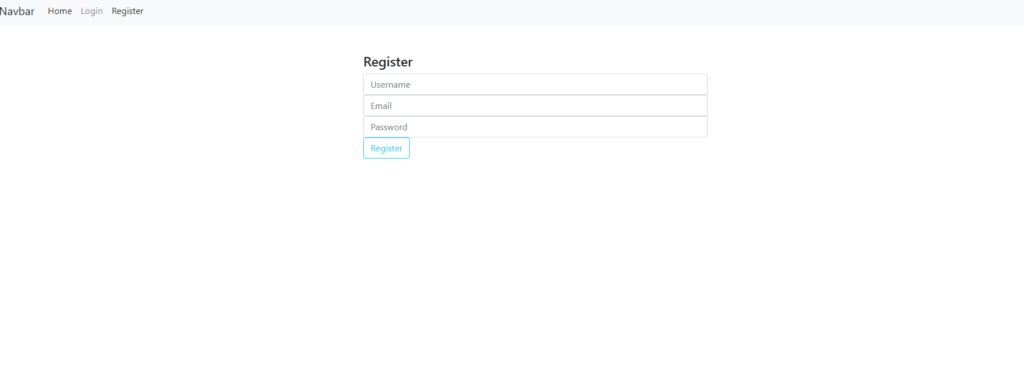
Fill in the username, email and password.
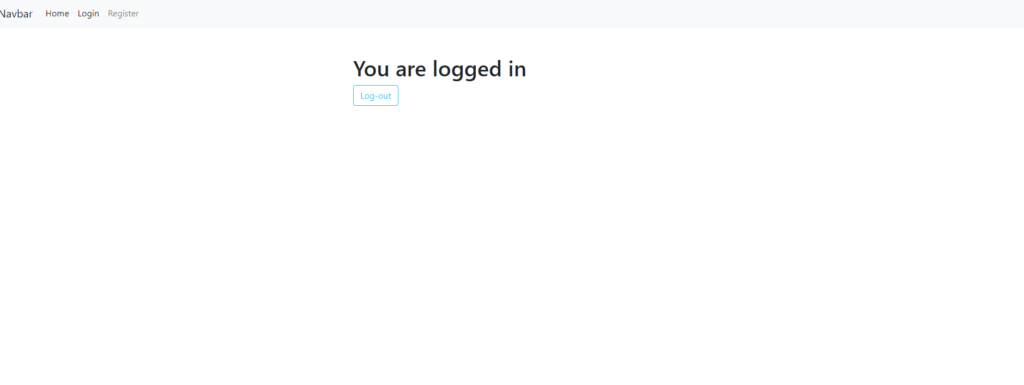
If everything works, you should get redirected to the login page. If you open your console -> Application -> Storage -> Local Storage. You should see the token.
Angular – Making Protected Page
Remember the interceptor and auth-guard services that we created previously. Let’s use these to create a protected page and also use the JWT that we received during the register/login to request for protected data.
Updating the Backend Express For Protected Endpoint
Before we can do that, we need to modify our backend so that the backend will check for the JWT that comes with the request from the frontend.
Let’s create a new folder in your backend application, and then create a new file auth.js
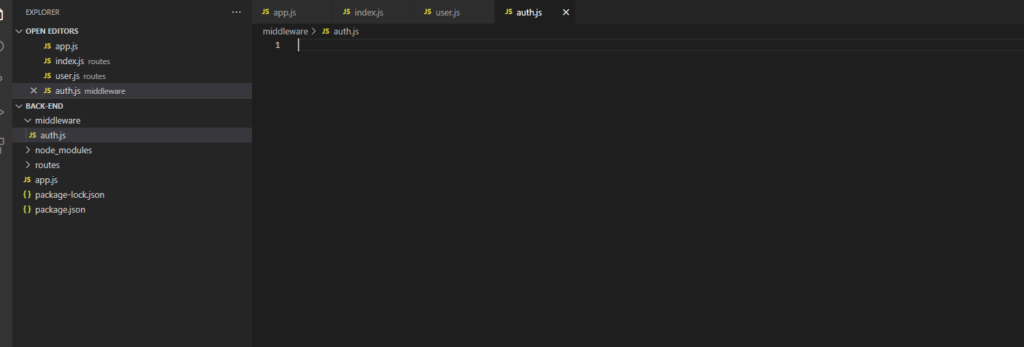
Paste the followings code in auth.js
const jwt = require('jsonwebtoken')

module.exports.verifyToken = (req, res, next) => {
    if (!req.headers.authorization) {
        res.status(401).send({ message: "Unauthorized" })
    } else {
        jwt.verify(req.headers.authorization, "secret", function (err, decoded) {
            if(decoded){
                req.user = decoded.data
                next()
            }else{
                res.status(401).send({ message: "Unauthorized" })
            }
        })
    }
}
Create a new file called profile.js in the routes folder, like so.
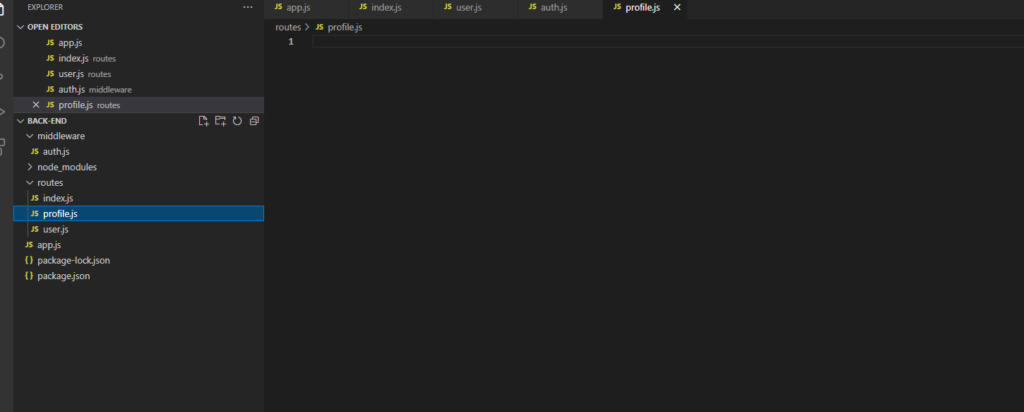
Paste the followings code.
const express = require('express');
const router = express.Router();
const auth = require('../middleware/auth');


router.get('/profile', auth.verifyToken, async (req, res) => {

    // i will just return a simple data here, you can try yourself to return data from the database

    res.send( { status: 1, data: {userName: 'yury', userWebsite: 'https://dotnet4blog.asphostportal.com'} ,message: 'Successful'} )
});


module.exports = router;
Finally, update the routes/index.js.
const express = require('express');
const router = express.Router();


const user = require('./user');
const profile = require('./profile');

router.use('/user', user);
router.use('/profile', profile);


module.exports = router;
Updating Frontend Angular For Protected Page
ng g component main/profile
In the profile.component.ts, paste the followings.
import { Component, OnInit } from '@angular/core';
import { ApiService } from 'src/app/services/api.service';

@Component({
  selector: 'app-profile',
  templateUrl: './profile.component.html',
  styleUrls: ['./profile.component.scss']
})
export class ProfileComponent implements OnInit {

  public protectedData: any
  public loading: boolean = false

  constructor(
    private _api: ApiService,

  ) { }

  ngOnInit(): void {


    this._api.getTypeRequest('profile/profile').subscribe((res: any) => {
      this.protectedData = res
    });

  }


}
For profile.component.html, paste the followings.
<h2 style = 'margin-top: 30px;'>This is the protected profile page</h2>

<h2 *ngIf = 'this.protectedData?.data' >{{this.protectedData.data.userName}}</h2>

<h2 *ngIf = 'this.protectedData?.data' >{{this.protectedData.data.userWebsite}}</h2>
Before we can test it out, modify app.module.ts to use the interceptor
import { HTTP_INTERCEPTORS } from '@angular/common/http';
import { NgModule } from '@angular/core';
import { BrowserModule } from '@angular/platform-browser';
import { RouterModule } from '@angular/router';

import { AppRoutingModule } from './app-routing.module';
import { AppComponent } from './app.component';
import { AuthModule } from './auth/auth/auth.module';
import { ProfileComponent } from './main/profile/profile.component';
import { InterceptorService } from './services/interceptor-service.service';

@NgModule({
  declarations: [
    AppComponent,
    ProfileComponent,
  ],
  imports: [
    BrowserModule,
    AppRoutingModule,
    RouterModule,
    AuthModule
  ],
  providers: [
    {
      provide: HTTP_INTERCEPTORS,
      useClass: InterceptorService,
      multi: true
    }
  ],
  bootstrap: [AppComponent]
})
export class AppModule { }
Finally, update app-routing.module.ts to create a route for the profile component.
import { NgModule } from '@angular/core';
import { RouterModule, Routes } from '@angular/router';
import { LoginComponent } from './auth/components/login/login.component';
import { RegisterComponent } from './auth/components/register/register.component';
import { ProfileComponent } from './main/profile/profile.component';
import { AuthGuardService } from './services/auth-guard.service';

const routes: Routes = [
  {path: 'login', component: LoginComponent},
  {path: 'register', component: RegisterComponent},
  {path: 'profile', canActivate: [AuthGuardService], component: ProfileComponent},
];

@NgModule({
  imports: [RouterModule.forRoot(routes)],
  exports: [RouterModule]
})
export class AppRoutingModule { }
Testing Out!
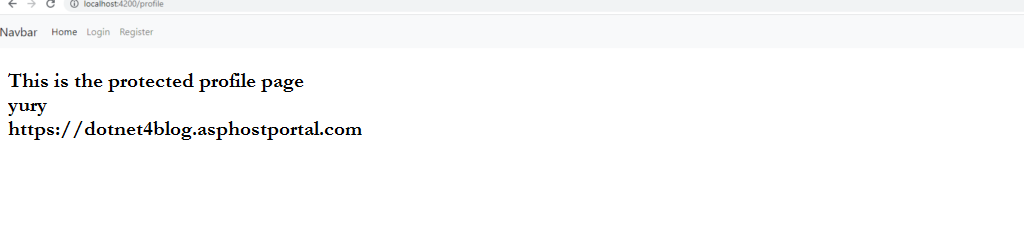
Make sure you are logged in and manually input the url localhost:4200/profile. If you are not logged in, it will redirect you back to the login page.
Conclusion
Now, you can use a login and registration system using Angular, MySQL, and also Express. I hope you enjoy this article.


Yury Sobolev is Full Stack Software Developer by passion and profession working on Microsoft ASP.NET Core. Also he has hands-on experience on working with Angular, Backbone, React, ASP.NET Core Web API, Restful Web Services, WCF, SQL Server.