The DNS Probe Finished No Internet Error is a network error that occurs due to mistakes in DNS (Domain Name System). There are multiple reasons why this error occurs, it could be due to Cache, cookies, or the DNS server itself. We have tried a few fixes to solve this issue for various reasons. Let us know to fix the DNS Probe Finished No Internet Error issue.
If you are wondering what exactly DNS is, it is like a mapping system between browsing sites and users. The DNS converts the browse requests for the sites into IP addresses and delivers the requested sites to the user. In much simpler words, DNS converts human-readable domain names to IP addresses.
To summarise, why the error occurs quickly if you are trying to access a site online? The device uses DNS to match the requested site on the server and process your request. If there is an error at the DNS level, the system shows DNS_PROBE_FINISHED_NO_INTERNET.
Why this Error Happened?
The reason for DNS_PROBE_FINISHED_NXDOMAIN is typically due to a misconfiguration or problem with your DNS. DNS is short for Domain Name System, which helps direct traffic on the internet by connecting domain names with actual web servers. Essentially, it takes a human-friendly request – a domain name like asphostportal.com – and translates it into a computer-friendly server IP address – like 232.1.158.18.
When a user enters a URL in their web browser, DNS gets to work to connect that URL to the IP address of the actual server. This is called DNS name resolution and involves a DNS recursor querying various nameservers to figure out the actual IP address of a server. If DNS fails to resolve the domain name or address then you might receive the DNS_PROBE_FINISHED_NXDOMAIN error. The NXDOMAIN part stand stands for Non-Existent Domain.
| Error Code | DNS_PROBE_FINISHED_NXDOMAIN |
| Error Type | DNS error |
| Error Variations | This site can’t be reached Hmm. We’re having trouble finding that site Hmmm… can’t reach this page Safari Can’t Find the Server |
| Error Causes | Internet connection error Firewall is blocking access DNS misconfiguration DNS not yet propagated Unresponsive server |

Main Causes of the DNS_PROBE_FINISHED Domain Error
As mentioned, this error happens when the Domain Name System cannot resolve a website’s URL into an IP address. The causes for this could be:
- You typed the site name incorrectly into the search bar.
- There is an internet connection error preventing your access.
- Your firewall is blocking access to the website.
- An antivirus or a VPN is interfering with your network settings.
- The domain has expired or is not registered.
- Your DNS settings are not configured the right way.
How to Fix DNS_PROBE_FINISHED Domain on Desktop
1. Release and Renew IP Address
Due to the fact that this is usually a client-side DNS issue, the very first thing you should do is try releasing and renewing the IP address on your computer. This also includes flushing your local DNS cache, which is similar to browser cache.
In Windows simply open up Command Prompt by pressing the Windows logo key and R. Then type “cmd” and hit Enter.

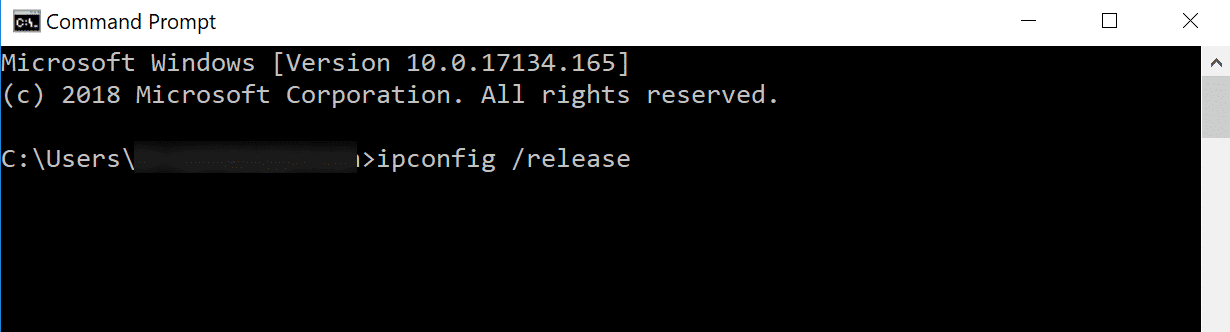
Type in ipconfig /release and hit Enter. This will release your current IP address.
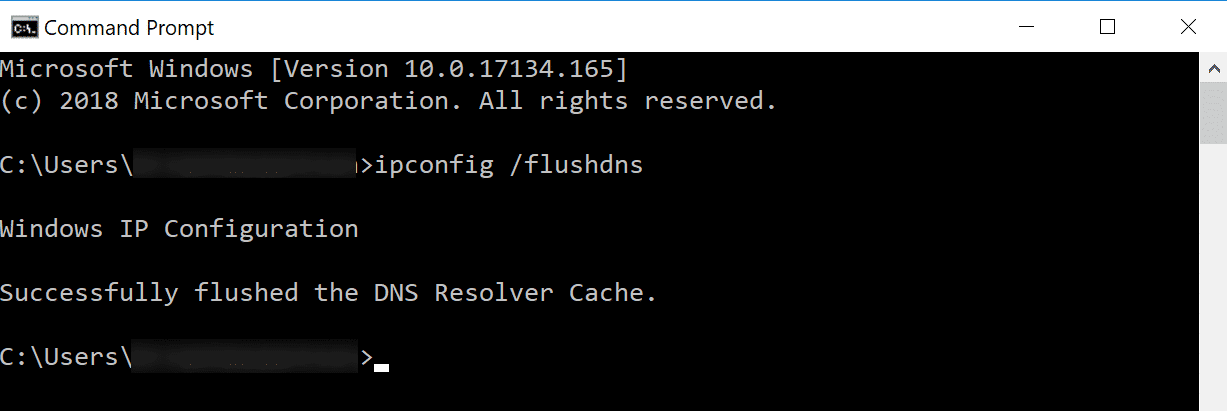
Then type in ipconfig /flushdns and hit Enter. This will flush your local DNS cache. You should see a “Successfully flushed the DNS resolver Cache” if it worked.
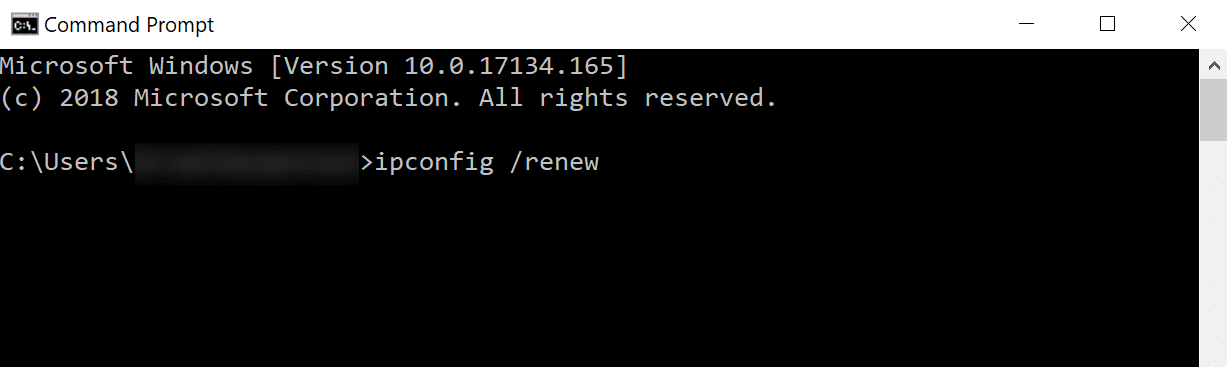
Then type in ipconfig /renew and hit Enter. This will renew your IP address.
You might also try resetting your IP settings and Winsock catalog with the following commands: netsh int ip set dns and netsh winsock reset.
An alternative way to flush and renew your DNS is simply by disabling your network adapter and re-enabling it.
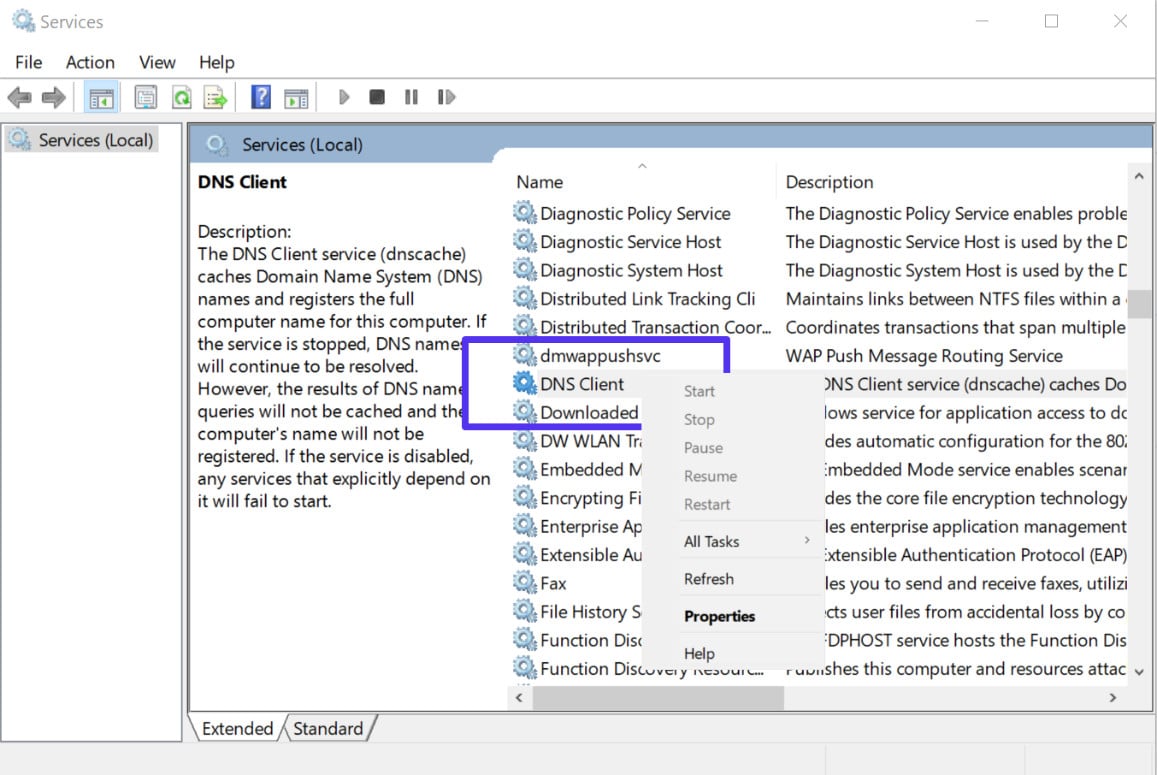
2. Restart DNS Client Service
If you’re running Windows you can try restarting the DNS client services which resolves and caches DNS domain names.
Simply open up Command Prompt by pressing the Windows logo key and R. Then type “services.msc” and hit Enter.

Scroll down to “DNS Client,” right click on it, and select “Restart.”
If the restart option is greyed out for you (as it was for us), an alternative way to do it is via the command prompt.
Open up Command Prompt by pressing the Windows logo key and R. Then type “cmd” and hit Enter.

Then enter the following commands:
net stop dnscache
net start dnscache
Depending on the version of Windows you’re running you might get an error saying:
The requested pause, continue, or stop is not valid for this service.
This is most likely because you need to run CMD as a network service to issue the command. If you’re running into this error, we suggest trying the other alternatives below first.
3. Change DNS Servers
The next thing you can try is changing your DNS servers. By default, DNS servers are automatically assigned by your ISP. But you could try temporarily changing these to a public DNS server, such as Google or Cloudflare.
- Some prefer to use Google’s public DNS (8.8.8.8 and 8.8.4.4) long-term due to them sometimes being more reliable.
- Cloudflare also just launched their new secure and blazing fast free DNS (1.1.1.1 and 1.0.0.1) which we will be using in this example. If you want to use Google’s the steps are the same, you simply replace the DNS server addresses with Googles.
Tip: If you’re already using a free DNS server and having issues, removing it and defaulting back to your ISP’s DNS servers also sometimes fix things. Google and Cloudflare aren’t perfect 100% of the time and there have been a few instances where we’ve noticed switching back has resolved the issue.
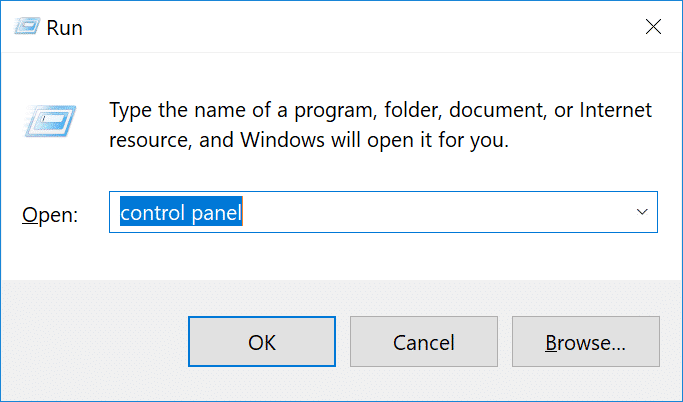
In Windows simply open up Command Prompt by pressing the Windows logo key and R. Then type “control panel” and hit Enter.
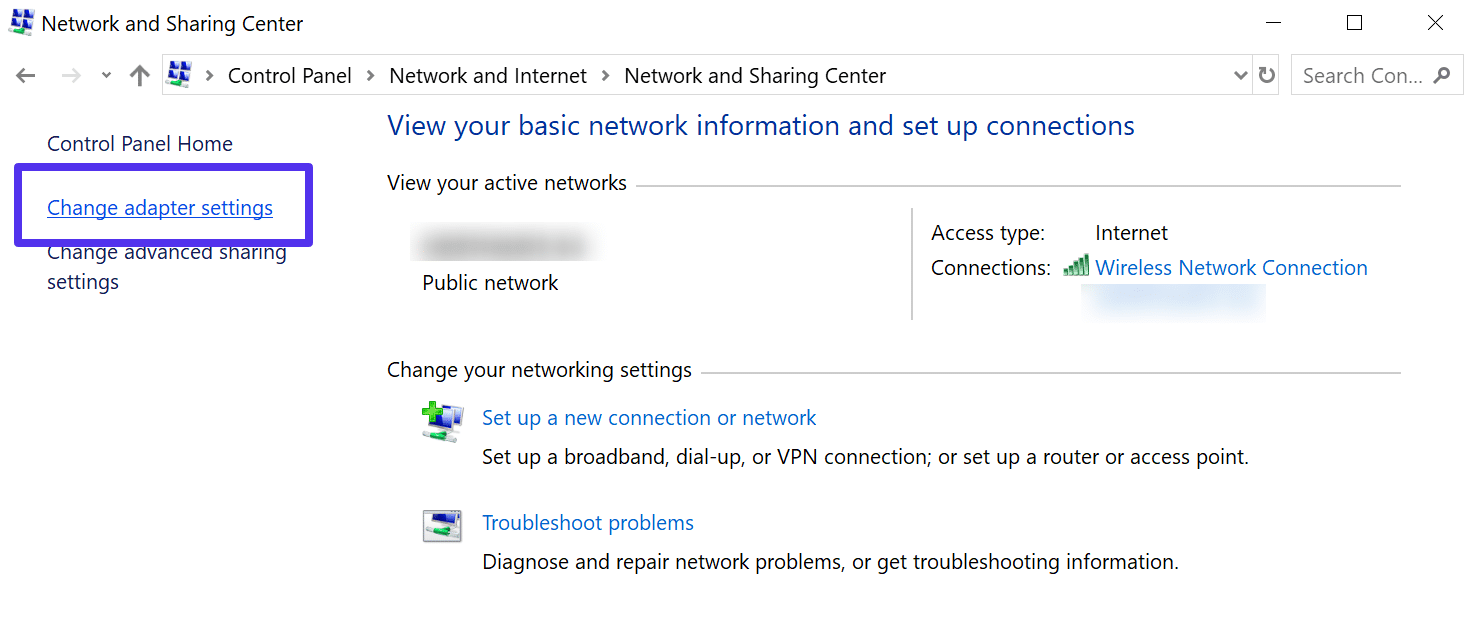
Click on “Network and Internet” and then “Network and Sharing Center.” On the left-hand side, click on “Change Adapter Settings.”
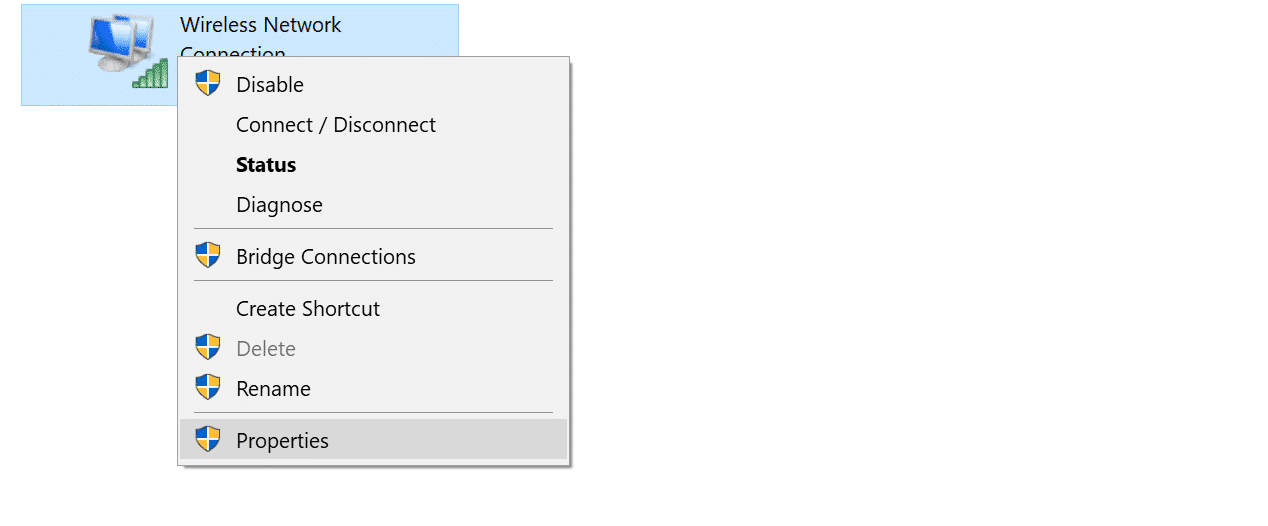
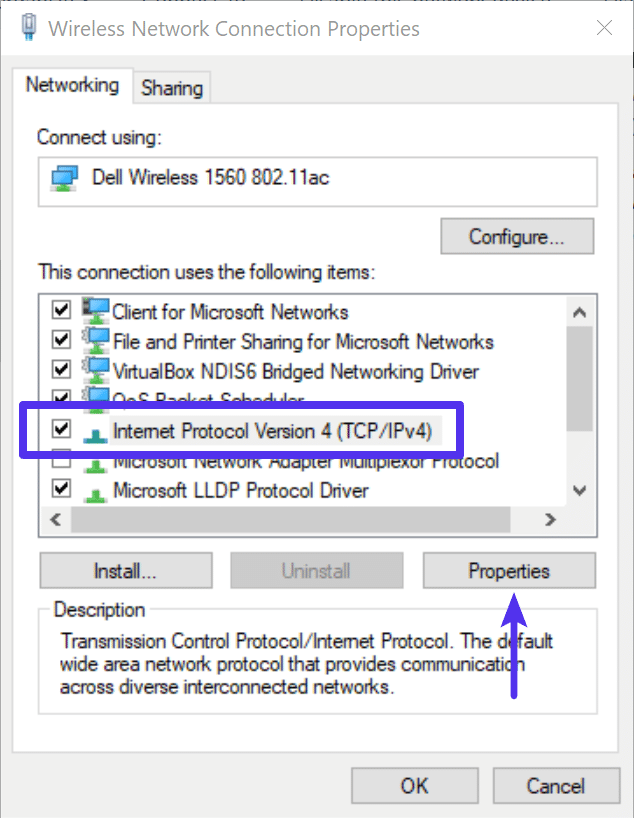
Right click on your current connection, this will either be Local Area Connection or Wireless Network Connection based on how you’re connecting. Then click on “Properties.”
Select Internet Protocol Version 4 (or IPv6 if desired) and click on “Properties.”
Make a note of any existing settings in case you need to revert back. Click “Use the following DNS server addresses.” Enter the following, or replace the existing with these:
For IPv4: 1.1.1.1 and 1.0.0.1
For IPv6: 2606:4700:4700::1111 and 2606:4700:4700::1001
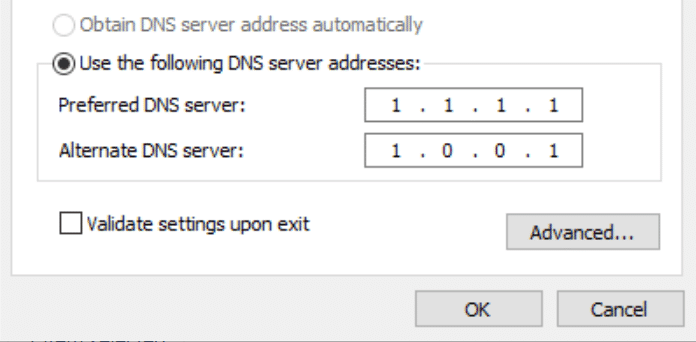
Click OK, then Close. Restart your browser.
4. Reset Chrome Flags
Sometimes Chrome settings or experimental features can get accidentally changed or messed up. You reset these back to default by entering chrome://flags into your browser and clicking on “Reset all to default.”
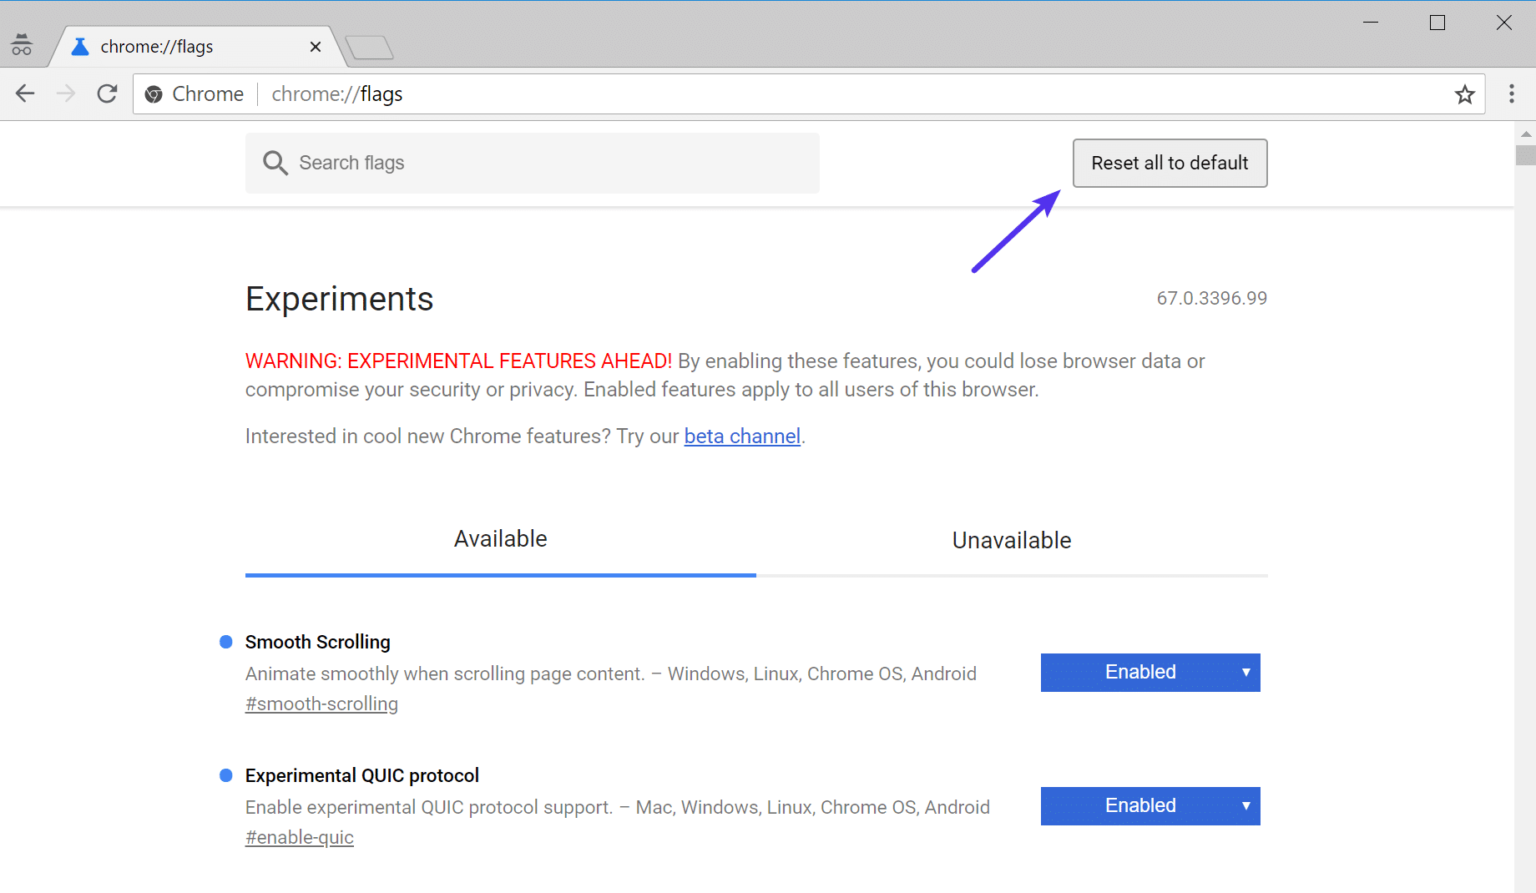
The restart your browser.
5. Disable VPN and Antivirus Temporarily
Sometimes VPNs and Antivirus software can conflict or override your network settings, including your DNS servers, etc. If you have any running, try temporarily disabling them (closing them) to see if it resolves the DNS probe finished nxdomain error in Chrome.
6. Check Your Local Hosts File
Every computer has what they call a local hosts file. This is a file that contains manual DNS entries which are mapped to specific IP addresses. Typically this is only edited when you want to preview your DNS before switching over domains to a new host. However, there is a multitude of different ways this file could have been changed or edited. Therefore, if none of the above options worked for you, it’s worth double checking your local hosts file to ensure the website you’re trying to access isn’t in there.
The hosts file typically requires additional access. So the first step is to open up your text editor as an administrator. Simply click on your start menu, search for your text editor, right-click on it and select “Run as administrator.” This can be done in any text editor such as Notepad, Notepad++, Atom, etc. We are using Sublime in our example below.
Within your text editor click File → Open and browse to the following location:
C:\Windows\System32\drivers\etc\
Click on the hosts file and “Open.”
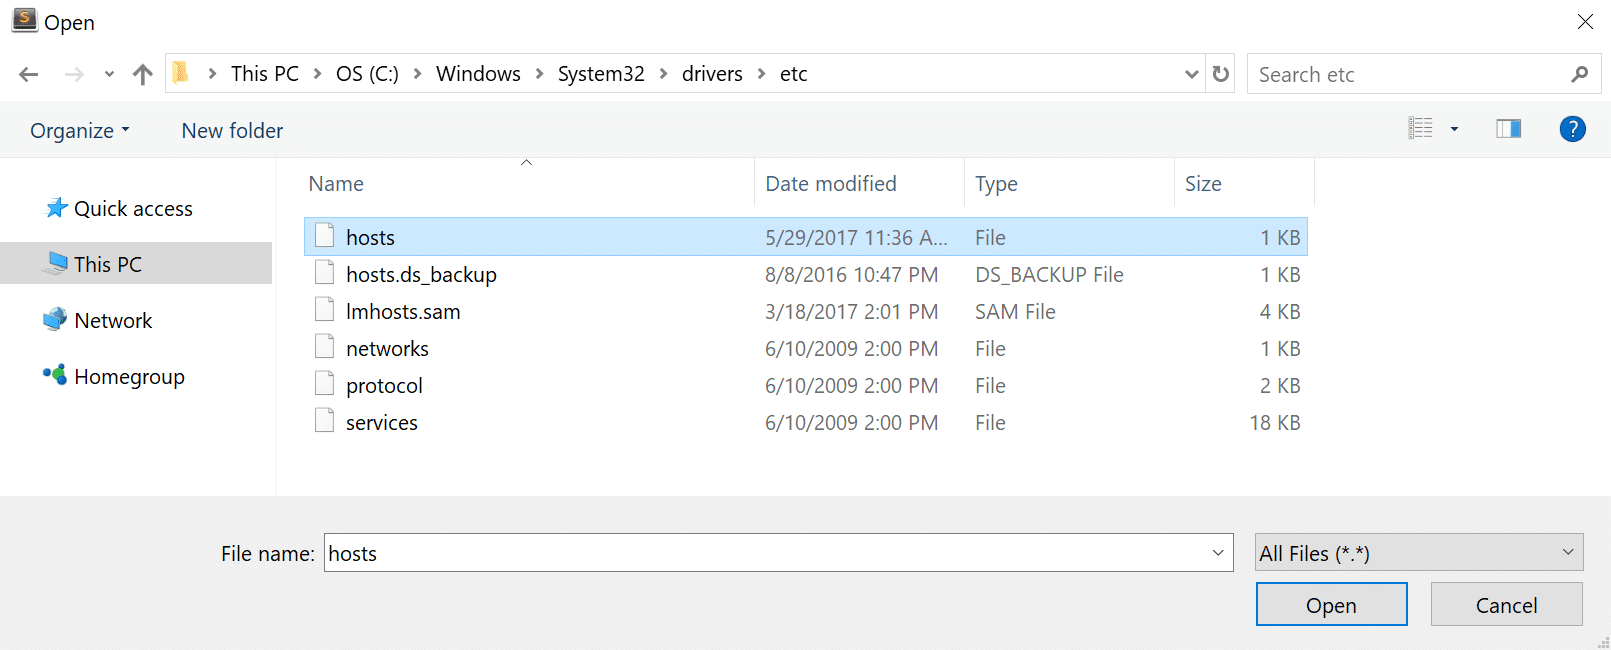
Double check and make sure the website you’re trying to visit isn’t listed in there. If it is, remove it.
7. Check DNS of Your Domain
If you’re only getting the DNS_PROBE_FINISHED_NXDOMAIN error on a single domain, even after checking your hosts file, you might need to check the DNS settings on the domain name itself. If you’re a Kinsta client we have an in-depth post on how to point your domain and or DNS to Kinsta. If you recently migrated your website to a new hosting provider, it could be the DNS was cached incorrectly on your computer. In which case, Step 2 above should have resolved that.
8. Restart Your Computer
We know it’s annoying, but it has to be mentioned. If none of the above options work, trying restarting your computer and even your router. We realize many of you probably have hundreds of tabs or applications open and that’s why we made this the last option. But rebooting devices actually clears out a lot of temporary cache.
Summary
Even though it’s frustrating, the DNS_PROBE_FINISHED_NXDOMAIN error is usually pretty easy to get resolved. Between flushing your DNS cache, renewing your IP, and trying different DNS servers, you should hopefully be back up and surfing the web in no time.


Javier is Content Specialist and also .NET developer. He writes helpful guides and articles, assist with other marketing and .NET community work